Creative Woodworks & crafts 1999-10, страница 37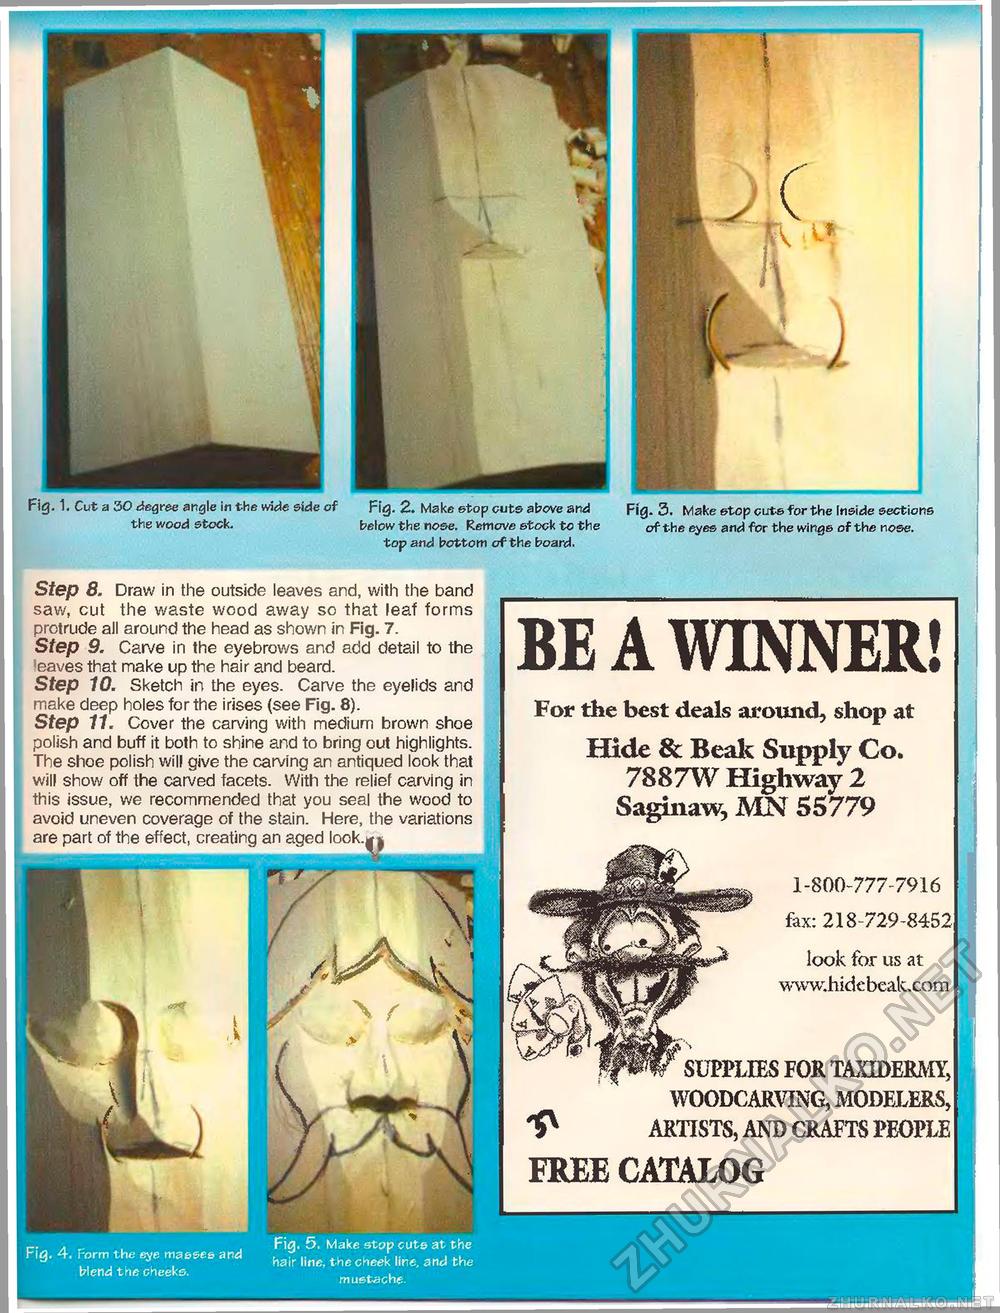
Fig. 1. Cut a 30 degree angle in the wide side of Fig. 2. Make ©top cuts above and Fig. 3. Make stop cuts for the Inside sections the wood stock. below the nose. Remove stock to the of the eyes and for the wings of the nose. top and bottom of the board. SUPPLIES FOR TAXIDERMY, WOODCARVING, MODELERS, ^ ARTISTS, AND CRAFTS PEOPLE FREE CATALOG Fig. 4. Form the eye masses and blend the cheeks. Fig. 5, Make stop cuts at the hair line, the cheek line, and the mustache Step 8. Draw in the outside leaves and, with the band saw, cut the waste wood away so that leaf forms protrude all around the head as shown in Fig. 7. Step 9. Carve in the eyebrows and add detail to the Seaves that make up the hair and beard. Step 10. Sketch in the eyes. Carve the eyelids and make deep holes for the irises (see Fig. 8). Step 11. Cover the carving with medium brown shoe polish and buff it both to shine and to bring out highlights. The shoe polish will give the carving an antiqued look that will show off the carved facets. With the relief carving in this issue, we recommended that you seal the wood to avoid uneven coverage of the stain. Here, the variations are part of the effect, creating an aged look.** BE A WINNER! For the best deals around, shop at Hide & Beak Supply Co. 7887W Highway 2 Saginaw, MN 55779 1-800-777-7916 fax: 218-729-8452 look for us at www.hidcbeak.com |


