Creative Woodworks & crafts 1999-11, страница 22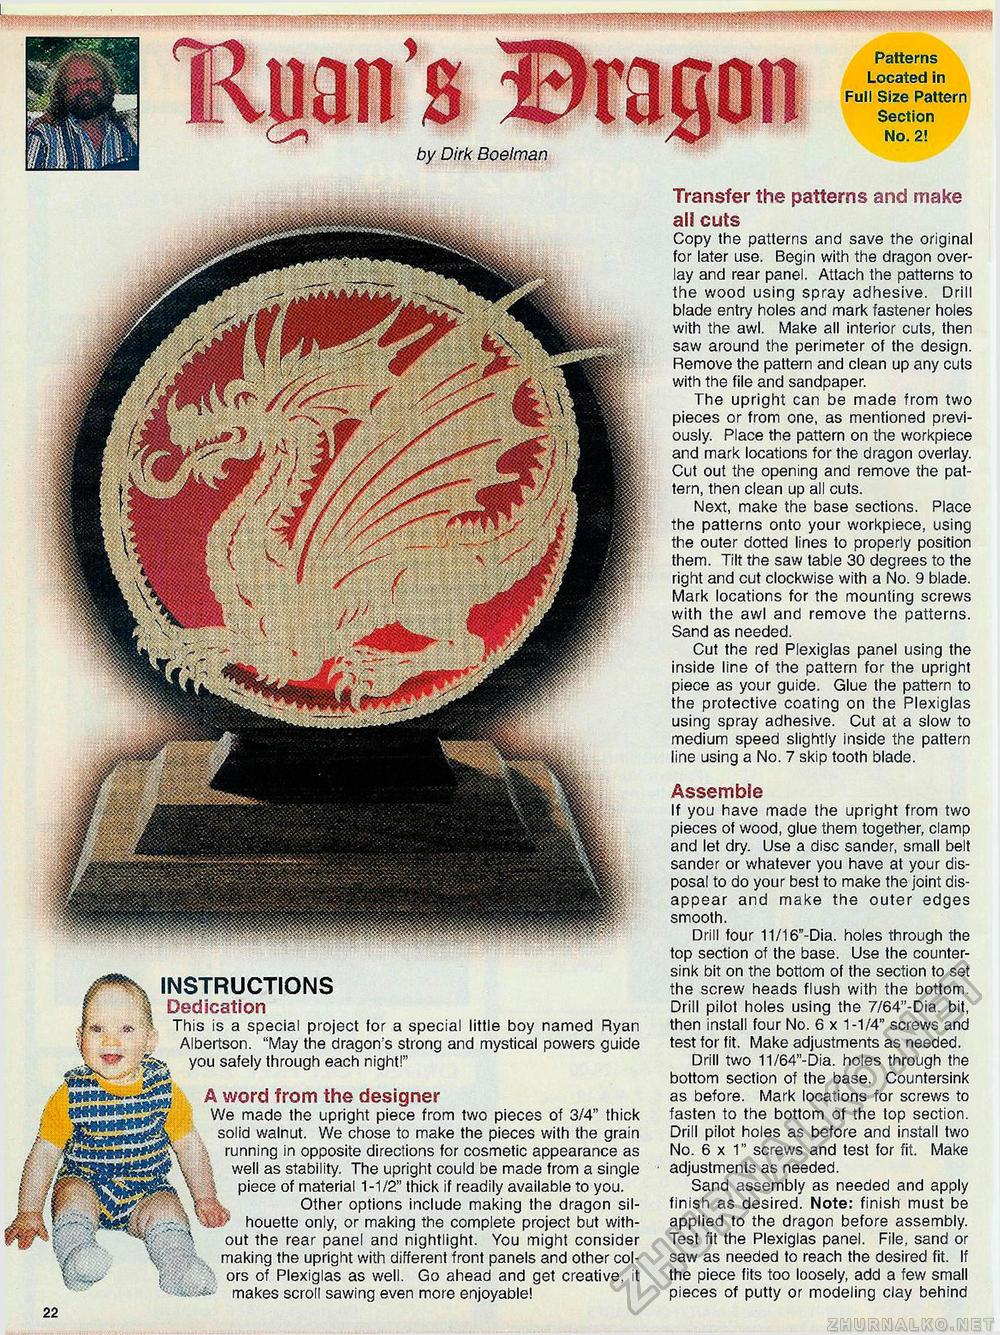
Patterns Located in Full Size Pattern Section No. 2! Transfer the patterns and make all cuts Copy the patterns and save the original for later use. Begin with the dragon overlay and rear panel. Attach the patterns to the wood using spray adhesive. Drill blade entry holes and mark fastener holes with the awl. Make all interior cuts, then saw around the perimeter of the design. Remove the pattern and clean up any cuts with the file and sandpaper. The upright can be made from two pieces or from one, as mentioned previously. Place the pattern on the workpiece and mark locations for the dragon overlay. Cut out the opening and remove the pattern, then clean up all cuts. Next, make the base sections. Place the patterns onto your workpiece, using the outer dotted lines to properly position them. Tilt the saw table 30 degrees to the right and cut clockwise with a No. 9 blade. Mark locations for the mounting screws with the awl and remove the patterns. Sand as needed. Cut the red Plexiglas panel using the inside line of the pattern for the upright piece as your guide. Glue the pattern to the protective coating on the Plexiglas using spray adhesive. Cut at a slow to medium speed slightly inside the pattern line using a No. 7 skip tooth blade. Assemble If you have made the upright from two pieces of wood, glue them together, clamp and let dry. Use a disc sander, small belt sander or whatever you have at your disposal to do your best to make the joint disappear and make the outer edges smooth. Drill four 11/16"-Dia. holes through the top section of the base. Use the countersink bit on the bottom of the section to set the screw heads flush with the bottom. Drill pilot holes using the 7/64"-Dia. bit, then install four No. 6 x 1-1/4" screws and test for fit. Make adjustments as needed. Drill two 11/64"-Dia. holes through the bottom section of the base. Countersink as before. Mark locations for screws to fasten to the bottom of the top section. Drill pilot holes as before and install two No. 6 x 1" screws and test for fit. Make adjustments as needed. Sand assembly as needed and apply finish as desired. Note: finish must be applied to the dragon before assembly. Test fit the Plexiglas panel. File, sand or saw as needed to reach the desired fit. If the piece fits too loosely, add a few small pieces of putty or modeling clay behind instructions Dedication This is a special project for a special little boy named Ryan Albertson. "May the dragon's strong and mystical powers guide you safely through each night!" A word from the designer We made the upright piece from two pieces of 3/4" thick solid walnut. We chose to make the pieces with the grain running in opposite directions for cosmetic appearance as well as stability. The upright could be made from a single piece of material 1-1/2" thick if readily available to you. Other options include making the dragon silhouette only, or making the complete project but without the rear panel and nightlight. You might consider making the upright with different front panels and other colors of Plexiglas as well. Go ahead and get creative, it makes scroll sawing even more enjoyable! |


