Creative Woodworks & crafts 1999-11, страница 37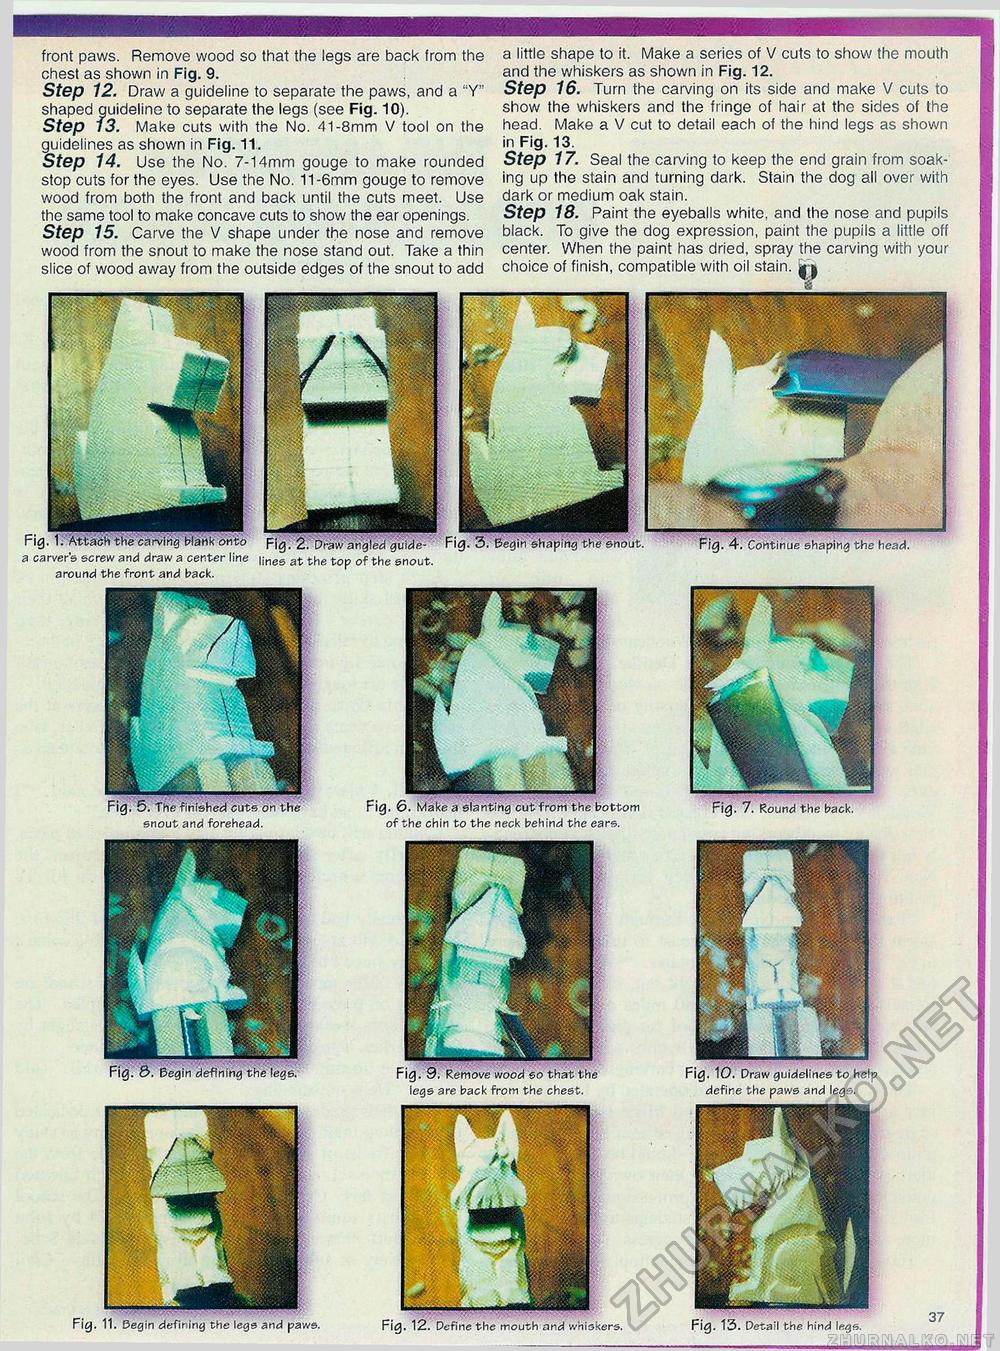
Continue shaping the head. front paws. Remove wood so that the legs are back from the chest as shown in Fig. 9. Step 12. Draw a guideline to separate the paws, and a "Y" shaped guideline to separate the legs (see Fig. 10). Step 13. Make cuts with the No. 41-8mm V tool on the guidelines as shown in Fig. 11. Step 14. Use the No. 7-14mm gouge to make rounded stop cuts for the eyes. Use the No. 11-6mm gouge to remove wood from both the front and back until the cuts meet. Use the same tool to make concave cuts to show the ear openings. Step 15. Carve the V shape under the nose and remove wood from the snout to make the nose stand out. Take a thin slice of wood away from the outside edges of the snout to add Fig a carver's screw and draw a center line around the front and back. lines at the top of the snout. a little shape to it. Make a scries of V cuts to show the mouth and the whiskers as shown in Fig. 12. Step 16. Turn the carving on its side and make V cuts to show the whiskers and the fringe of hair at the sides of the head. Make a V cut to detail each of the hind legs as shown in Fig. 13. Step 17. Seal the carving to keep the end grain from soaking up the stain and turning dark. Stain the dog all over with dark or medium oak stain. Step 18. Paint the eyeballs white, and the nose and pupils black. To give the dog expression, paint the pupils a little off center. When the paint has dried, spray the carving with your choice of finish, compatible with oil stain. jr| snout and forehead. Fig. Fig. 6. Make a slanting cut from the bottom of the chin to the neck behind the ears. F _ legs are back from the chest. Fig Fig. the back. Fig. 10. Draw guidelines to help define the paws and legs. Fig. 13. Detail the hind Ifigs. 37 |


