Creative Woodworks & crafts 1999-11, страница 46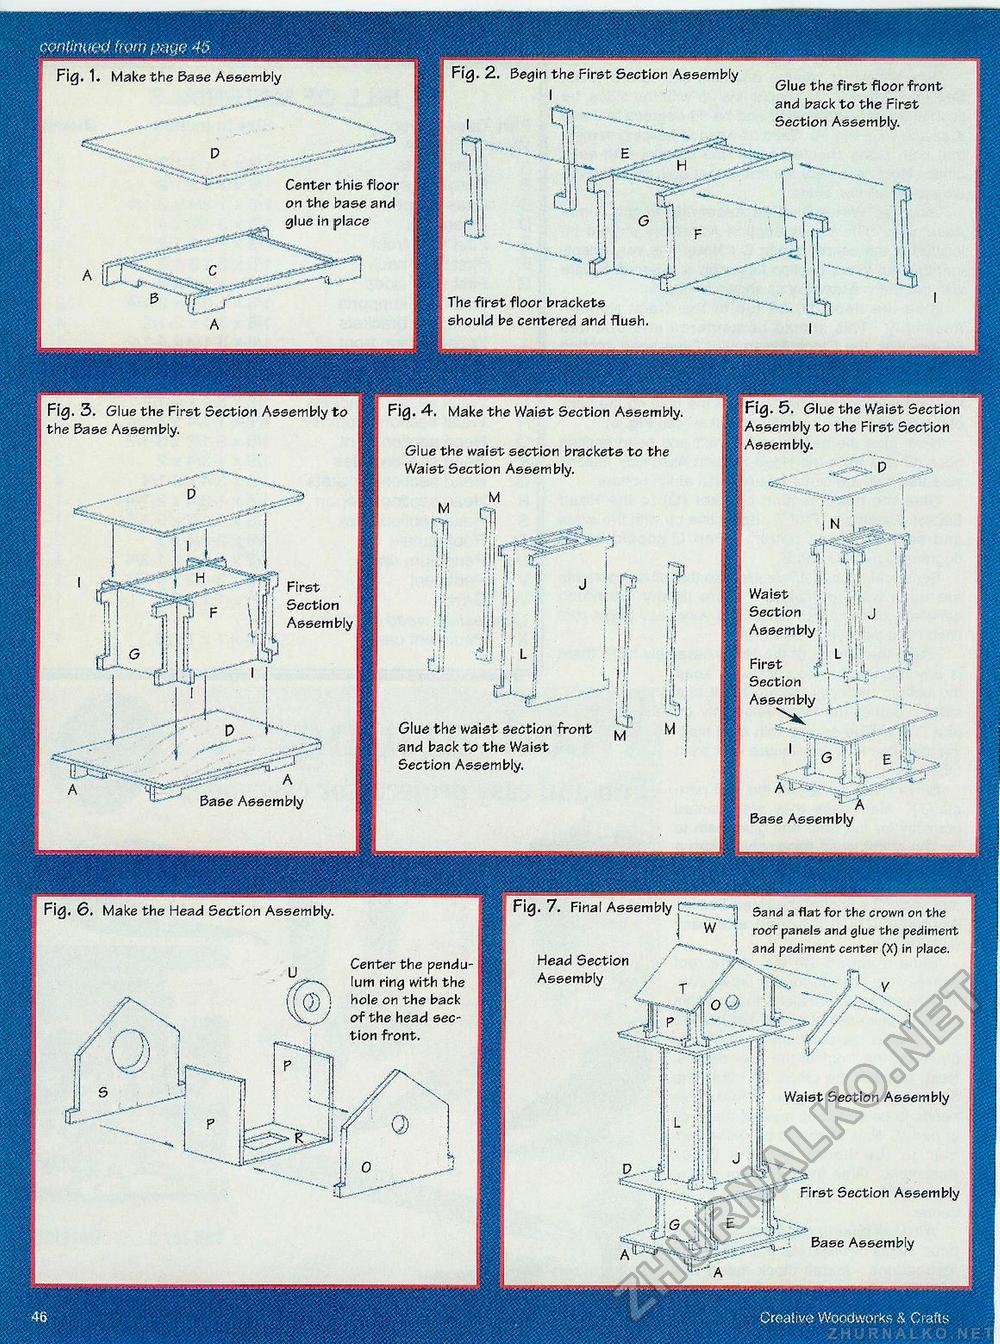
Creative Woodworks & Crafts Fig. 2. Begin the First Section Assembly Fig. 1. Make the Base Assembly Glue the first floor front and back to the First Section Assembly. Center this floor on the base and glue in place The first floor brackets should be centered and flush Fig. 5. Glue the Waist Section Assembly to the First Section Assembly. Fig. 3. Glue the First Section Assembly to the Base Assembly. Fig. 4, Make the Waist Section Assembly. Glue the waist section brackets to the Waist Section Assembly. " j;J First I iPj Section i !■) Assembly Waist Section Assembly First Section Assembly Glue the waist section front and back to the Waist Section Assembly. Base Assembly Base Assembly Fig. 7. Final Assembly Cr~* Fig. 6. Make the Head Section Assembly. Sand a flat for the crown on the roof panels and glue the pediment and pediment center (X) in place. — ir, Head Section Assembly / Center the pendulum ring with the hole on the back of the head section front. Waist Section Assembly ! First Section Assembly Base Assembly |


