Creative Woodworks & crafts 2000-01, страница 56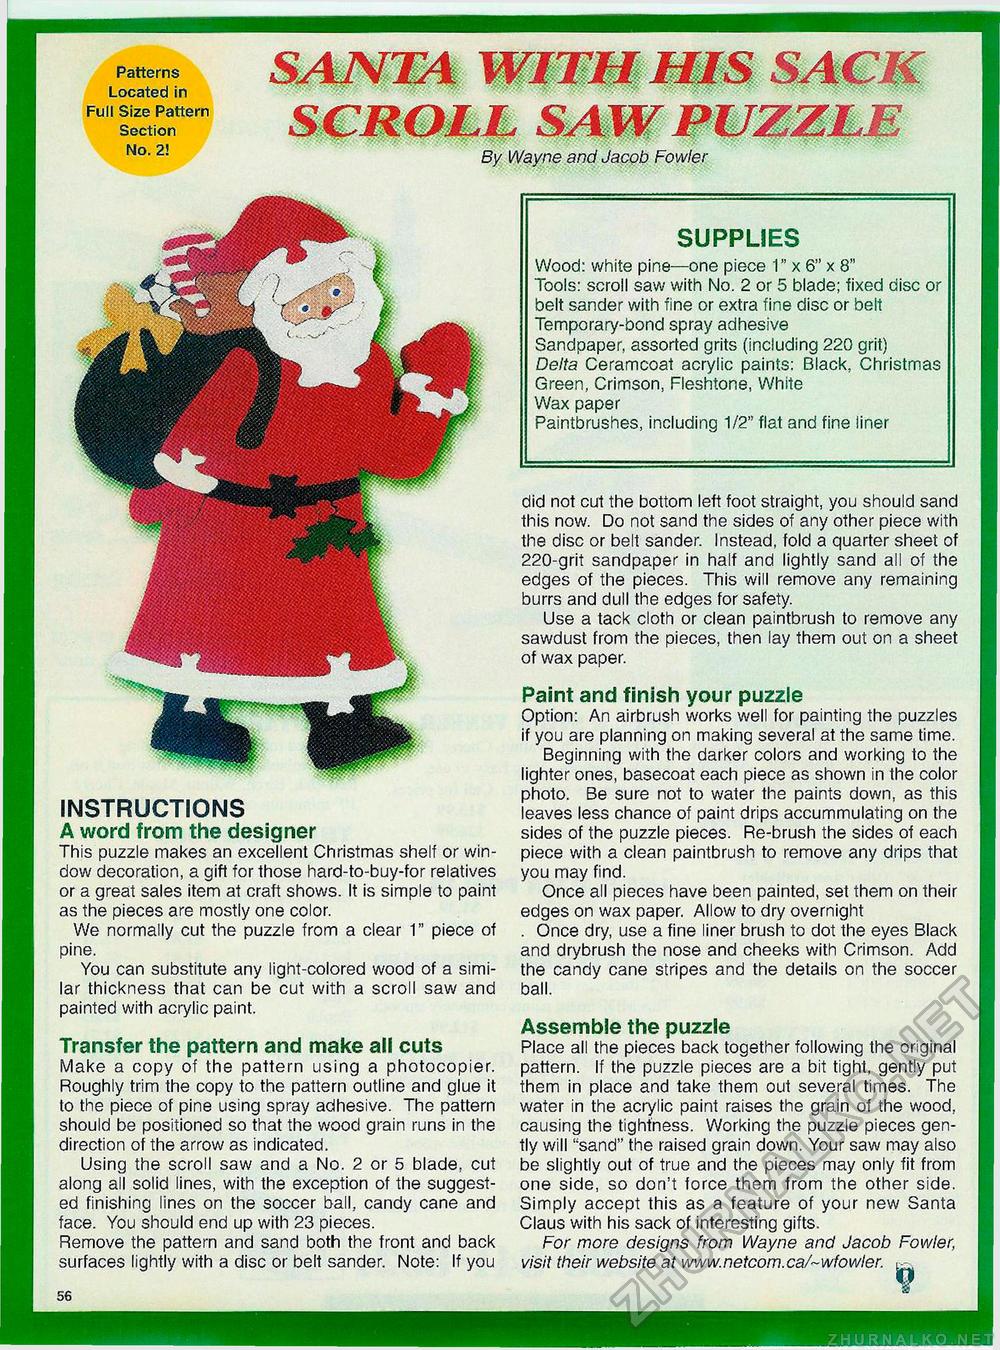
Patterns Located in Full Size Pattern Section No. 2! By Wayne and Jacob Fowler SUPPLIES Wood: white pine—one piece 1" x 6" x 8" Tools: scroll saw with No. 2 or 5 blade; fixed disc or belt sander with fine or extra fine disc or belt Temporary-bond spray adhesive Sandpaper, assorted grits (including 220 grit) Delta Ceramcoat acrylic paints: Black, Christmas Green, Crimson, Fleshtone, White Wax paper Paintbrushes, including 1/2" flat and fine liner INSTRUCTIONS A word from the designer This puzzle makes an excellent Christmas shelf or window decoration, a gift for those hard-to-buy-for relatives or a great sales item at craft shows. It is simple to paint as the pieces are mostly one color. We normally cut the puzzle from a clear 1" piece of pine. You can substitute any light-colored wood of a similar thickness that can be cut with a scroll saw and painted with acrylic paint. Transfer the pattern and make all cuts Make a copy of the pattern using a photocopier. Roughly trim the copy to the pattern outline and glue it to the piece of pine using spray adhesive. The pattern should be positioned so that the wood grain runs in the direction of the arrow as indicated. Using the scroll saw and a No. 2 or 5 blade, cut along all solid lines, with the exception of the suggested finishing lines on the soccer ball, candy cane and face. You should end up with 23 pieces. Remove the pattern and sand both the front and back surfaces lightly with a disc or belt sander. Note: If you did not cut the bottom left foot straight, you should sand this now. Do not sand the sides of any other piece with the disc or belt sander. Instead, fold a quarter sheet of 220-grit sandpaper in half and lightly sand all of the edges of the pieces. This will remove any remaining burrs and dull the edges for safety. Use a tack cloth or clean paintbrush to remove any sawdust from the pieces, then lay them out on a sheet of wax paper. Paint and finish your puzzle Option: An airbrush works well for painting the puzzles if you are planning on making several at the same time. Beginning with the darker colors and working to the lighter ones, basecoat each piece as shown in the color photo. Be sure not to water the paints down, as this leaves less chance of paint drips accummulating on the sides of the puzzle pieces. Re-brush the sides of each piece with a clean paintbrush to remove any drips that you may find. Once all pieces have been painted, set them on their edges on wax paper. Allow to dry overnight . Once dry, use a fine liner brush to dot the eyes Black and drybrush the nose and cheeks with Crimson. Add the candy cane stripes and the details on the soccer ball. Assemble the puzzle Place all the pieces back together following the original pattern. If the puzzle pieces are a bit tight, gently put them in place and take them out several times. The water in the acrylic paint raises the grain of the wood, causing the tightness. Working the puzzle pieces gently will "sand" the raised grain down. Your saw may also be slightly out of true and the pieces may only fit from one side, so don't force them from the other side. Simply accept this as a feature of your new Santa Claus with his sack of interesting gifts. For more designs from Wayne and Jacob Fowler, visit their website at www.netcom.ca/~wfowler. |


