Creative Woodworks & crafts 2000-03, страница 115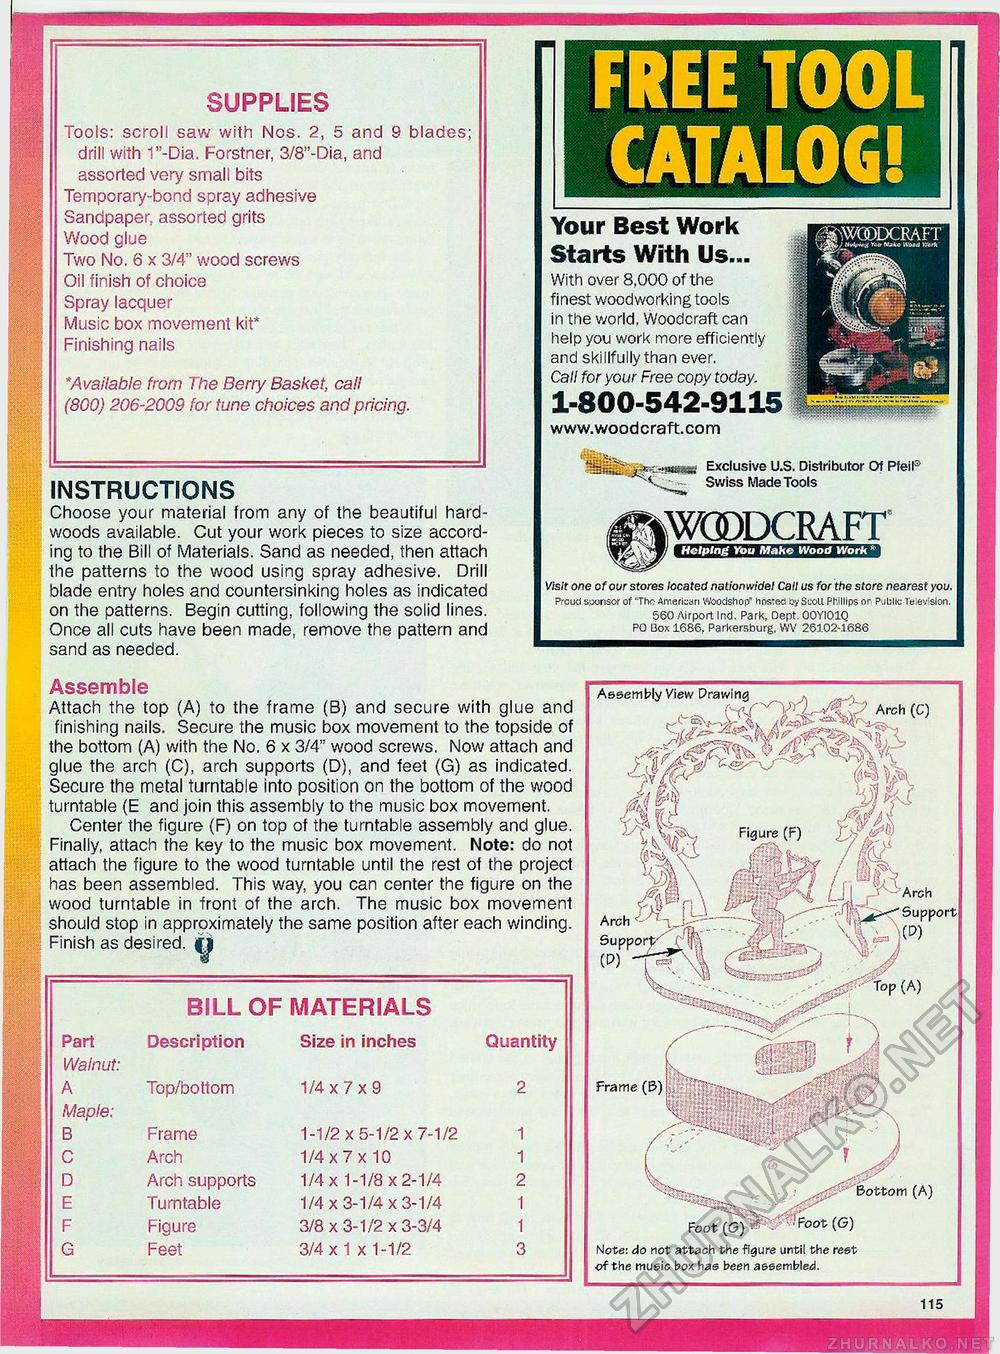
FREE TOOL CATALOG!SUPPLIES Tools: scroll saw with Nos. 2, 5 and 9 blades; drill with 1"-Dia. Forstner, 3/8"-Dia, and assorted very small bits Temporary-bond spray adhesive Sandpaper, assorted grits Wood glue Two No. 6 x 3/4" wood screws Oil finish of choice Spray lacquer Music box movement kit* Finishing nails *Available from The Berry Basket, call (800) 206-2009 for tune choices and pricing. INSTRUCTIONS Choose your material from any of the beautiful hardwoods available. Cut your work pieces to size according to the Bill of Materials. Sand as needed, then attach the patterns to the wood using spray adhesive. Drill blade entry holes and countersinking holes as indicated on the patterns. Begin cutting, following the solid lines. Once all cuts have been made, remove the pattern and sand as needed. Your Best Work Starts With Us... With over 8,000 of the finest woodworking tools in the world. Woodcraft can help you work more efficiently and skillfully than ever. Call for your Free copy today. 1-800-542-9115 Exclusive U.S. Distributor Of PfeiP Swiss Made Tools kWGDDCRAFT Helping You Make Wood Work * Visit one of our stores located nationwideI Call us for the store nearest you. Proud sponsor of "The American Woodshop* hosa» by ScoU Phillips or, Public Television. 560 Airport Ind. Park, Dept. OOYIOIO PO Box 1686, Parkersburg, WV 26102-1686 Assemble Attach the top (A) to the frame (B) and secure with glue and finishing nails. Secure the music box movement to the topside of the bottom (A) with the No. 6 x 3/4" wood screws. Now attach and glue the arch (C), arch supports (D), and feet (G) as indicated. Secure the metal turntable into position on the bottom of the wood turntable (E and join this assembly to the music box movement. Center the figure (F) on top of the turntable assembly and glue. Finally, attach the key to the music box movement. Note: do not attach the figure to the wood turntable until the rest of the project has been assembled. This way, you can center the figure on the wood turntable in front of the arch. The music box movement should stop in approximately the same position after each winding. Finish as desired. I Assembly View Drawing AW .„ /iew Drawing «
Figure (F) jitter / ips j-W'i /jf3'-Arch V^fc<SuPport -Jt--' \ClV) ..'-^•"Tbp (A) . Bottom (A) Foot (G) •?Foot Note: do not attach the figure until the rest of the music box Has been assembled. 115 |
||||||||||||||||||||||||||||||||||||||||||||


