Creative Woodworks & crafts 2000-03, страница 40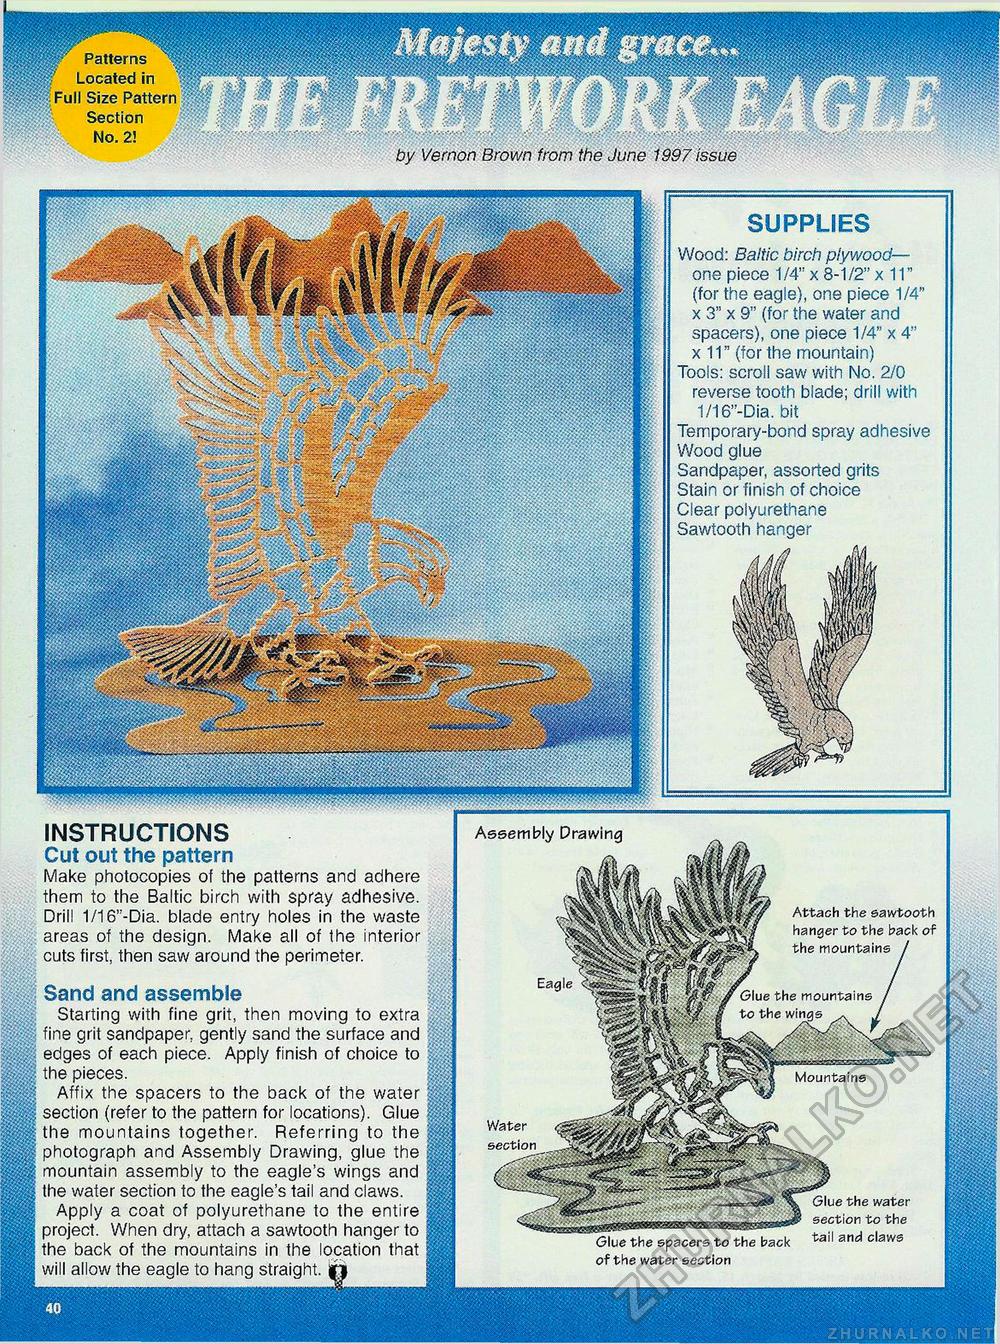
¥ Patterns "<:| Located in Full Size Pattern Section No. 2! by Vernon Brown from the June 1997 issue SUPPLIES Wood: Baltic birch plywood— one piece 1/4" x 8-1/2" x 11" (for the eagle), one piece 1/4" x 3" x 9" (for the water and spacers), one piece 1/4" x 4" x 11" (for the mountain) Tools: scroll saw with No. 2/0 reverse tooth blade; drill with 1/16"-Dia. bit Temporary-bond spray adhesive Wood glue Sandpaper, assorted grits Stain or finish of choice Clear polyurethane Sawtooth hanger • - ".....: INSTRUCTIONS Cut out the pattern Make photocopies of the patterns and adhere them to the Baltic birch with spray adhesive. Drill 1/16"-Dia. blade entry holes in the waste areas of the design. Make all of the interior cuts first, then saw around the perimeter. Sand and assemble Starting with fine grit, then moving to extra fine grit sandpaper, gently sand the surface and edges of each piece. Apply finish of choice to the pieces. Affix the spacers to the back of the water section (refer to the pattern for locations). Glue the mountains together. Referring to the photograph and Assembly Drawing, glue the mountain assembly to the eagle's wings and the water section to the eagle's tail and claws. Apply a coat of polyurethane to the entire project. When dry, attach a sawtooth hanger to the back of the mountains in the location that will allow the eagle to hang straight, ij Assembly Drawing Attach the sawtooth hanger to the back of the mountains / Glue the mountains to the wings « Mountains Water section Glue the water section to the tail and claws Glue the spacers to of the water section |


