Creative Woodworks & crafts 2000-03, страница 48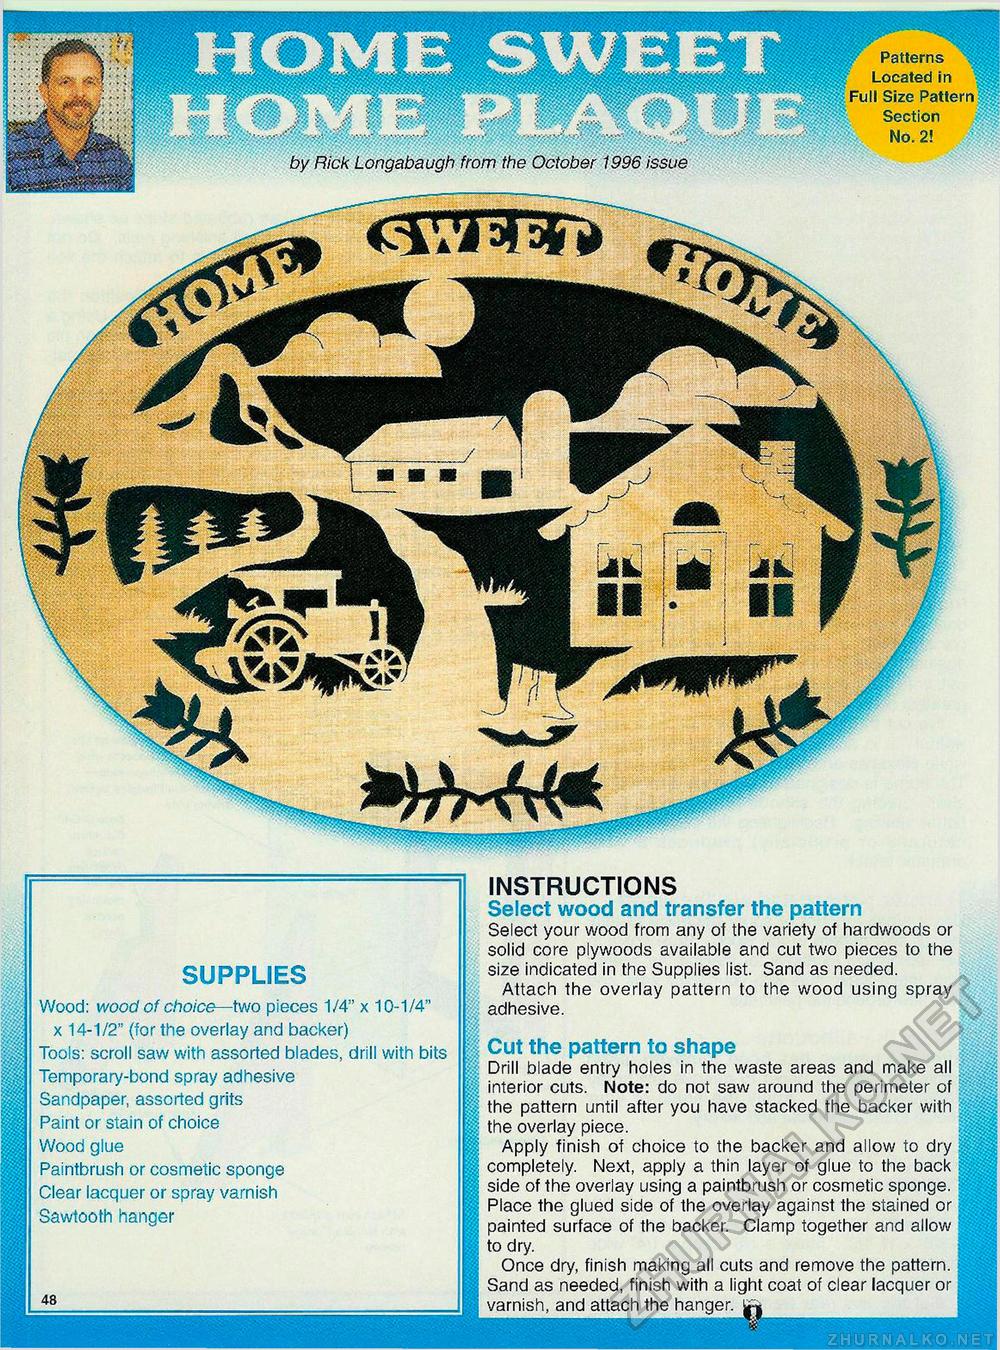
Patterns Located in Full Size Pattern Section No. 2! 8J by Rick Longabaugh from the October 1996 issue SUPPLIES Wood: wood of choice—two pieces 1/4" x 10-1/4" x 14-1/2" (for the overlay and backer) Tools: scroll saw with assorted blades, drill with bits Temporary-bond spray adhesive Sandpaper, assorted grits Paint or stain of choice Wood glue Paintbrush or cosmetic sponge Clear lacquer or spray varnish Sawtooth hanger 48 INSTRUCTIONS Select wood and transfer the pattern Select your wood from any of the variety of hardwoods or solid core plywoods available and cut two pieces to the size indicated in the Supplies list. Sand as needed. Attach the overlay pattern to the wood using spray adhesive. Cut the pattern to shape Drill blade entry holes in the waste areas and make all interior cuts. Note: do not saw around the perimeter of the pattern until after you have stacked the backer with the overlay piece. Apply finish of choice to the backer and allow to dry completely. Next, apply a thin layer of glue to the back side of the overlay using a paintbrush or cosmetic sponge. Place the glued side of the overlay against the stained or painted surface of the backer. Clamp together and allow to dry. Once dry, finish making all cuts and remove the pattern. Sand as needed, finish with a light coat of clear lacquer or varnish, and attach the hanger. |


