Creative Woodworks & crafts 2000-03, страница 72
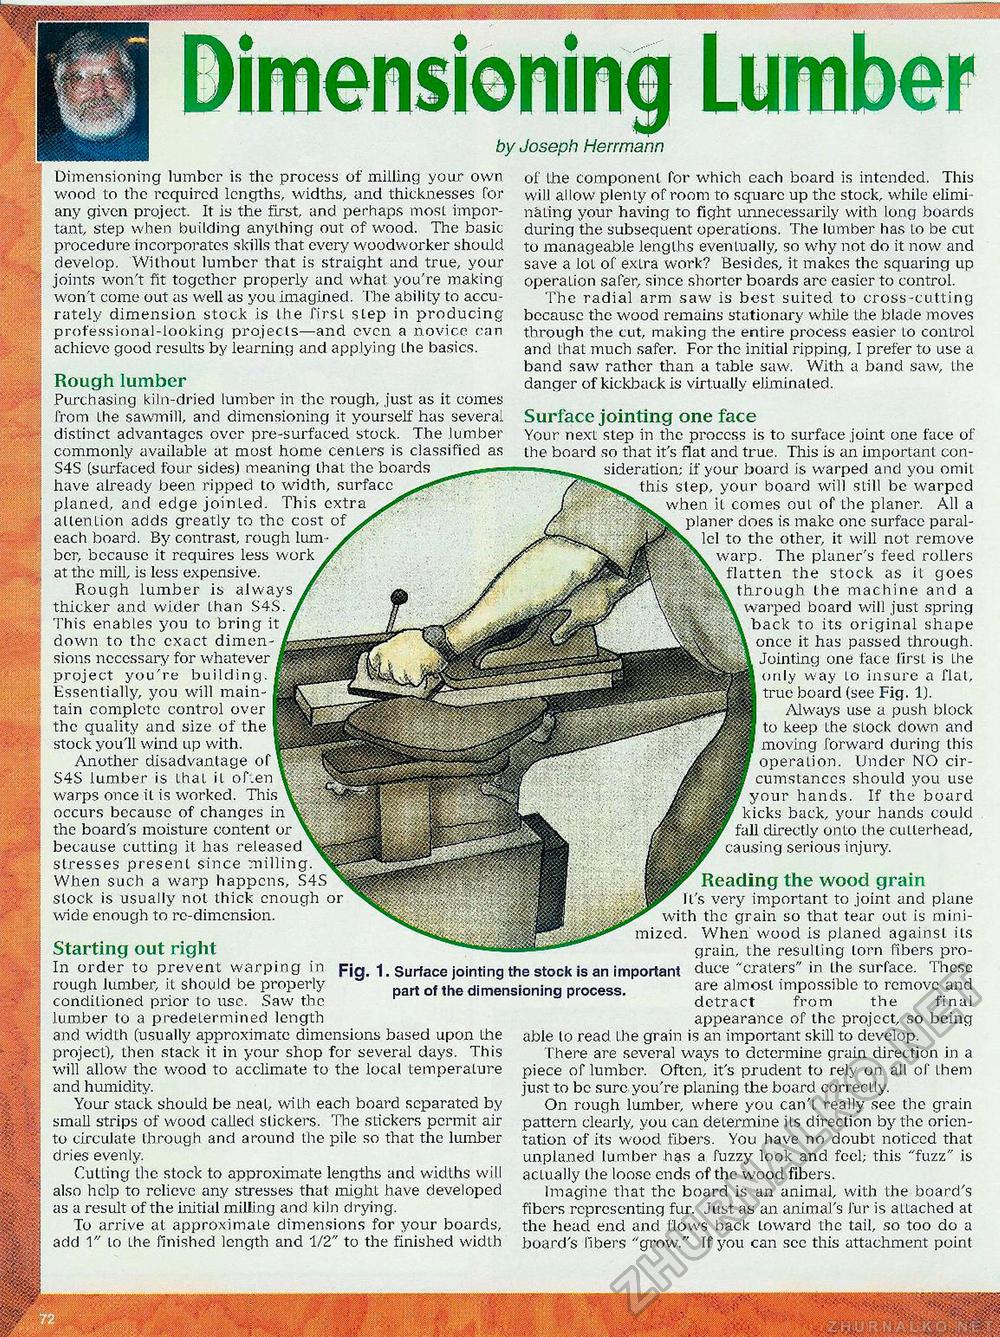
Dimensioning lumber is the process of milling your own wood to the required lengths, widths, and thicknesses for any given project. It is the first and perhaps most important, step when building anything out of wood. The basic procedure incorporates skills that every woodworker should develop. Without lumber that is straight and true, your joints won't fit together properly and what you're making won't come out as well as you imagined. The ability to accurately dimension stock is Ihe first step in producing professional-looking projects—and even a novice can achieve good results by learning and applying the basics. Rough lumber Purchasing kiln-dried lumber in the rough, just as it comes from the sawmill, and dimensioning it yourself has several distinct advantages over pre-surfacecl stock. The lumber commonly available at most home centers is classified as S4S (surfaced four sides) meaning that the boards have already been ripped to width, surface planed, and edge jointed. This extra attention adds greatly to the cost of each board. By contrast, rough lum ber, because it requires less work at the mill, is less expensive. Rough lumber is always thicker and wider than S4S This enables you to bring it down to the exact dimensions necessary for whatever project you're building. Essentially, you will maintain complete control over the quality and size of the stock you'll wind up with. Another disadvantage of S4S lumber is that it of.en warps once it is worked. This occurs because of changes in the board's moisture content because cutting it has released stresses present since milling When such a warp happens, S4S slock is usually not thick enough or wide enough to re-dimension. or Starting out right In order to prevent warping in rough lumber, it should be properly conditioned prior to use. Saw the lumber to a predetermined length and width (usually approximate dimensions based upon the project), then stack it in your shop for several days. This will allow the wood to acclimate to the local temperature and humidity. Your stack should be neat, with each board separated by small strips of wood called slickers. The sLickers permit air to circulate through and around the pile so that the lumber dries evenly. Cutting the stock to approximate lengths and widths will also help to relieve any stresses that might have developed as a result of the initial milling and kiln drying. To arrive at approximate dimensions for your boards, add to Lhe finished length and 1/2" to the finished width of lhe component for which cach board is intended. This will allow plenty of room to square up the stock, while elimi naLing your having to fight unnecessarily with long boards during the subsequent operations. The lumber has lo be cut to manageable lengths eventually, so why not do it now and save a lot of extra work? Besides, it makes the squaring up operation safer, since shorter boards arc easier to control. The radial arm saw is best suited to cross-cutting because the wood remains stationary while lhe blade moves through the cut, making the entire process easier to control and that much safer. For the initial ripping, I prefer to use a band saw rather than a table saw. With a band saw, Lhe danger of kickback is virtually eliminated. Surface jointing one face Your next step in the process is to surface .joint one face of the board so that it's flat and true. This is an important consideration; if your board is warped and you omit this step, your board will still be warped when it comes out of the planer. All a planer does is make one surface parallel to the other, it will not remove warp. The planer's feed rollers flatten the stock as it goes through the machine and a warped board will just spring back to its original shape once it has passed through. Jointing one face first is lhe only way Lo insure a flat, true board (see Fig. 1). Always use a push block to keep lhe slock down and moving forward during this operation. Under NO circumstances should you use your hands. If the board kicks back, your hands could fall directly onto lhe cullerhead, causing serious injury. Reading the wood grain It's very important to joint and plane with the grain so that tear out is minimized. When wood is planed against its grain, the resulting lorn fibers produce "craters" in the surface. These are almost impossible to remove and detract from the final appearance of the project, so being able to read the grain is an important skill to develop. There are several ways to determine grain direction in a piece of lumber. Often, it's prudent to rely on all of them just to be sure you're planing the board correctly. On rough lumber, where you can'l really see the grain pattern clearly you can deiermine its direction by the orientation of its wood fibers. You have no doubt noticed that unplaned lumber has a fuzzy look and feel; this "fuzz" is actually the loose ends of the wood fibers. Imagine that the board is an animal, with the board's fibers representing fur. Just as an animal's fur is alLached at the head end and flows back toward the tail, so too do a board's libers "grow." If you can sec this attachment point Surface jointing the stock is an important part of the dimensioning process. |


