Creative Woodworks & crafts 2000-03, страница 81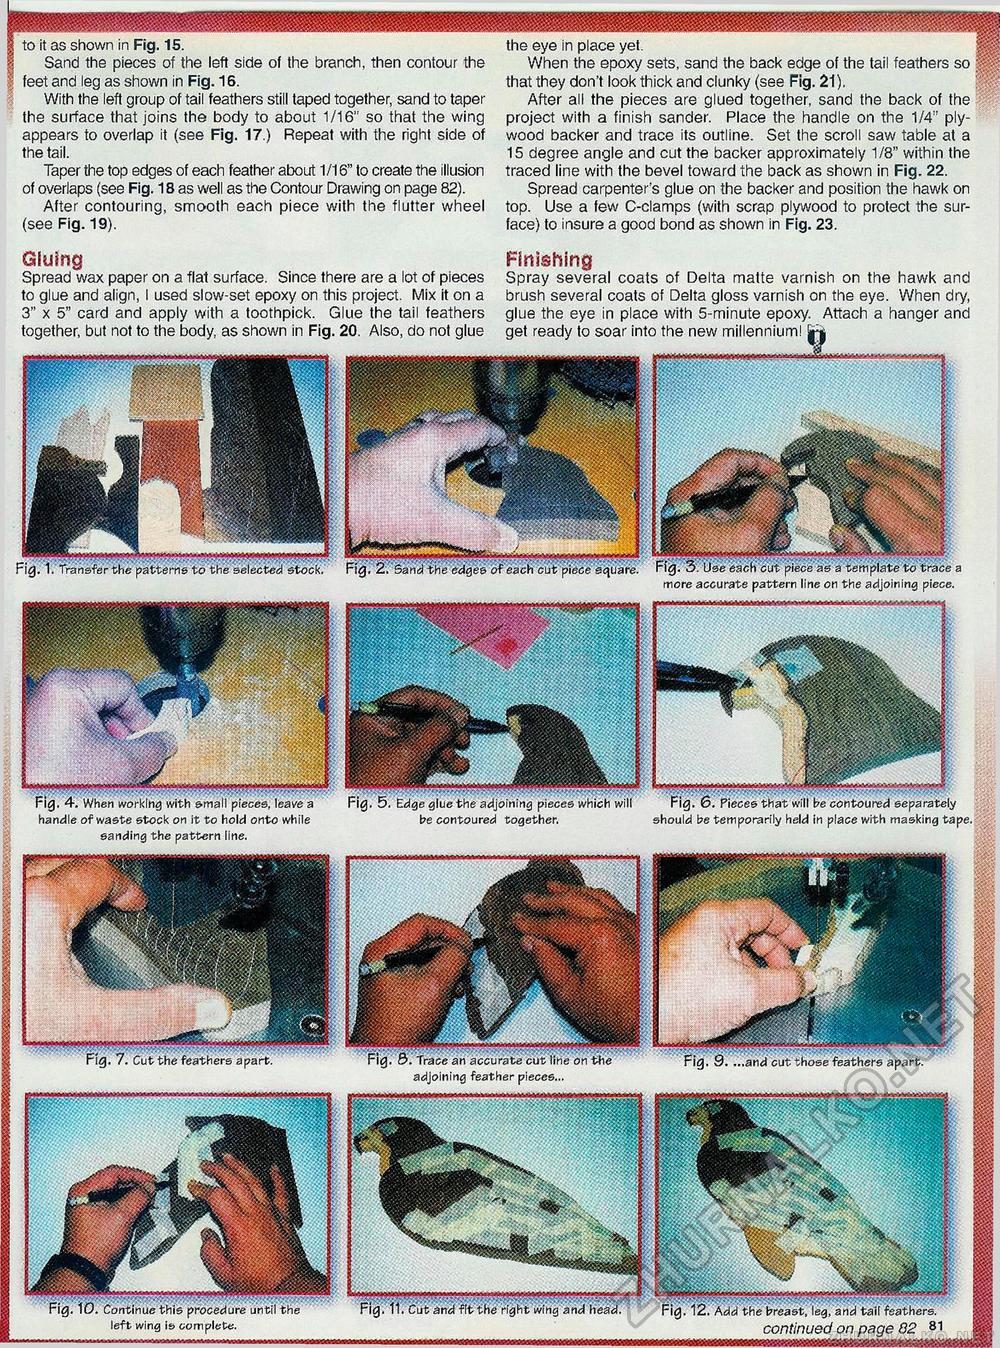
to it as shown in Fig. 15. Sand the pieces of the left side of the branch, then contour the feet and leg as shown in Fig. 16. With the left group of tail feathers still taped together, sand to taper the surface that joins the body to about 1/16" so that the wing appears to overlap it (see Fig. 17.) Repeat with the right side of the tail. Taper the top edges of each feather about 1/16" to create the illusion of overlaps (see Fig. 18 as well as the Contour Drawing on page 82). After contouring, smooth each piece with the flutter wheel (see Fig. 19). ^9 the eye in place yet. When the epoxy sets, sand the back edge of the tail feathers so ; that they don't look thick and clunky (see Fig. 21). After all the pieces are glued together, sand the back of the project with a finish sander. Place the handle on the 1/4" plywood backer and trace its outline. Set the scroll saw table at a 15 degree angle and cut the backer approximately 1/8" within the traced line with the bevel toward the back as shown in Fig. 22. Spread carpenter's glue on the backer and position the hawk on top. Use a few C-clamps (with scrap plywood to protect the surface) to insure a good bond as shown in Fig. 23. Fig. 12. Add the breast, leg, and tail feathers. Fig. 11. Cut and fit the right wing and head. Gluing Spread wax paper on a flat surface. Since there are a lot of pieces to glue and align, I used slow-set epoxy on this project. Mix it on a 3" x 5" card and apply with a toothpick. Glue the tail feathers together, but not to the body, as shown in Fig. 20. Also, do not glue Finishing Spray several coats of Delta matte varnish on the hawk and brush several coats of Delta gloss varnish on the eye. When dry, glue the eye in place with 5-minute epoxy. Attach a hanger and get ready to soar into the new millennium! j Fig. 1. transfer the patterns to'the selected stock. Fig. 2. Sand ti-e edges, of each "cut piede square. Fig- 3. Use each'cut piece as a template to trace a more accurate pattern line on the adjoining piece. Fig. 4. When working with small pieces, leave a handle of waste stock on it to hold onto while sanding the pattern line. Fig. 5. Edge giue the adjoining pieces which will Fig. 6. Pieces that will be contoured separately be contoured together. should be temporarily held in place with masking tape. Fig. 1D. Continue this procedure until the left wing is complete. |


