Creative Woodworks & crafts 2000-03, страница 80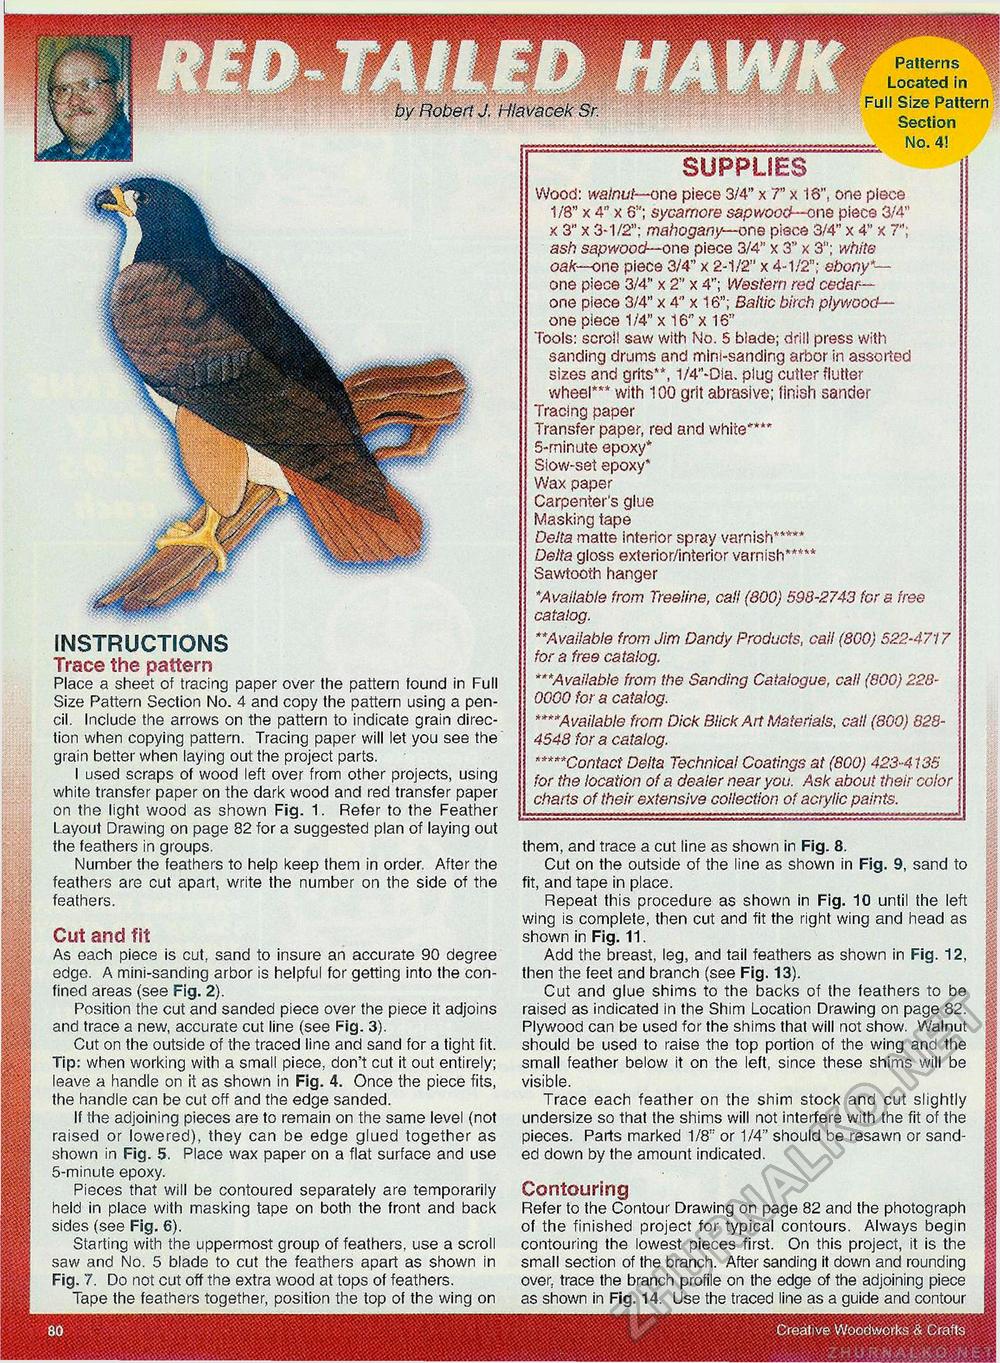
Creative Woodworks & Crafts Contouring Refer to the Contour Drawing on page 82 and the photograph of the finished project for typical contours. Always begin contouring the lowest pieces first. On this project, it is the small section of the branch. After sanding it down and rounding over, trace the branch profile on the edge of the adjoining piece as shown in Fig. 14. Use the traced line as a guide and contour by Robert J. HIavacek Sr. Patterns Located Full Size Pattern Section — No. 4! SUPPLIES Wood: walnut— one piece 3/4" x 7" x 16", one piece 1/8" x 4" x 6"; sycamore sapwood—one piece 3/4" x 3" x 3-1/2": mahogany—one piece 3/4" x 4" x 7"; ash sapwood— one piece 3/4" x 3" x 3"; white oak—one piece 3/4" x 2-1/2" x 4-1/2"; ebony — one piece 3/4" x 2" x 4"; Western red cedar-one piece 3/4" x 4" x 16"; Baltic birch plywood-one piece 1/4" x 16" x 16" Tools: scroll saw with No. 5 blade; drill press with sanding drums and mini-sanding arbor in assorted sizes and grits**, 1/4"-Dia, plug cutter flutter wheel*** with 100 grit abrasive; finish sander Tracing paper Transfer paper, red and white'*** 5-minute epoxy* Slow-set epoxy* Wax paper Carpenter's glue Masking tape Delta matte interior spray varnish***** Delta gloss exterior/interior varnish***** Sawtooth hanger *Available from Treeiine, cali (800) 598-2743 for a free catalog. **Available from Jim Dandy Products, call (800) 522-4717 for a free catalog. *"*.Available from the Sanding Catalogue, call (800)228-0000 for a catalog. ****Available from Dick Blick Art Materials, call (800) 828-4548 for a catalog. *****Contaci Delta Technical Coatings at (800) 423-4135 for the location of a dealer near you. Ask about their color charts of their extensive collection of acrylic paints. INSTRUCTIONS Trace the pattern Place a sheet of tracing paper over the pattern found in Full Size Pattern Section No. 4 and copy the pattern using a pencil. Include the arrows on the pattern to indicate grain direction when copying pattern. Tracing paper will let you see the grain better when laying out the project parts. I used scraps of wood left over from other projects, using white transfer paper on the dark wood and red transfer paper on the light wood as shown Fig. 1. Refer to the Feather L ayout Drawing on page 82 for a suggested plan of laying out the feathers in groups. Number the feathers to help keep them in order. After the feathers are cut apart, write the number on the side of the feathers. Cut and fit As each piece is cut, sand to insure an accurate 90 degree edge. A mini-sanding arbor is helpful for getting into the confined areas (see Fig. 2). Position the cut and sanded piece over the piece it adjoins and trace a new, accurate cut line (see Fig. 3). Cut on the outside of the traced line and sand for a tight fit. Tip: when working with a small piece, don't cut it out entirely; leave a handle on it as shown in Fig. 4. Once the piece fits, the handle can be cut off and the edge sanded. If the adjoining pieces are to remain on the same level (not raised or lowered), they can be edge glued together as shown in Fig. 5. Place wax paper on a flat surface and use 5-minute epoxy. Pieces that will be contoured separately are temporarily held in place with masking tape on both the front and back sides (see Fig. 6). Starting with the uppermost group of feathers, use a scroll saw and No. 5 blade to cut the feathers apart as shown in Fig. 7. Do not cut off the extra wood at tops of feathers. Tape the feathers together, position the top of the wing on them, and trace a cut line as shown in Fig. 8. Cut on the outside of the line as shown in Fig. 9, sand to fit, and tape in place. Repeat this procedure as shown in Fig. 10 until the left wing is complete, then cut and fit the right wing and head as shown in Fig. 11. Add the breast, leg, and tail feathers as shown in Fig. 12, then the feet and branch (see Fig. 13). Cut and glue shims to the backs of the feathers to be raised as indicated in the Shim Location Drawing on page 82. Plywood can be used for the shims that will not show. Walnut should be used to raise the top portion of the wing and the small feather below it on the left, since these shims will be visible. Trace each feather on the shim stock and cut slightly undersize so that the shims will not interfere with the fit of the pieces. Parts marked 1/8" or 1/4" should be resawn or sanded down by the amount indicated. |


