Creative Woodworks & crafts 2000-04, страница 36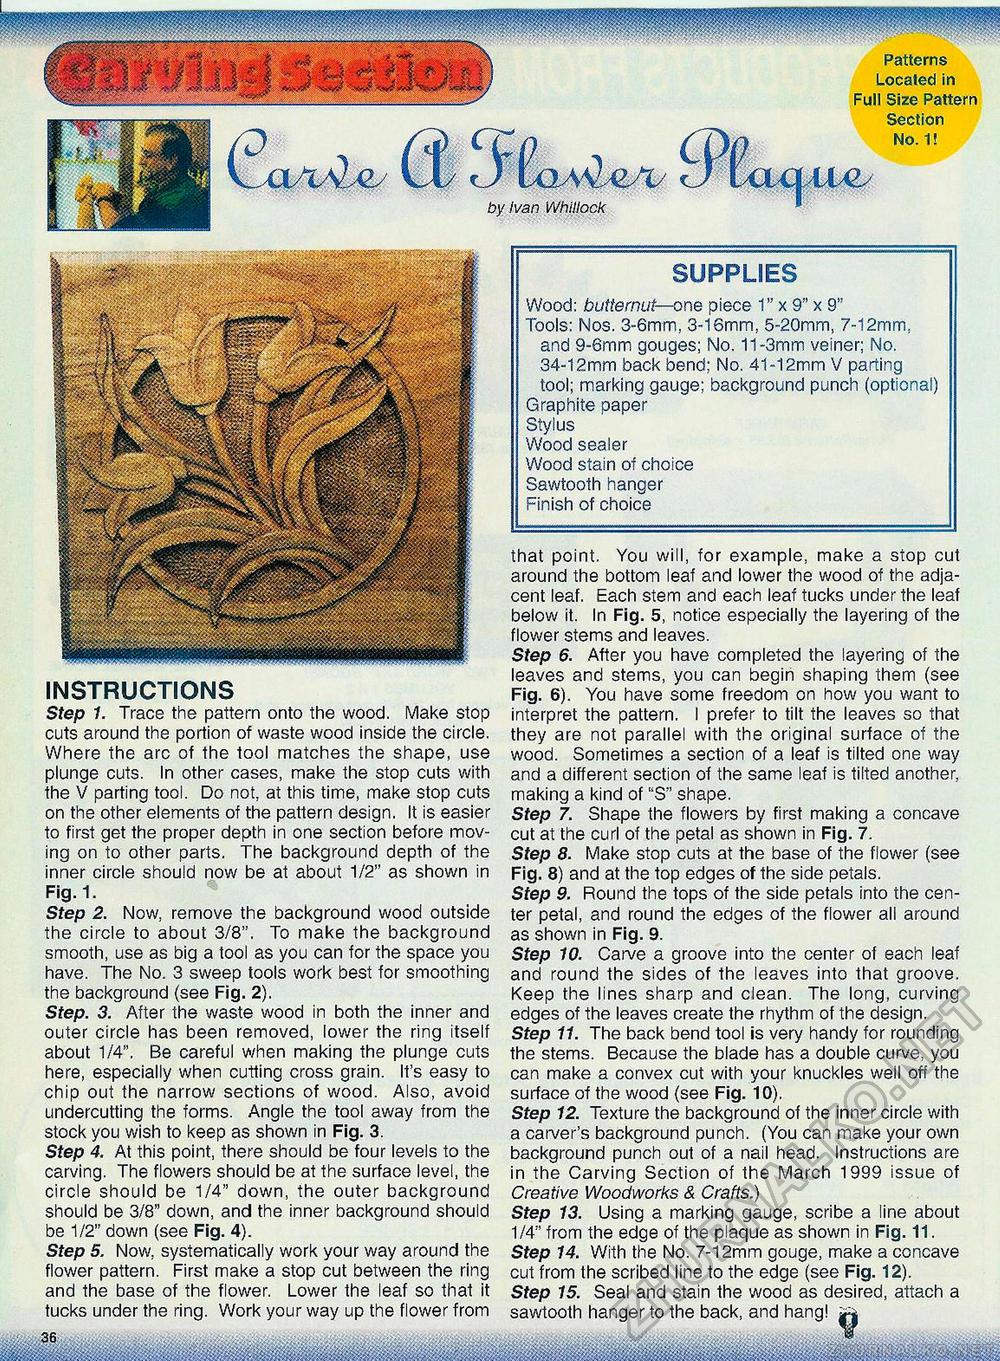
INSTRUCTIONS Step 1. Trace the pattern onto the wood. Make stop cuts around the portion of waste wood inside the circle. Where the arc of the tool matches the shape, use plunge cuts. In other cases, make the stop cuts with the V parting tool. Do not, at this time, make stop cuts on the other elements of the pattern design. It is easier to first get the proper depth in one section before moving on to other parts. The background depth of the inner circle should now be at about 1/2" as shown in Fig. 1. Step 2. Now, remove the background wood outside the circle to about 3/8". To make the background smooth, use as big a tool as you can for the space you have. The No. 3 sweep tools work best for smoothing the background (see Fig. 2). Step. 3. After the waste wood in both the inner and outer circle has been removed, lower the ring itself about 1/4". Be careful when making the plunge cuts here, especially when cutting cross grain. It's easy to chip out the narrow sections of wood. Also, avoid undercutting the forms. Angle the tool away from the stock you wish to keep as shown in Fig. 3. Step 4. At this point, there should be four levels to the carving. The flowers should be at the surface level, the circle should be 1/4" down, the outer background should be 3/8" down, and the inner background should be 1/2" down (see Fig. 4). Step 5. Now, systematically work your way around the flower pattern. First make a stop cut between the ring and the base of the flower. Lower the leaf so that it tucks under the ring. Work your way up the flower from .. .. ..36 ......H........... .........I......Hi......Ill SUPPLIES Wood: butternut—one piece 1" x 9" x 9" Tools: Nos. 3-6mm, 3-16mm, 5-20mm, 7-12mm, and 9-6mm gouges; No. 11-3mm veiner; No. 34-12mm back bend; No. 41-12mm V parting tool; marking gauge; background punch (optional) Graphite paper Stylus Wood sealer Wood stain of choice Sawtooth hanger Finish of choice that point. You will, for example, make a stop cut around the bottom leaf and lower the wood of the adjacent leaf. Each stem and each leaf tucks under the leaf below it. In Fig. 5, notice especially the layering of the flower stems and leaves. Step 6. After you have completed the layering of the leaves and stems, you can begin shaping them (see Fig. 6). You have some freedom on how you want to interpret the pattern. I prefer to tilt the leaves so that they are not parallel with the original surface of the wood. Sometimes a section of a leaf is tilted one way and a different section of the same leaf is tilted another, making a kind of "S" shape. Step 7. Shape the flowers by first making a concave cut at the curl of the petal as shown in Fig. 7. Step 8. Make stop cuts at the base of the flower (see Fig. 8) and at the top edges of the side petals. Step 9. Round the tops of the side petals into the center petal, and round the edges of the flower all around as shown in Fig. 9. Step 10. Carve a groove into the center of each leaf and round the sides of the leaves into that groove. Keep the lines sharp and clean. The long, curving edges of the leaves create the rhythm of the design. Step 11. The back bend tool is very handy for rounding the stems. Because the blade has a double curve, you can make a convex cut with your knuckles well off the surface of the wood (see Fig. 10). Step 12. Texture the background of the inner circle with a carver's background punch. (You can make your own background punch out of a nail head. Instructions are in the Carving Section of the March 1999 issue of Creative Woodworks & Crafts.) Step 13. Using a marking gauge, scribe a line about 1/4" from the edge of the plaque as shown in Fig. 11. Step 14. With the No. 7-12mm gouge, make a concave cut from the scribed line to the edge (see Fig. 12). Step 15. Seal and stain the wood as desired, attach a sawtooth hanger to the back, and hang! ^ MiBiiMiiiMwi^^^ isu i n.....MB |


