Creative Woodworks & crafts 2000-04, страница 38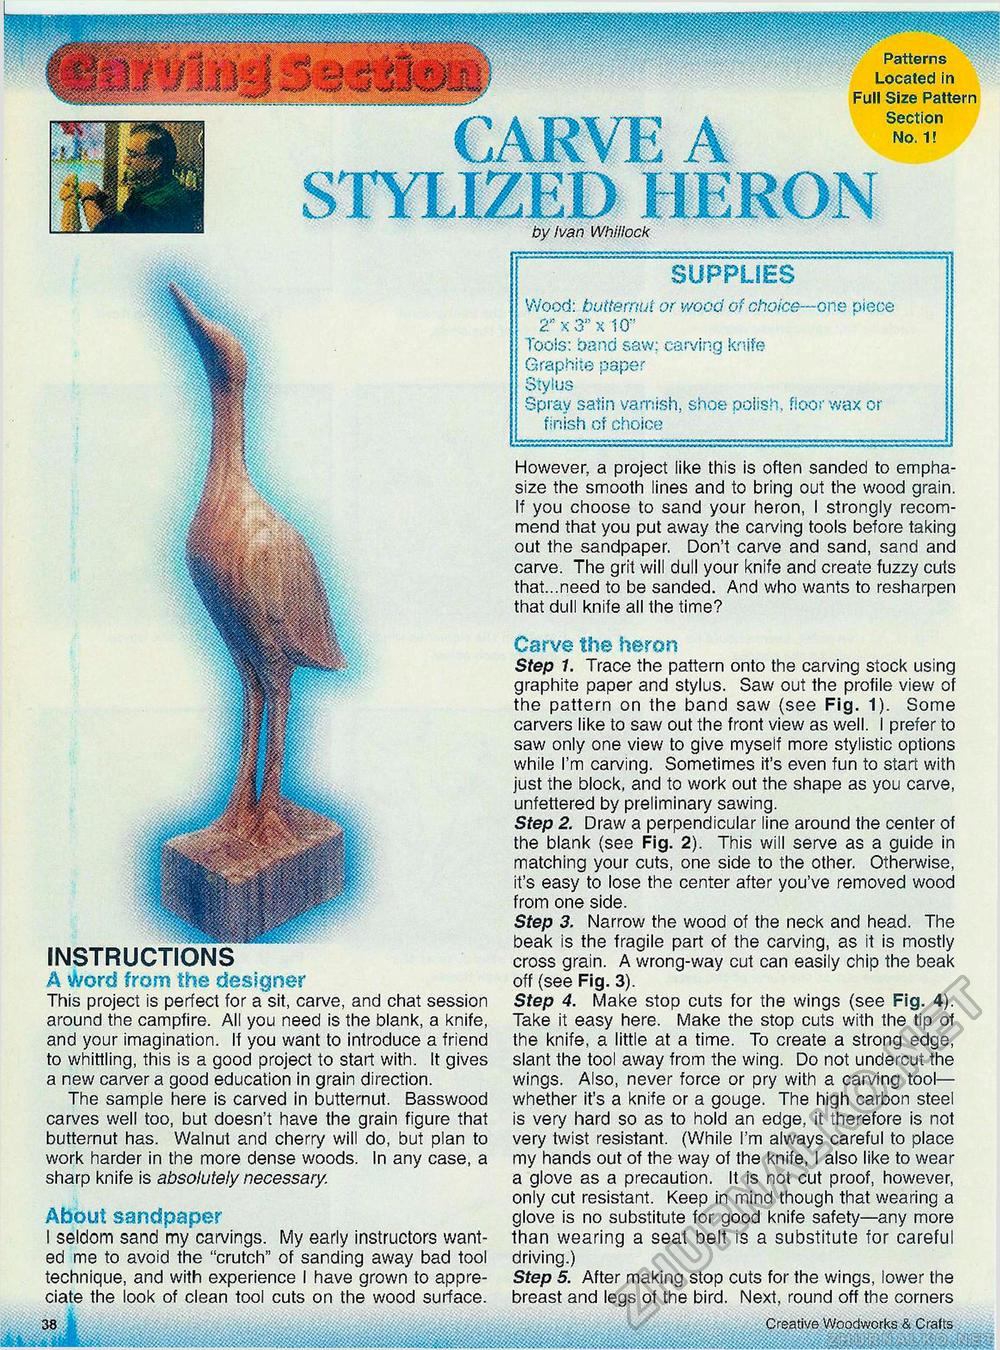
Patterns Located in Full Size Pattern Section No. 1! by Ivan Whillock Creative Woodworks & Crafts HH IIMmm Wmi SUPPLIES Wood: butternut or wood of choice—one piece 2" x 3" x 10" Tools: band saw; carving knife Graphite paper Stylus Spray satin varnish, shoe polish, floor wax or finish of choice However, a project like this is often sanded to emphasize the smooth lines and to bring out the wood grain. If you choose to sand your heron, I strongly recommend that you put away the carving tools before taking out the sandpaper. Don't carve and sand, sand and carve. The grit will dull your knife and create fuzzy cuts that...need to be sanded. And who wants to resharpen that dull knife all the time? Carve the heron Step 1. Trace the pattern onto the carving stock using graphite paper and stylus. Saw out the profile view of the pattern on the band saw (see Fig. 1). Some carvers like to saw out the front view as well. I prefer to saw only one view to give myseif more stylistic options while I'm carving. Sometimes it's even fun to start with just the block, and to work out the shape as you carve, unfettered by preliminary sawing. Step 2. Draw a perpendicular line around the center of the blank (see Fig. 2). This will serve as a guide in matching your cuts, one side to the other. Otherwise, it's easy to lose the center after you've removed wood from one side. Step 3. Narrow the wood of the neck and head. The beak is the fragile part of the carving, as it is mostly cross grain. A wrong-way cut can easily chip the beak off (see Fig. 3). Step 4. Make stop cuts for the wings (see Fig. 4). Take it easy here. Make the stop cuts with the tip of the knife, a little at a time. To create a strong edge, slant the tool away from the wing. Do not undercut the wings. Also, never force or pry with a carving tool— whether it's a knife or a gouge. The high carbon steel is very hard so as to hold an edge, it therefore is not very twist resistant. (While I'm always careful to place my hands out of the way of the knife, I also like to wear a glove as a precaution. It is not cut proof, however, only cut resistant. Keep in mind though that wearing a glove is no substitute for good knife safety—any more than wearing a seat belt is a substitute for careful driving.) Step 5. After making stop cuts for the wings, lower the breast and legs of the bird. Next, round off the corners INSTRUCTIONS A &ord from the designer This project is perfect for a sit, carve, and chat session around the campfire. All you need is the blank, a knife, and your imagination. If you want to introduce a friend to whittling, this is a good project to start with. It gives a new carver a good education in grain direction. The sample here is carved in butternut. Basswood carves well too, but doesn't have the grain figure that butternut has. Walnut and cherry will do, but plan to work harder in the more dense woods. In any case, a sharp knife is absolutely necessary About sandpaper I seldom sand my carvings. My early instructors wanted me to avoid the "crutch" of sanding away bad tool technique, and with experience I have grown to appreciate the look of clean tool cuts on the wood surface. |


