Creative Woodworks & crafts 2000-04, страница 40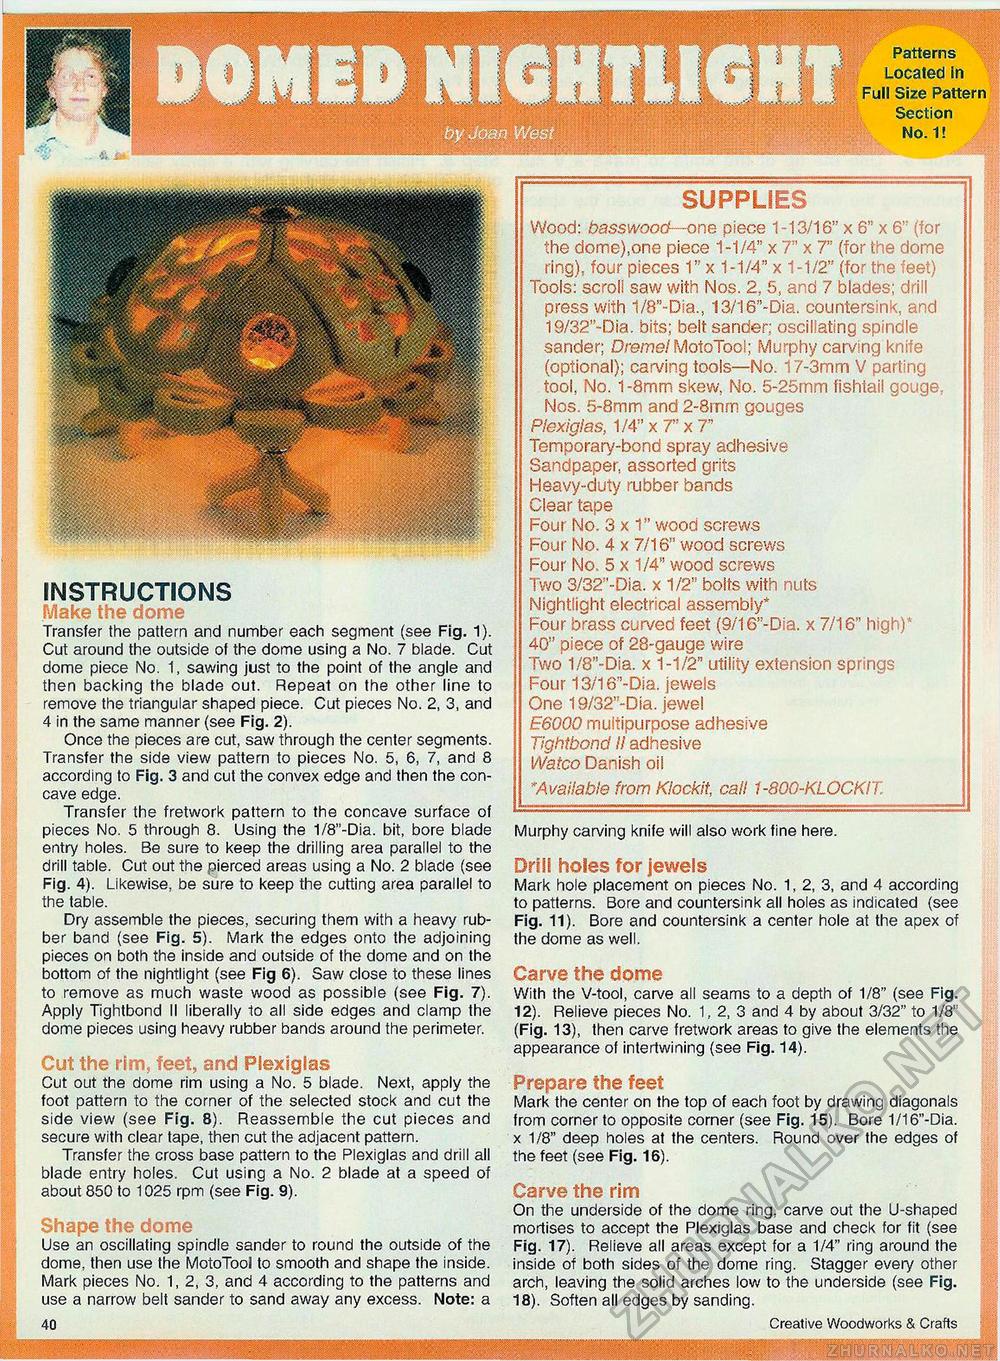
INSTRUCTIONS Make the dome Transfer the pattern and number each segment (see Fig. 1). Cut around the outside of the dome using a No. 7 blade. Cut dome piece No. 1, sawing just to the point of the angle and then backing the blade out. Repeat on the other line to remove the triangular shaped piece. Cut pieces No. 2, 3, and 4 in the same manner (see Fig. 2). Once the pieces are cut, saw through the center segments. Transfer the side view pattern to pieces No. 5, 6, 7, and 8 according to Fig. 3 and cut the convex edge and then the concave edge. Transfer the fretwork pattern to the concave surface of pieces No. 5 through 8. Using the 1/8"-Dia. bit, bore blade entry holes. Be sure to keep the drilling area parallel to the drill table. Cut out the pierced areas using a No. 2 blade (see Fig. 4). Likewise, be sure to keep the cutting area parallel to the table. Dry assemble the pieces, securing them with a heavy rubber band (see Fig. 5). Mark the edges onto the adjoining pieces on both the inside and outside of the dome and on the bottom of the nightlight (see Fig 6). Saw close to these lines to remove as much waste wood as possible (see Fig. 7). Apply Tightbond II liberally to all side edges and clamp the dome pieces using heavy rubber bands around the perimeter. Cut the rim, feet, and Plexiglas Cut out the dome rim using a No. 5 blade. Next, apply the foot pattern to the corner of the selected stock and cut the side view (see Fig. 8). Reassemble the cut pieces and secure with clear tape, then cut the adjacent pattern. Transfer the cross base pattern to the Plexiglas and drill all blade entry holes. Cut using a No. 2 blade at a speed of about 850 to 1025 rpm (see Fig. 9). Shape the dome Use an oscillating spindle sander to round the outside of the dome, then use the MotoTool to smooth and shape the inside. Mark pieces No. 1, 2, 3, and 4 according to the patterns and use a narrow belt sander to sand away any excess. Note: a 40 SUPPLIES Wood: basswood—one piece 1-13/16" x 6" x 6" (for the dome),one piece 1-1/4" x 7" x 7" (for the dome ring), four pieces 1" x 1-1/4" x 1-1/2" (for the feet) Tools: scroll saw with Nos. 2, 5, and 7 blades; drill press with 1/8"-Dia., 13/16"-Dia. countersink, and 19/32"-Dia. bits; belt sander; oscillating spindle sander; Dremel MotoTool; Murphy carving knife (optional); carving tools—No. 17-3mm V parting tool, No. 1-8mm skew, No. 5-25mm fishtail gouge, Nos. 5-8mm and 2-8mm gouges Plexiglas, 1/4" x 7" x 7" Temporary-bond spray adhesive Sandpaper, assorted grits Heavy-duty rubber bands Clear tape Four No. 3x1" wood screws Four No. 4 x 7/16" wood screws Four No. 5 x 1/4" wood screws Two 3/32"-Dia. x 1/2" bolts with nuts Nightlight electrical assembly* Four brass curved feet (9/16"-Dia. x 7/16" high)* 40" piece of 28-gauge wire Two 1/8"-Dia. x 1-1/2" utility extension springs Four 13/16"-Dia. jewels One 19/32"-Dia. jewel E6000 multipurpose adhesive Tightbond II adhesive Watco Danish oil *Available from Klockit, call 1-800-KLOCKIT. Murphy carving knife will also work fine here. Drill holes for jewels Mark hole placement on pieces No. 1, 2, 3, and 4 according to patterns. Bore and countersink all holes as indicated (see Fig. 11). Bore and countersink a center hole at the apex of the dome as well. Carve the dome With the V-tool, carve all seams to a depth of 1/8" (see Fig. 12). Relieve pieces No. 1, 2, 3 and 4 by about 3/32" to 1/8" (Fig. 13), then carve fretwork areas to give the elements the appearance of intertwining (see Fig. 14). Prepare the feet Mark the center on the top of each foot by drawing diagonals from corner to opposite corner (see Fig. 15). Bore 1/16"-Dia. x 1/8" deep holes at the centers. Round over the edges of the feet (see Fig. 16). Carve the rim On the underside of the dome ring, carve out the U-shaped mortises to accept the Plexiglas base and check for fit (see Fig. 17). Relieve all areas except for a 1/4" ring around the inside of both sides of the dome ring. Stagger every other arch, leaving the solid arches low to the underside (see Fig. 18). Soften all edges by sanding. Creative Woodworks & Crafts |


