Creative Woodworks & crafts 2000-04, страница 42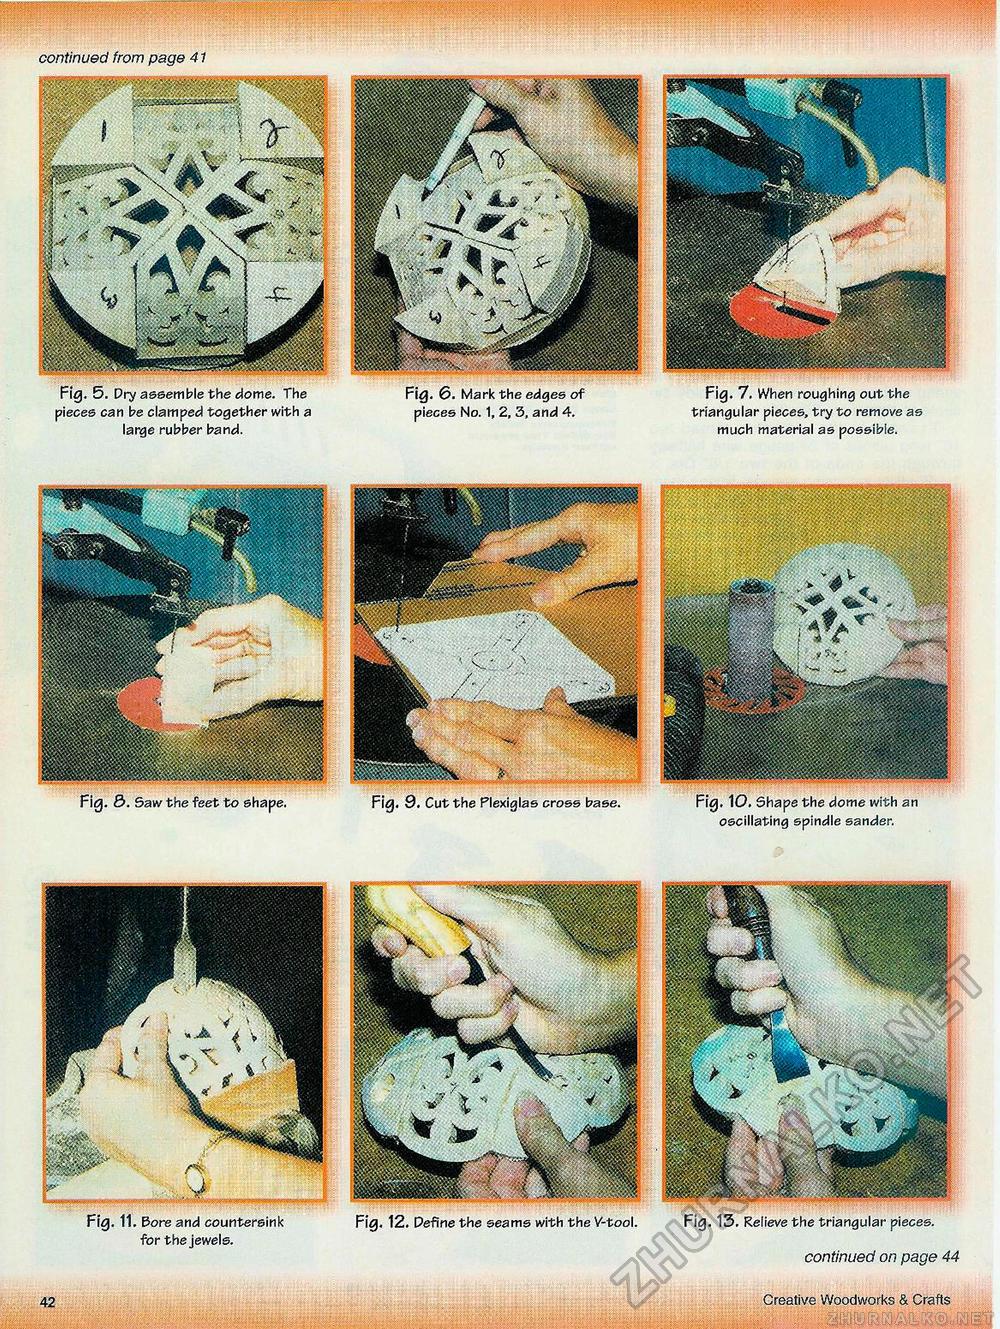
continued from page 41 Fig. 5. Dry assemble the dome. The Fig. &. Mark the edges of Fig. 7. When roughing out the pieces can be clamped together with a pieces No. 1, 2, 3, and 4. triangular pieces, try to remove as large rubber band. much material as possible. Fig. 3. Saw the feet to shape. Fig. 9. Cut the Plexiglas cross base. Fig. 10. Shape the dome with an oscillating spindle sander. Fig. 11. Pore and countersink Fig. 12. Define the seams with the V-tool. Fig. 13. Relieve the triangular pieces, for the jewels. continued on page 44 42 Creative Woodworks & Crafts |


