Creative Woodworks & crafts 2000-04, страница 39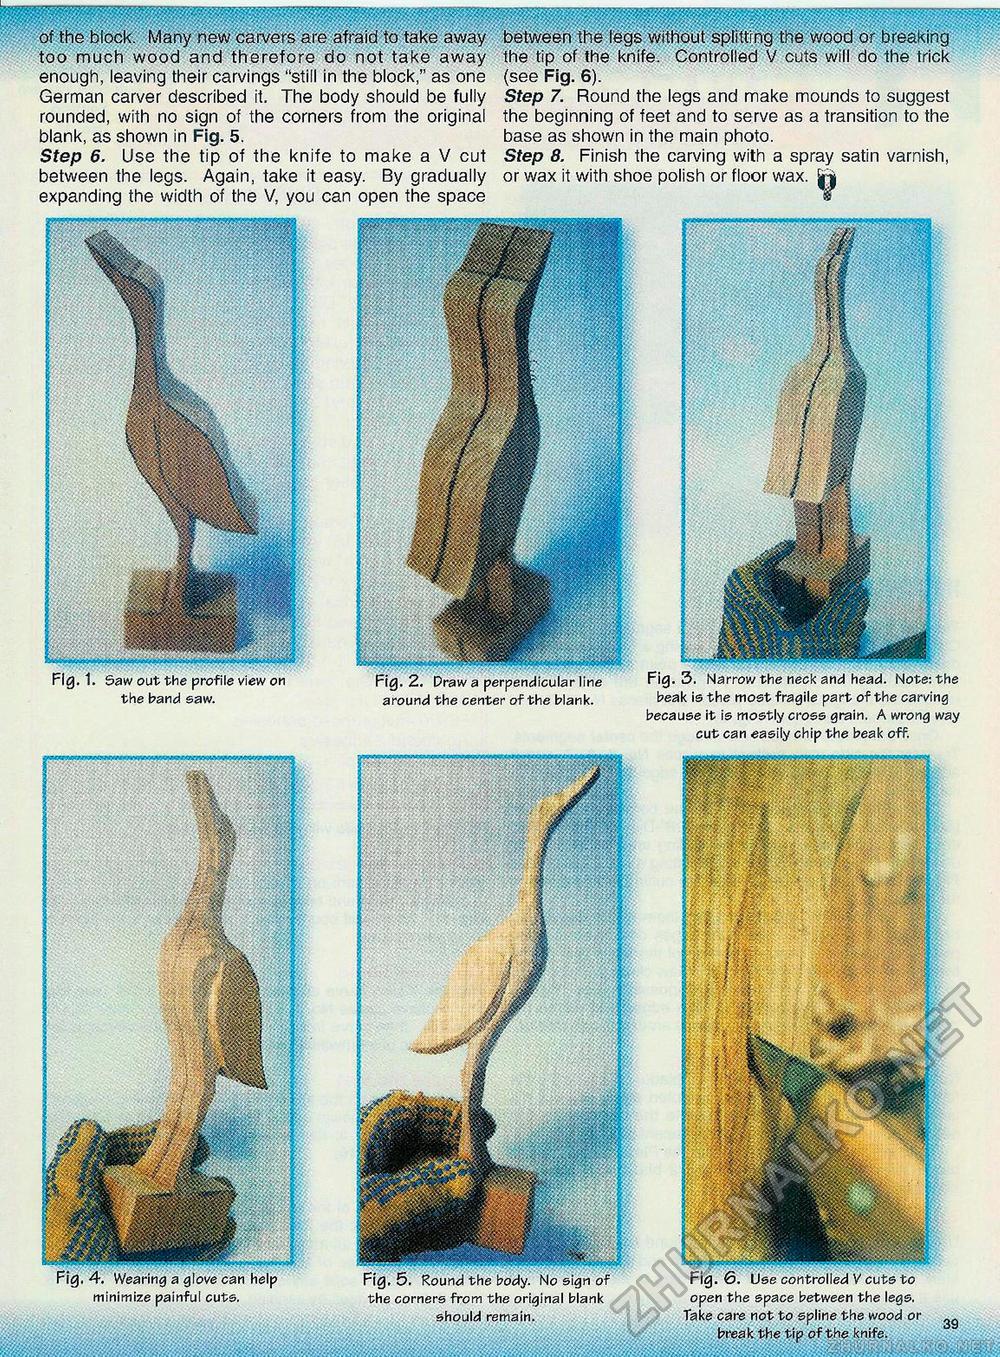
of the block. Many new carvers are afraid to take away too much wood and therefore do not take away enough, leaving their carvings "still in the block," as one German carver described it. The body should be fully rounded, with no sign of the corners from the original blank, as shown in Fig. 5. Step 6. Use the tip of the knife to make a V cut between the legs. Again, take it easy. By gradually expanding the width of the V, you can open the space between the legs without splitting the wood or breaking the tip of the knife. Controlled V cuts will do the trick (see Fig. 6). Step 7. Round the legs and make mounds to suggest the beginning of feet and to serve as a transition to the base as shown in the main photo. Step 8. Finish the carving with a spray satin varnish, or wax it with shoe polish or floor wax. Fig. 2. Draw a perpendicular line araun d the center of the blank. Fig. beak is the most fragile part of the carving because it is mostly cross grain. A wrong way cut can easily chip the beak off. Fig. 4. Wearing a glove can help minimize painful cuts. Fig. 5. Round the body. No sign of the corners from the original blank should remain. Fig. 6. Use controlled V cuts to open the space between the legs. Take care not to spline the wood or break the tip of the knife. |


