Creative Woodworks & crafts 2000-06, страница 24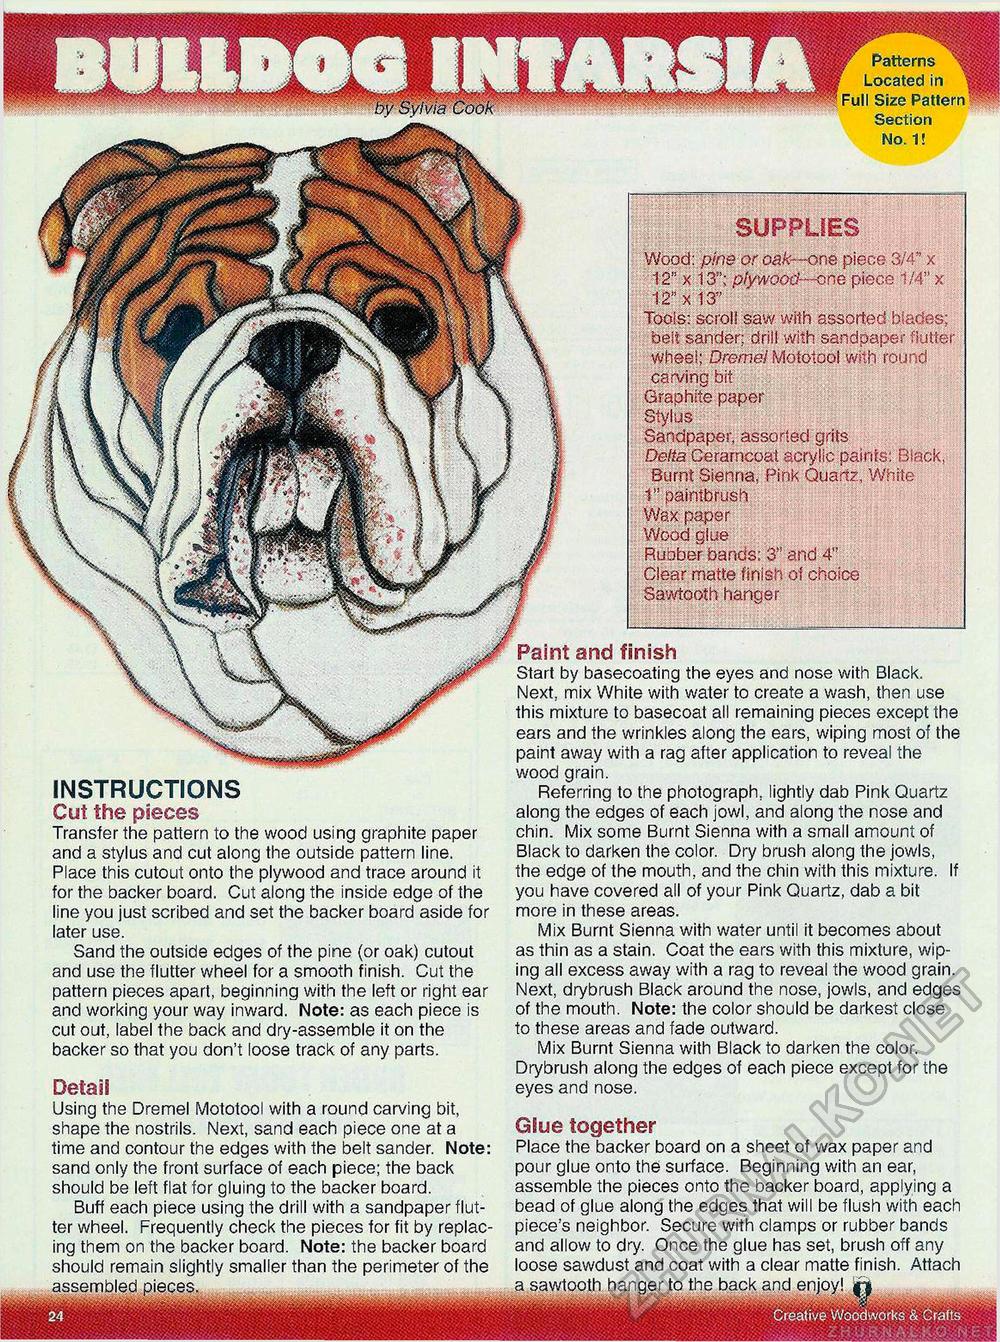
Creative Woodworks & Crafts SUPPLIES Wood: pine or oak—one piece 3/4" x 12" x 13"; plywood—one piece 1/4" x 12" x 13" Tools: scroll saw with assorted blades: belt sander; drill with sandpaper flutter wheel; Dremel Mototool with round carving bit Graphite paper Stylus Sandpaper, assorted grits Delta Ceramcoat. acrylic paints: Black, Burnt Sienna. Pink Quartz, White 1" paintbrush Wax paper Wood glue Rubber bands: 3" and 4" Clear matte finish of choice Sawtooth hanger INSTRUCTIONS Cut the pieces Transfer the pattern to the wood using graphite paper and a stylus and cut along the outside pattern line. Place this cutout onto the plywood and trace around it for the backer board. Cut along the inside edge of the line you just scribed and set the backer board aside for later use. Sand the outside edges of the pine (or oak) cutout and use the flutter wheel for a smooth finish. Cut the pattern pieces apart, beginning with the left or right ear and working your way inward. Note: as each piece is cut out, label the back and dry-assemble it on the backer so that you don't loose track of any parts. Detail Using the Dremel Mototool with a round carving bit, shape the nostrils. Next, sand each piece one at a time and contour the edges with the belt sander. Note: sand only the front surface of each piece; the back should be left flat for gluing to the backer board. Buff each piece using the drill with a sandpaper flutter wheel. Frequently check the pieces for fit by replacing them on the backer board. Note: the backer board should remain slightly smaller than the perimeter of the assembled pieces. Paint and finish Start by basecoating the eyes and nose with Black. Next, mix White with water to create a wash, then use this mixture to basecoat all remaining pieces except the ears and the wrinkles along the ears, wiping most of the paint away with a rag after application to reveal the wood grain. Referring to the photograph, lightly dab Pink Quartz along the edges of each jowl, and along the nose and chin. Mix some Burnt Sienna with a small amount of Black to darken the color. Dry brush along the jowls, the edge of the mouth, and the chin with this mixture. If you have covered all of your Pink Quartz, dab a bit more in these areas. Mix Burnt Sienna with water until it becomes about as thin as a stain. Coat the ears with this mixture, wiping all excess away with a rag to reveal the wood grain. Next, drybrush Black around the nose, jowls, and edges of the mouth. Note: the color should be darkest close to these areas and fade outward. Mix Burnt Sienna with Black to darken the color. Drybrush along the edges of each piece except for the eyes and nose. Glue together Place the backer board on a sheet of wax paper and pour glue onto the surface. Beginning with an ear, assemble the pieces onto the backer board, applying a bead of glue along the edges that will be flush with each piece's neighbor. Secure with clamps or rubber bands and allow to dry. Once the glue has set, brush off any loose sawdust and coat with a clear matte finish. Attach a sawtooth hanger to the back and enjoy! jj| |


