Creative Woodworks & crafts 2000-06, страница 46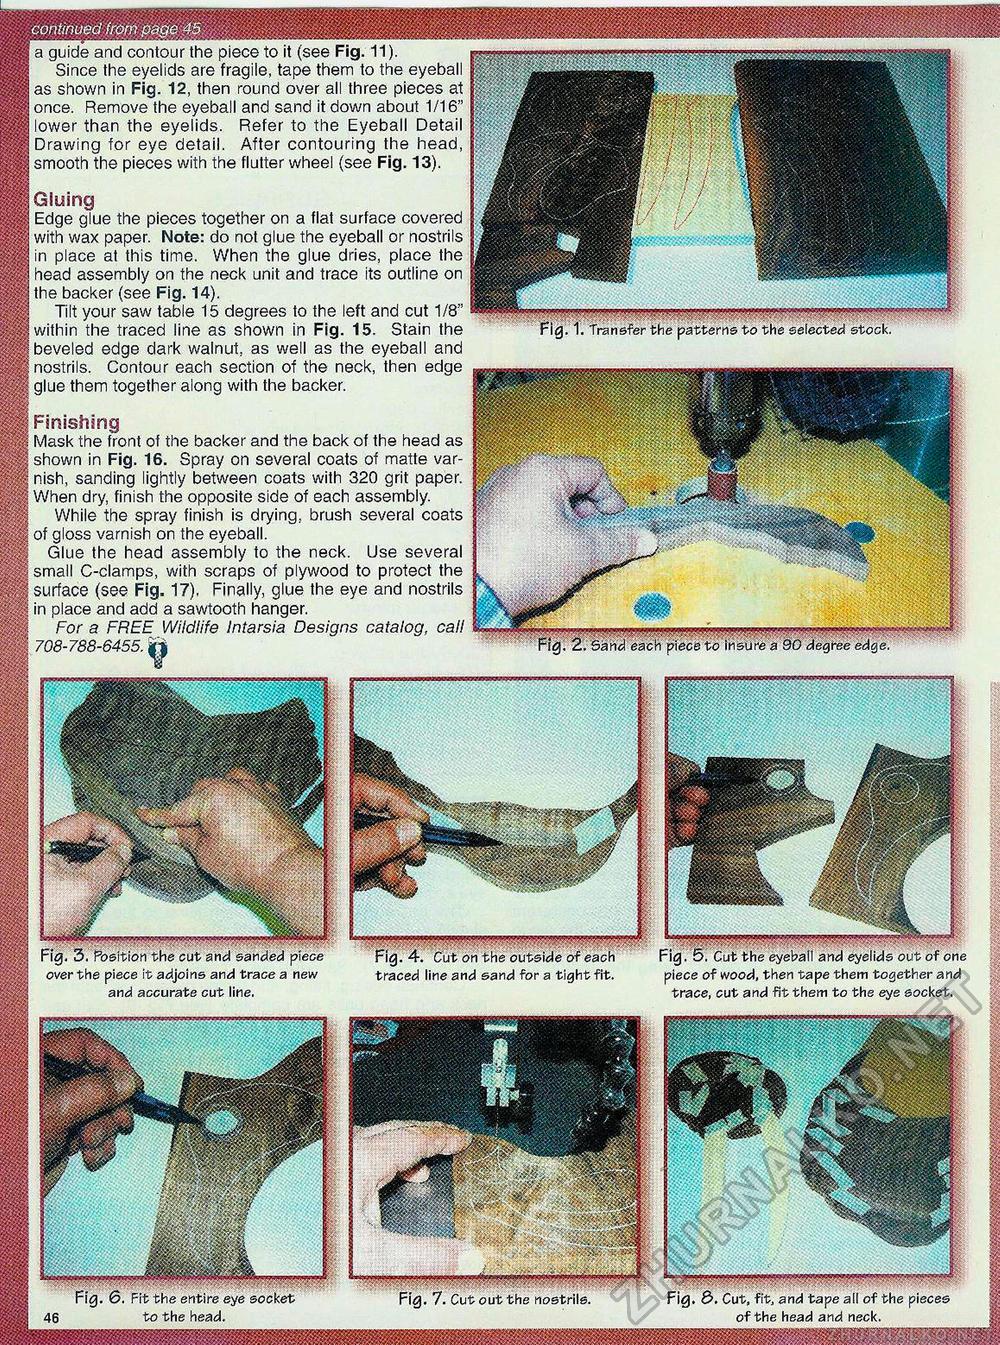
continued from page 45 a guide and contour the piece to it (see Fig. 11). pfgSs Since the eyelids are fragile, tape them to the eyeball |;f§f§ as shown in Fig. 12, then round over all three pieces at '; once. Remove the eyeball and sand it down about 1/16" ;, -i lower than the eyelids. Refer to the Eyeball Detail \ a Drawing for eye detail. After contouring the head, '■' M smooth the pieces with the flutter wheel (see Fig. 13). J| Gluing 0m Edge glue the pieces together on a flat surface covered Mm with wax paper. Note: do not glue the eyeball or nostrils in place at this time. When the glue dries, place the jHpf head assembly on the neck unit and trace its outline on |||||| the backer (see Fig. 14). Tilt your saw table 15 degrees to the left and cut 1/8" within the traced line as shown in Fig. 15. Stain the beveled edge dark walnut, as well as the eyeball and nostrils. Contour each section of the neck, then edge glue them together along with the backer. : # ':J Finishing Mask the front of the backer and the back of the head as shown in Fig. 16. Spray on several coats of matte var- : nish, sanding lightly between coats with 320 grit paper. When dry, finish the opposite side of each assembly. While the spray finish is drying, brush several coats of gloss varnish on the eyeball. Glue the head assembly to the neck. Use several small C-clamps, with scraps of plywood to protect the k surface (see Fig. 17), Finally, glue the eye and nostrils in place and add a sawtooth hanger. |pPi| For a FREE Wildlife Intarsia Designs catalog, call WUM 708-788-6455. i'i Fig. 1. Transfer the patterns to the selected stock. Fig. 2. Sand each piece to insure a 90 degree edge, Fig. 5. Cut the eyeball and eyelids out of one piece of wood, then tape them together and trace, cut and fit them to the eye socket. Fig. 4. Cut on the outside of each traced line and sand for a tight fit. Fig. 3. Position the cut and sanded piece over the piece it adjoins and trace a new and accurate cut line. Fig. 7. Cut out the nostrils. Fig. 6. Fit the entire eye socket 46 to the head. |


