Creative Woodworks & crafts 2000-06, страница 61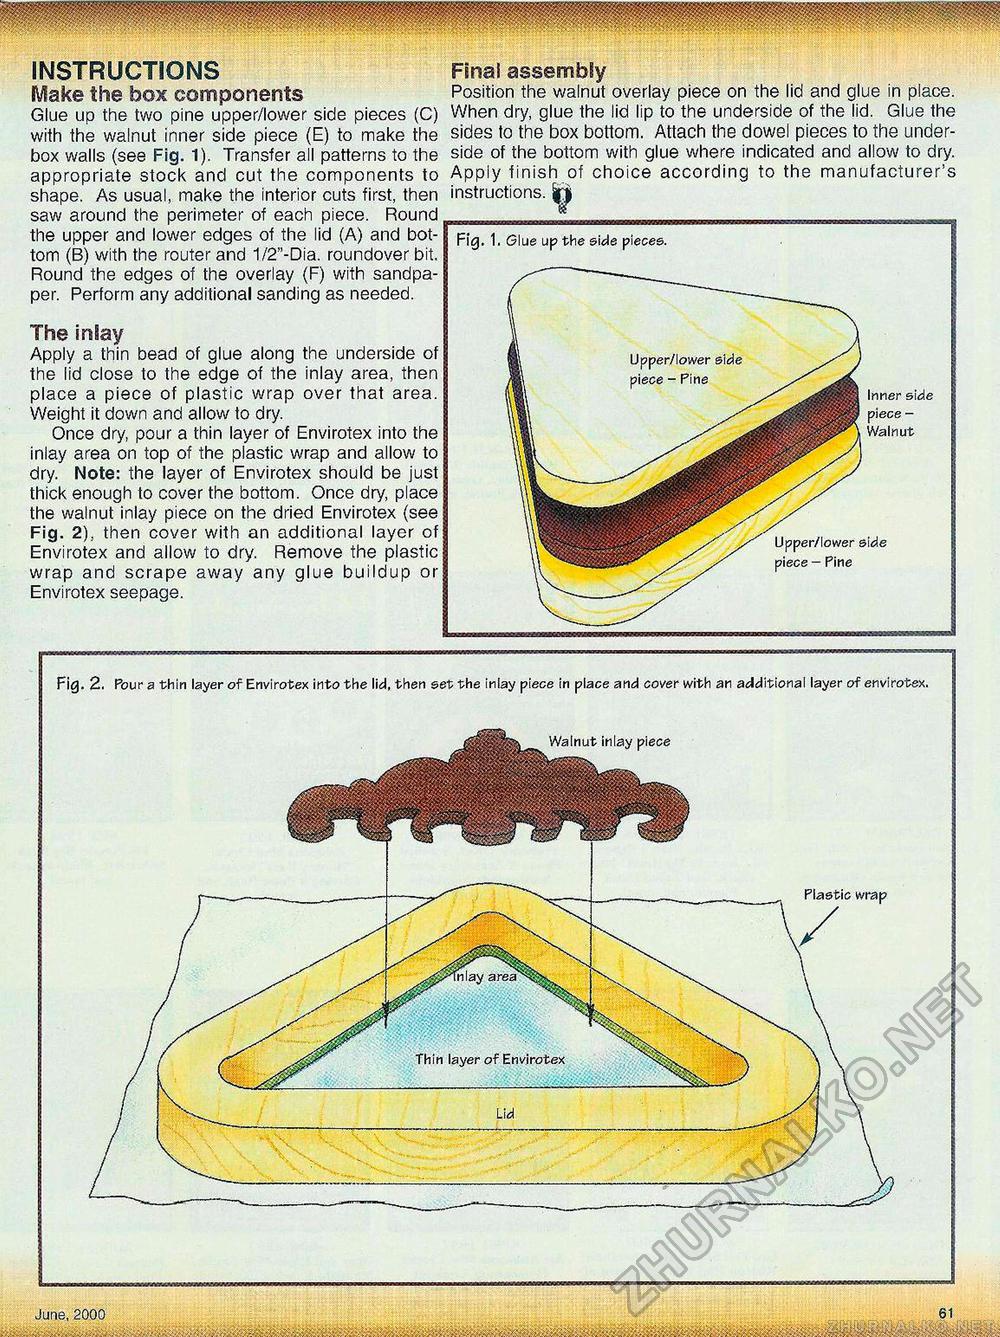
^puf Wymmm INSTRUCTIONS Make the box components Glue up the two pine upper/lower side pieces (C) with the walnut inner side piece (E) to make the box walls (see Fig. 1). Transfer all patterns to the appropriate stock and cut the components to shape. As usual, make the interior cuts first, then saw around the perimeter of each piece. Round the upper and lower edges of the lid (A) and bottom (B) with the router and 1/2"-Dia. roundover bit. Round the edges of the overlay (F) with sandpaper. Perform any additional sanding as needed. The inlay Apply a thin bead of glue along the underside of the lid close to the edge of the inlay area, then place a piece of plastic wrap over that area. Weight it down and allow to dry. Once dry, pour a thin layer of Envirotex into the inlay area on top of the plastic wrap and allow to dry. Note: the layer of Envirotex should be just thick enough to cover the bottom. Once dry, place the walnut inlay piece on the dried Envirotex (see Fig. 2), then cover with an additional layer of Envirotex and allow to dry. Remove the plastic wrap and scrape away any glue buildup or Envirotex seepage. Final assembly Position the walnut overlay piece on the lid and glue in place. When dry, glue the lid lip to the underside of the lid. Glue the sides to the box bottom. Attach the dowel pieces to the underside of the bottom with glue where indicated and allow to dry. Appiy finish of choice according to the manufacturer's instructions. £ri Fig. 1, Glue up the side pieces. Inner side piece -Walnut Upper/lower side piece - Pine Fig. 2. Pour a thin layer of Envirotex into the lid, then set the inlay piece in place and cover with an additional layer of envirotex, Walnut inlay piece Plastic wrap June, 2000 61 ....................................................i................ i........... ' . . ...................................... |


