Creative Woodworks & crafts 2000-10, страница 18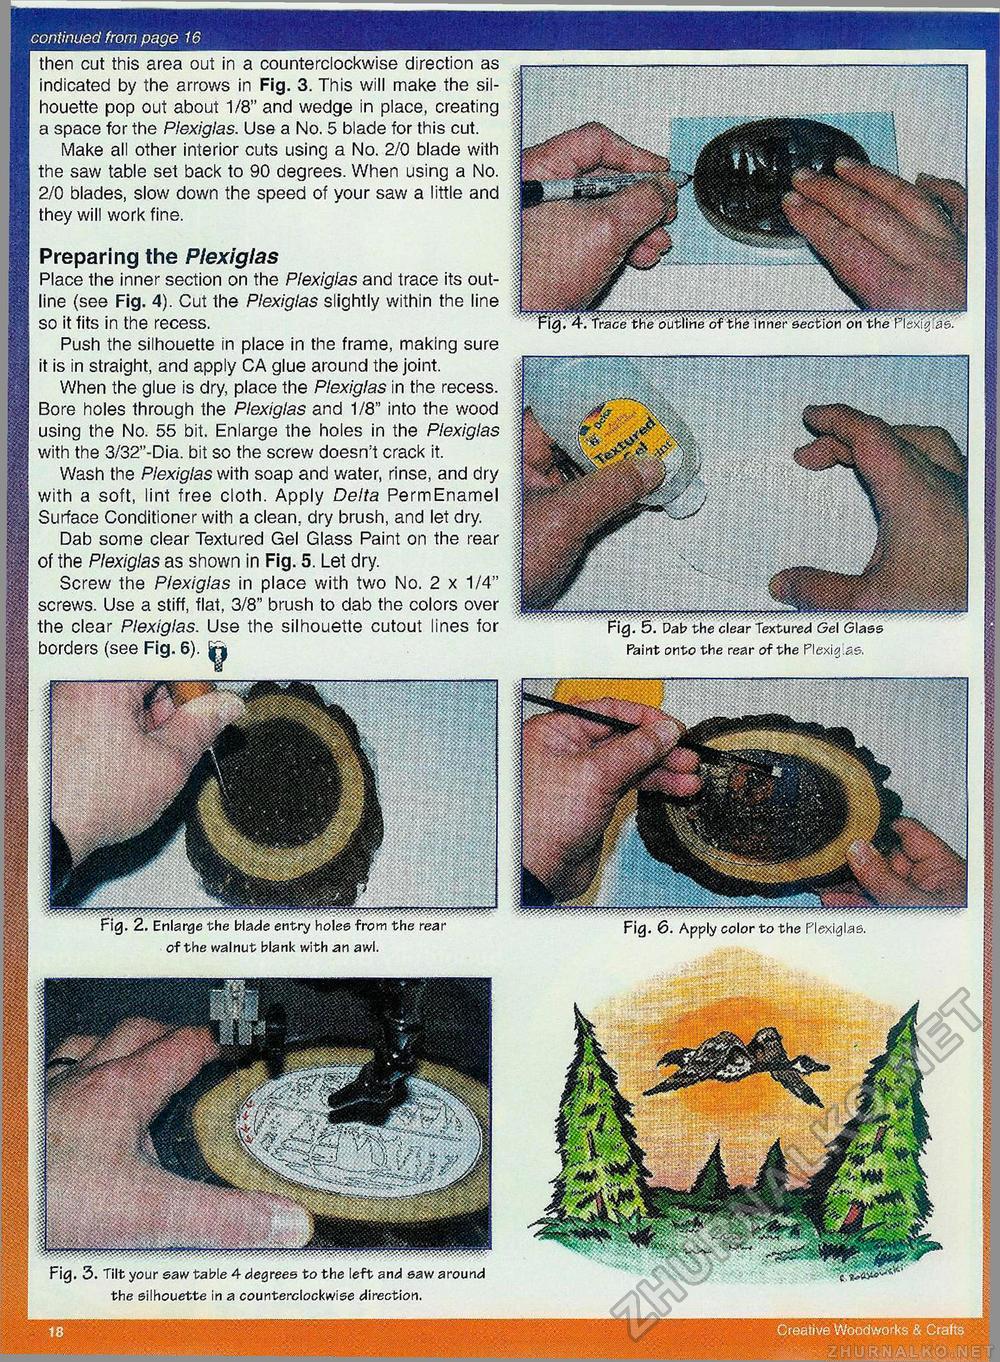
continued from page 16 then cut this area out in a counterclockwise direction as indicated by the arrows in Fig. 3. This will make the silhouette pop out about 1/8" and wedge in place, creating a space for the Plexiglas. Use a No. 5 blade for this cut. Make all other interior cuts using a No. 2/0 blade with the saw table set back to 90 degrees. When using a No. 2/0 blades, slow down the speed of your saw a little and they will work fine. Preparing the Plexiglas Place the inner section on the Plexiglas and trace its outline (see Fig. 4). Cut the Plexiglas slightly within the line so it fits in the recess. Push the silhouette in place in the frame, making sure it is in straight, and apply CA glue around the joint. When the glue is dry, place the Plexiglas in the recess. Bore holes through the Plexiglas and 1/8" into the wood using the No. 55 bit. Enlarge the holes in the Plexiglas with the 3/32"-Dia. bit so the screw doesn't crack it. Wash the Plexiglas with soap and water, rinse, and dry with a soft, lint free cloth. Apply Delta PermEnamel Surface Conditioner with a clean, dry brush, and let dry. Dab some clear Textured Gel Glass Paint on the rear of the Plexiglas as shown in Fig. 5. Let dry. Screw the Plexiglas in place with two No. 2 x 1/4" screws. Use a stiff, flat, 3/8" brush to dab the colors over the clear Plexiglas. Use the silhouette cutout lines for borders (see Fig. 6). || Paint onto the rear of the Plexig .fis. of the walnut blank with an awl. . ___Apply color to the Plexiglas. Fig. 3. Tilt your saw table 4 degrees to the left and saw around the silhouette in a counterclockwise direction. wmmm |


