Creative Woodworks & crafts 2000-11, страница 10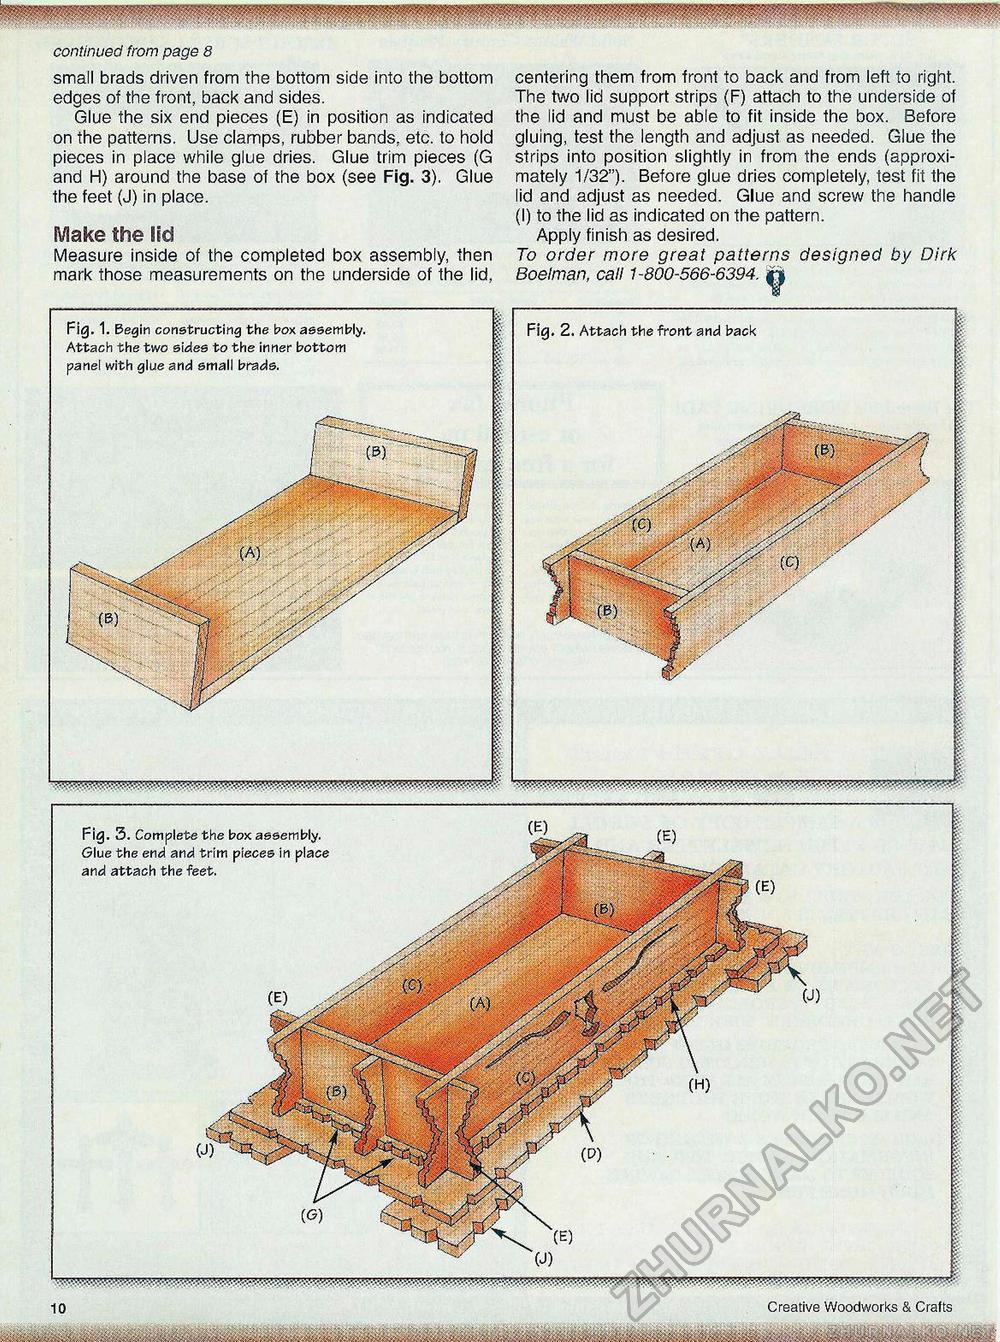
continued from page 8 small brads driven from the bottom side into the bottom edges of the front, back and sides. Glue the six end pieces (E) in position as indicated on the patterns. Use clamps, rubber bands, etc. to hold pieces in place while glue dries. Glue trim pieces (G and H) around the base of the box (see Fig. 3). Glue the feet (J) in place. Make the lid Measure inside of the completed box assembly, then mark those measurements on the underside of the lid, centering them from front to back and from left to right. The two lid support strips (F) attach to the underside of the lid and must be able to fit inside the box. Before gluing, test the length and adjust as needed. Glue the strips into position slightly in from the ends (approximately 1/32"). Before glue dries completely, test fit the lid and adjust as needed. Glue and screw the handle (I) to the lid as indicated on the pattern. Apply finish as desired. To order more great patterns designed by Dirk Boelman, call 1-800-566-6394. rf 10 ® Creative Woodworks & Crafts Fig. 1. Begin constructing the box assembly. Attach the two sides to the inner bottom panel with glue and small brads. Fig. 2. Attach the front and back i Fig. 3. Completethe box assembly. Glue the end and trim pieces in place and attach the feet. |


