Creative Woodworks & crafts 2000-11, страница 27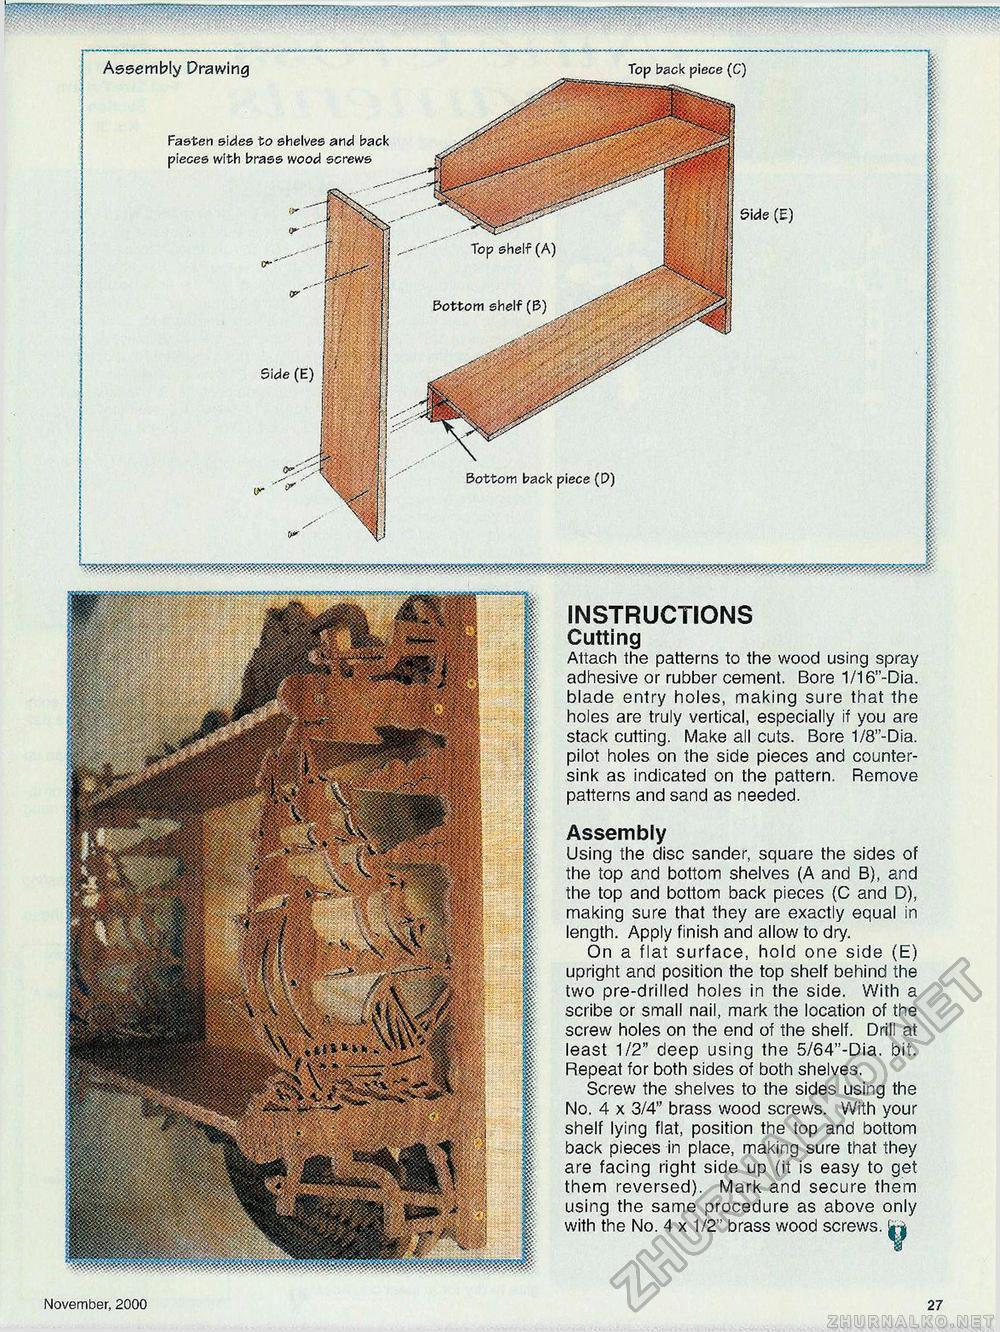
INSTRUCTIONS Cutting Attach the patterns to the wood using spray adhesive or rubber cement. Bore 1/16"-Dia. blade entry holes, making sure that the holes are truly vertical, especially if you are stack cutting. Make all cuts. Bore 1/8"-Dia. pilot holes on the side pieces and countersink as indicated on the pattern. Remove patterns and sand as needed. Assembly Using the disc sander, square the sides of the top and bottom shelves (A and B), and the top and bottom back pieces (C and D), making sure that they are exactly equal in length. Apply finish and allow to dry. On a flat surface, hold one side (E) upright and position the top shelf behind the two pre-drilled holes in the side. With a scribe or small nail, mark the location of the screw holes on the end of the shelf. Drill at least 1/2" deep using the 5/64"-Dia. bit. Repeat for both sides of both shelves. Screw the shelves to the sides using the No. 4 x 3/4" brass wood screws. With your shelf lying flat, position the top and bottom back pieces in place, making sure that they are facing right side up (it is easy to get them reversed). Mark and secure them using the same procedure as above only with the No. 4 x 1/2" brass wood screws, li-i Fasten sides to shelves and back pieces with brass wood screws Bottom back piece (D) Assembly Drawing Side (E) Top back piece (C) November, 2000 27 |


