Creative Woodworks & crafts 2001-04, страница 36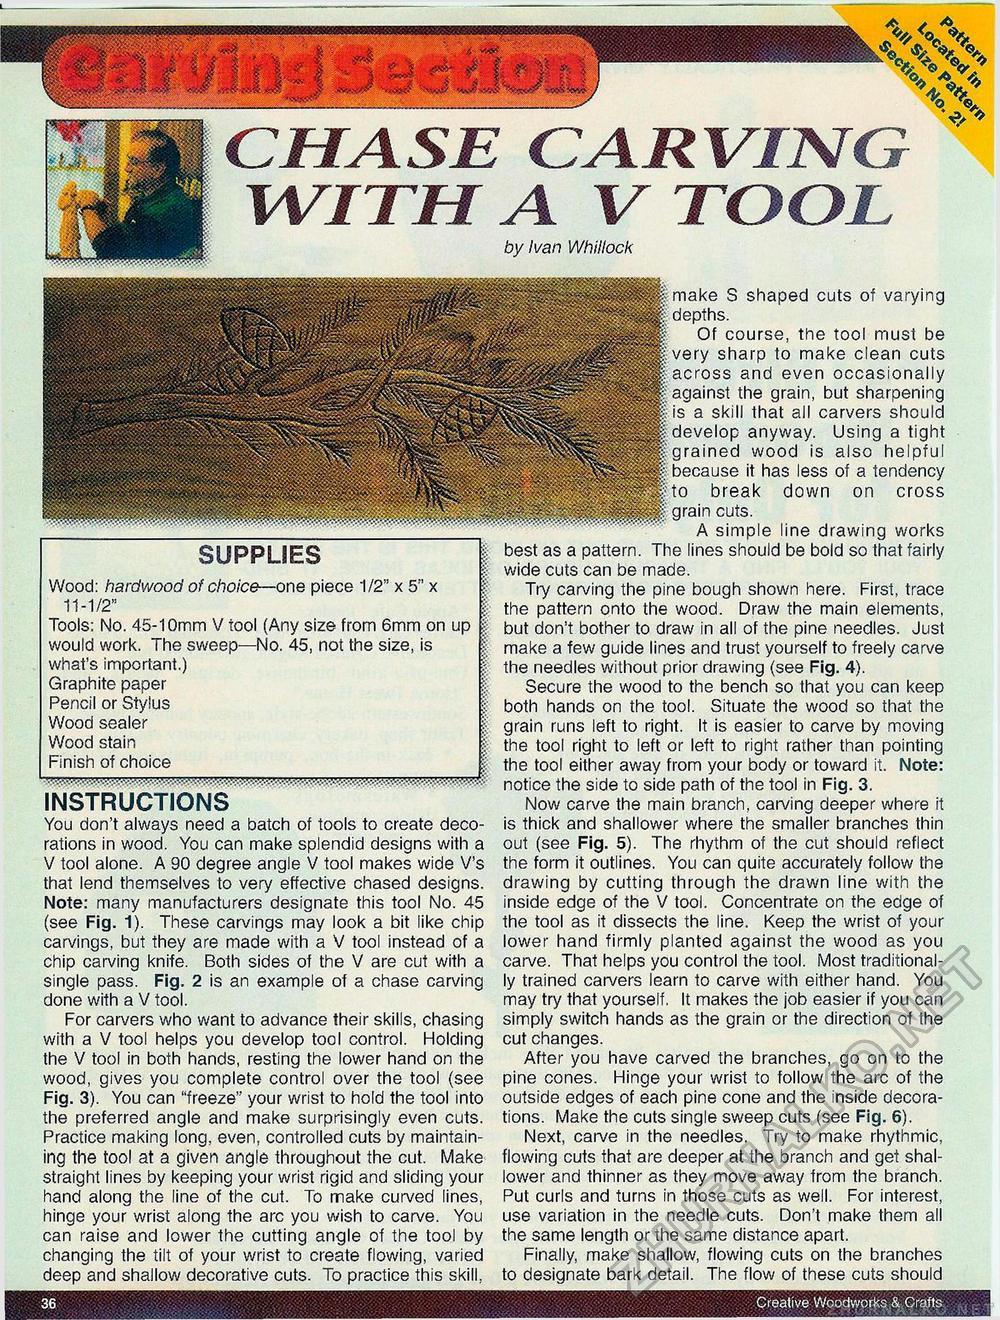
36 Creative Woodworks & Crafts SUPPLIES Wood: hardvi/ood of choice—one piece 1/2" x 5" x 11-1/2" | Tools: No. 45-1 Omm V tool (Any size from 6mm on up | would work. The sweep—No. 45, not the size, is what's important.) | Graphite paper Pencil or Stylus f Wood sealer Wood stain Finish of choice | instructions You don't always need a batch of tools to create decorations in wood. You can make splendid designs with a V tool alone. A 90 degree angle V tool makes wide V's that lend themselves to very effective chased designs. Note: many manufacturers designate this tool No. 45 (see Fig. 1). These carvings may look a bit like chip carvings, but they are made with a V tool instead of a chip carving knife. Both sides of the V are cut with a single pass. Fig. 2 is an example of a chase carving done with a V tool. For carvers who want to advance their skills, chasing with a V tool helps you develop tool control. Holding the V tool in both hands, resting the lower hand on the wood, gives you complete control over the tool (see Fig. 3). You can "freeze" your wrist to hold the tool into the preferred angle and make surprisingly even cuts. Practice making long, even, controlled cuts by maintaining the tool at a given angle throughout the cut. Make straight lines by keeping your wrist rigid and sliding your hand along the line of the cut. To make curved lines, hinge your wrist along the arc you wish to carve. You can raise and lower the cutting angle of the tool by changing the tilt of your wrist to create flowing, varied deep and shallow decorative cuts. To practice this skill, CHASE CARVING WITH A V TOOL by Ivan Whillock make S shaped cuts of varying Of course, the tool must be very sharp to make clean cuts across and even occasionally against the grain, but sharpening is a skill that all carvers should develop anyway. Using a tight rained wood is also helpful it has less of a tendency break down on cross grain cuts. A simple line drawing works best as a pattern. The lines should be bold so that fairly wide cuts can be made. Try carving the pine bough shown here. First, trace the pattern onto the wood. Draw the main elements, but don't bother to draw in all of the pine needles. Just make a few guide lines and trust yourself to freely carve the needles without prior drawing (see Fig. 4). Secure the wood to the bench so that you can keep both hands on the tool. Situate the wood so that the grain runs left to right. It is easier to carve by moving the tool right to left or left to right rather than pointing the tool either away from your body or toward it. Note: notice the side to side path of the tool in Fig. 3. Now carve the main branch, carving deeper where it is thick and shallower where the smaller branches thin out (see Fig. 5). The rhythm of the cut should reflect the form it outlines. You can quite accurately follow the drawing by cutting through the drawn line with the inside edge of the V tool. Concentrate on the edge of the tool as it dissects the line. Keep the wrist of your lower hand firmly planted against the wood as you carve. That helps you control the tool. Most traditionally trained carvers learn to carve with either hand. You may try that yourself. It makes the job easier if you can simply switch hands as the grain or the direction of the cut changes. After you have carved the branches, go on to the pine cones. Hinge your wrist to follow the arc of the outside edges of each pine cone and the inside decorations. Make the cuts single sweep cuts (see Fig. 6). Next, carve in the needles. Try to make rhythmic, flowing cuts that are deeper at the branch and get shallower and thinner as they move away from the branch. Put curls and turns in those cuts as well. For interest, use variation in the needle cuts. Don't make them all the same length or the same distance apart. Finally, make shallow, flowing cuts on the branches to designate bark detail. The flow of these cuts should |


