Creative Woodworks & crafts 2001-04, страница 37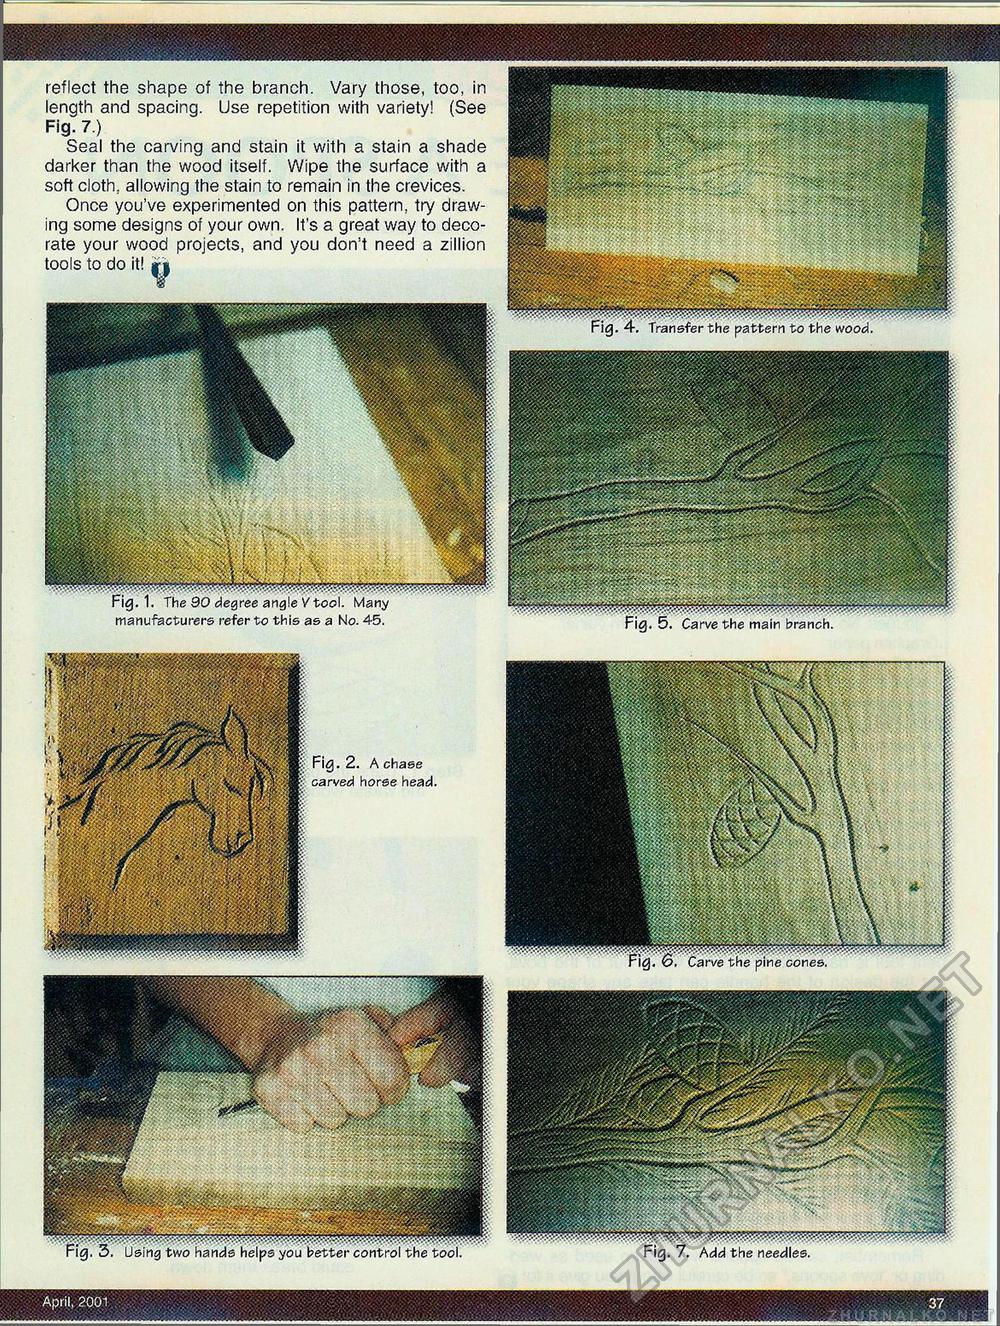
reflect the shape of the branch. Vary those, too, in length and spacing. Use repetition with variety! (See Fig. 7.) Seal the carving and stain it with a stain a shade darker than the wood itself. Wipe the surface with a soft cloth, allowing the stain to remain in the crevices. Once you've experimented on this pattern, try drawing some designs of your own. It's a great way to decorate your wood projects, and you don't need a zillion tools to do it! jyj| Fig. 1. The 90 degree angle V tool. Many manufacturers refer to this as a No. 45. Fig. 3. Using two hands helps you better control the tool. Fig. 5. Carve the main branch. Fig. 7. Add the needles. April, 2001 37 |


