Creative Woodworks & crafts 2001-04, страница 38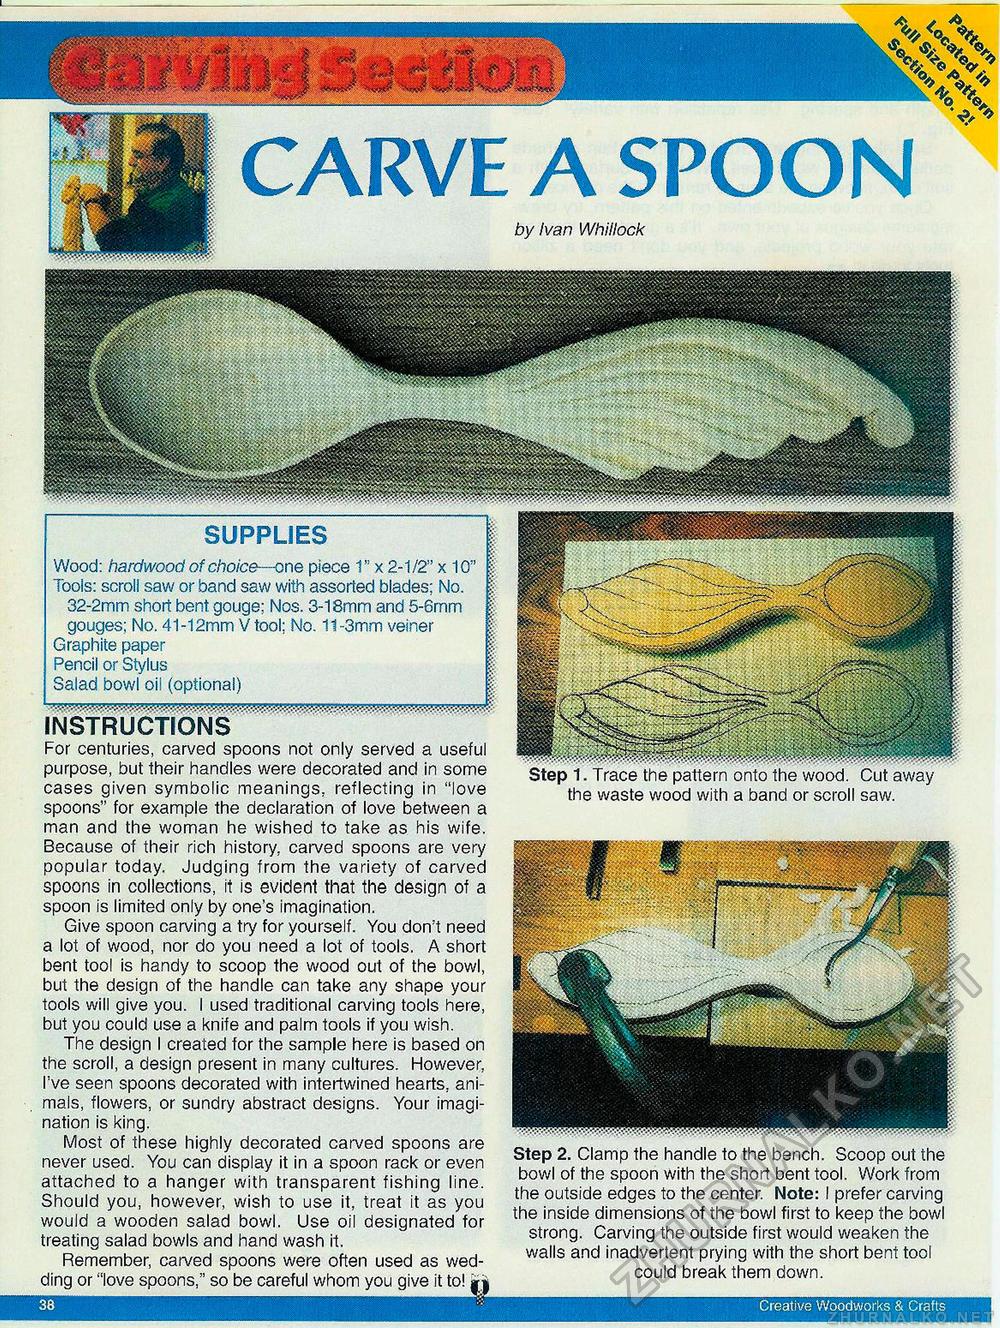
38 Creative Woodworks & Crafts SUPPLIES Wood: hardwood of choice—one piece 1" x 2-1/2" x 10" | Tools: scroll saw or band saw with assorted blades; No. | 32-2mm short bent gouge; Nos. 3-18mm and 5-6rnm | gouges; No. 41-12mm Vtool: No. 11-3mm veiner | Graphite paper | Pencil or Stylus | Salad bowl oil (optional) I instructions For centuries, carved spoons not only served a useful purpose, but their handles were decorated and in some cases given symbolic meanings, reflecting in "love spoons" for example the declaration of love between a man and the woman he wished to take as his wife. Because of their rich history, carved spoons are very popular today. Judging from the variety of carved spoons in collections, it is evident that the design of a spoon is limited only by one's imagination. Give spoon carving a try for yourself. You don't need a lot of wood, nor do you need a lot of tools. A short bent tool is handy to scoop the wood out of the bowl, but the design of the handle can take any shape your tools will give you. I used traditional carving tools here, but you could use a knife and palm tools if you wish. The design I created for the sample here is based on the scroll, a design present in many cultures. However, I've seen spoons decorated with intertwined hearts, animals, flowers, or sundry abstract designs. Your imagination is king. Most of these highly decorated carved spoons are never used. You can display it in a spoon rack or even attached to a hanger with transparent fishing line. Should you, however, wish to use it, treat it as you would a wooden salad bowl. Use oil designated for treating salad bowls and hand wash it. Remember, carved spoons were often used as wedding or "love spoons," so be careful whom you give it to! i| CARVE A SPOON by Ivan Whillock the waste wood with a band or scroll saw. Step 2. Clamp the handle to the bench. Scoop out the bowl of the spoon with the short bent tool. Work from the outside edges to the center. Note: I prefer carving the inside dimensions of the bowl first to keep the bowl strong. Carving the outside first would weaken the walls and inadvertent prying with the short bent tool could break them down. |


