Creative Woodworks & crafts 2001-04, страница 40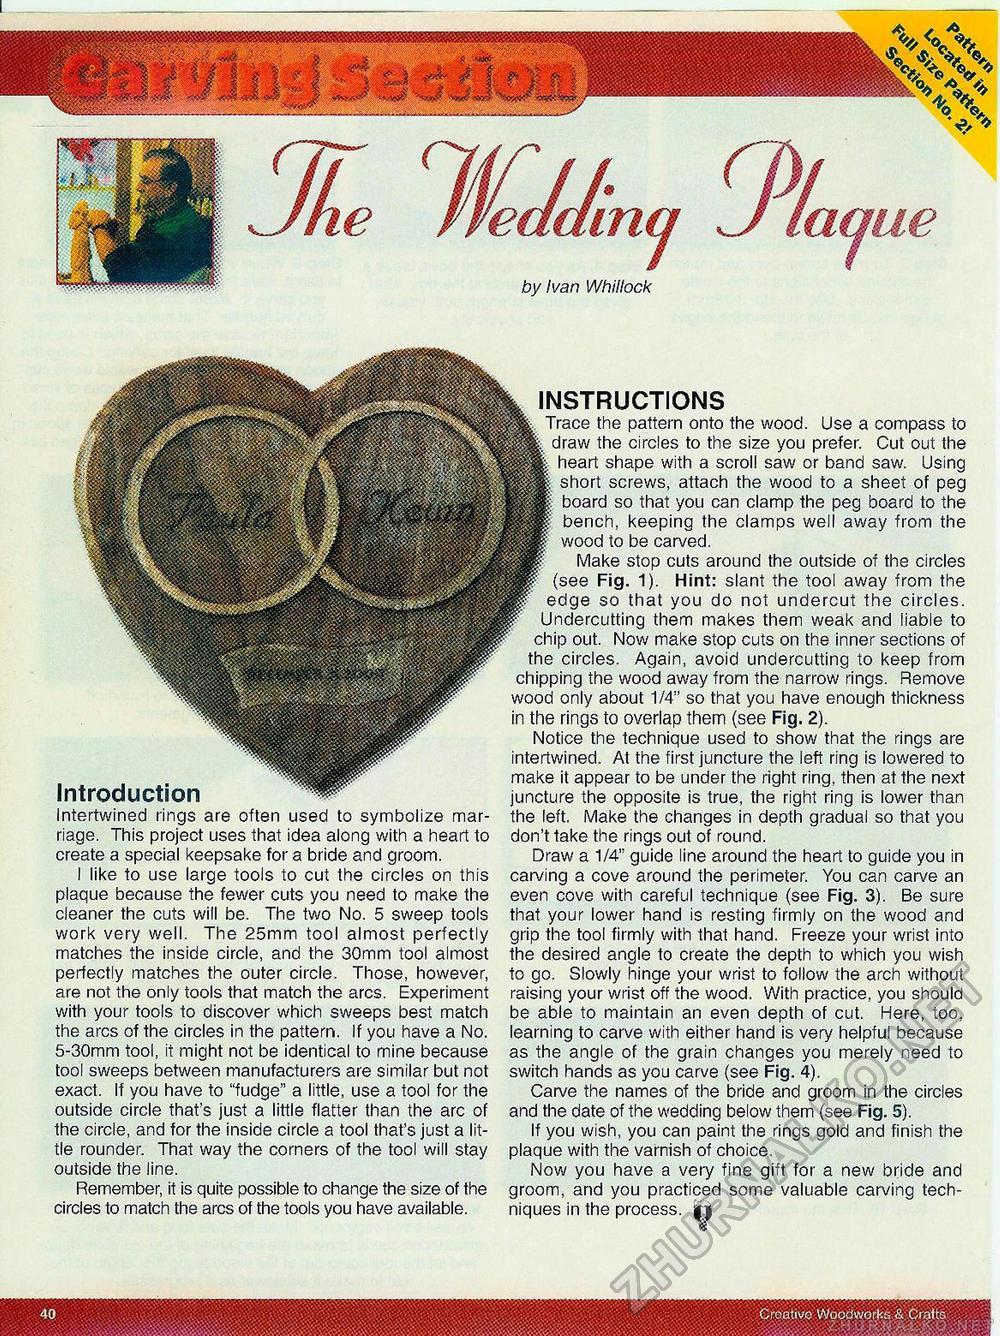
by Ivan Whillock INSTRUCTIONS Trace the pattern onto the wood. Use a compass to draw the circles to the size you prefer. Cut out the heart shape with a scroll saw or band saw. Using short screws, attach the wood to a sheet of peg board so that you can clamp the peg board to the bench, keeping the clamps well away from the wood to be carved. Make stop cuts around the outside of the circles (see Fig. 1). Hint: slant the tool away from the edge so that you do not undercut the circles. Undercutting them makes them weak and liable to chip out. Now make stop cuts on the inner sections of the circles. Again, avoid undercutting to keep from chipping the wood away from the narrow rings. Remove wood only about 1/4" so that you have enough thickness in the rings to overlap them (see Fig. 2). Notice the technique used to show that the rings are intertwined. At the first juncture the left ring is lowered to make it appear to be under the right ring, then at the next juncture the opposite is true, the right ring is lower than the left. Make the changes in depth gradual so that you don't take the rings out of round. Draw a 1/4" guide line around the heart to guide you in can/ing a cove around the perimeter. You can carve an even cove with careful technique (see Fig. 3). Be sure that your lower hand is resting firmly on the wood and grip the tool firmly with that hand. Freeze your wrist into the desired angle to create the depth to which you wish to go. Slowly hinge your wrist to follow the arch without raising your wrist off the wood. With practice, you should be able to maintain an even depth of cut. Here, too, learning to carve with either hand is very helpful because as the angle of the grain changes you merely need to switch hands as you carve (see Fig. 4). Carve the names of the bride and groom in the circles and the date of the wedding below them (see Fig. 5). If you wish, you can paint the rings gold and finish the plaque with the varnish of choice. Now you have a very fine gift for a new bride and groom, and you practiced some valuable carving techniques in the process. £ Introduction Intertwined rings are often used to symbolize marriage. This project uses that idea along with a heart to create a special keepsake for a bride and groom. I like to use large tools to cut the circles on this plaque because the fewer cuts you need to make the cleaner the cuts will be. The two No. 5 sweep tools work very well. The 25mm tool almost perfectly matches the inside circle, and the 30mm tool almost perfectly matches the outer circle. Those, however, are not the only tools that match the arcs. Experiment with your tools to discover which sweeps best match the arcs of the circles in the pattern. If you have a No. 5-30mm tool, it might not be identical to mine because tool sweeps between manufacturers are similar but not exact. If you have to "fudge" a little, use a tool for the outside circle that's just a little flatter than the arc of the circle, and for the inside circle a tool that's just a little rounder. That way the corners of the tool will stay outside the line. Remember, it is quite possible to change the size of the circles to match the arcs of the tools you have available. |


