Creative Woodworks & crafts 2001-04, страница 42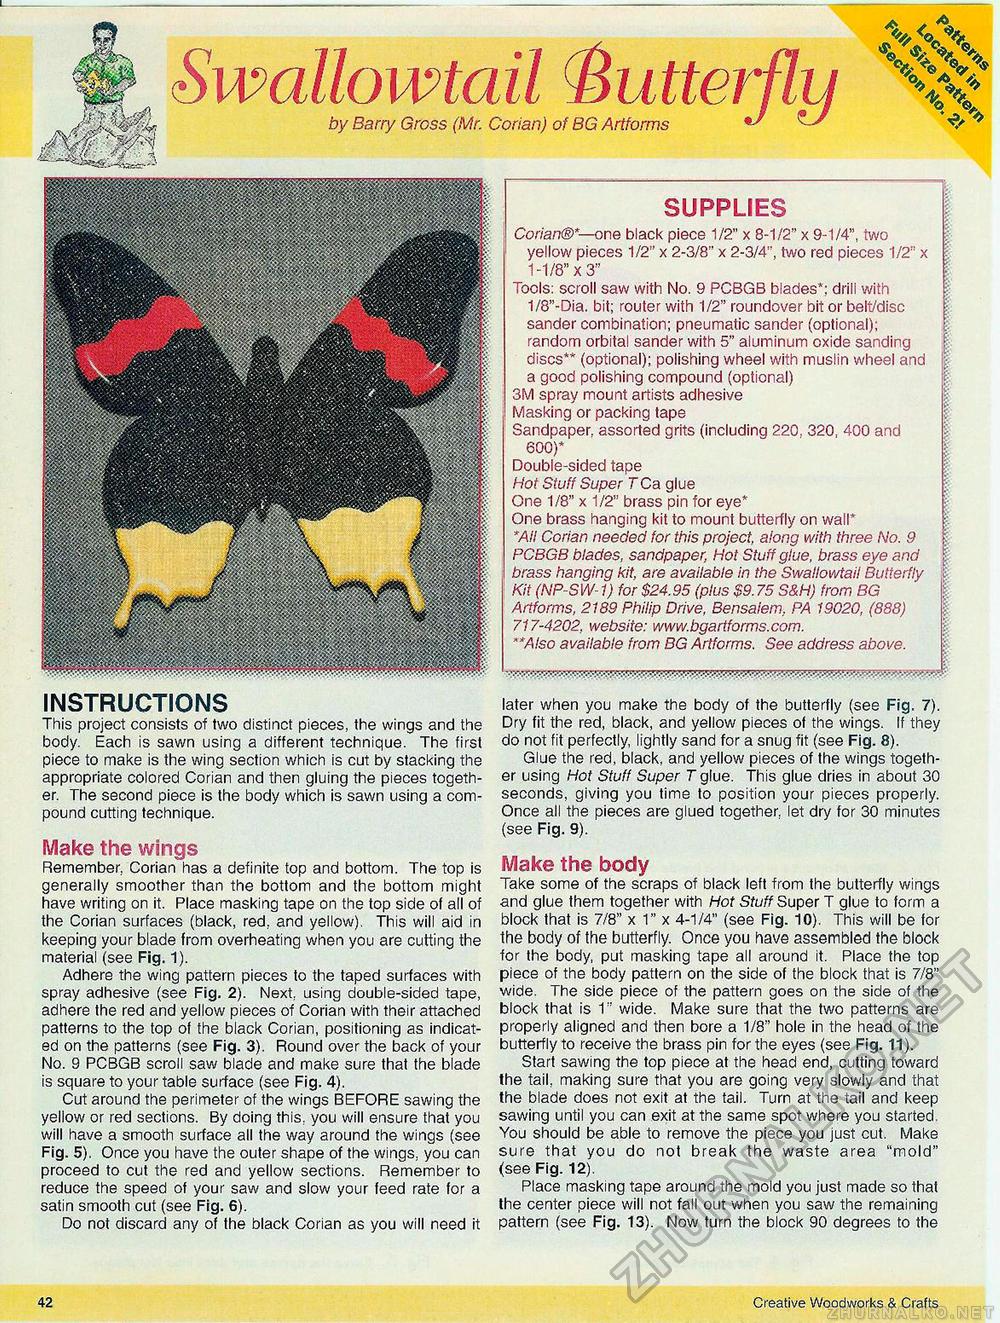
Swallowtail butterfly by Barry Gross (Mr. Corian) of BG Artforms - ' \ 4 % SUPPLIES Corian®"— one black piece 1/2" x 8-1/2" x 9-1/4", two yellow pieces 1/2" x 2-3/8" x 2-3/4", two red pieces 1/2" x 1-1/8" X 3" Tools: scroll saw with No. 9 PCBGB blades*; drill with 1/8"-Dia. bit; router with 1/2" roundover bit or belt/disc sander combination; pneumatic sander (optional); random orbital sander with 5" aluminum oxide sanding discs** (optional); polishing wheel with muslin wheel and a good polishing compound (optional) 3M spray mount artists adhesive Masking or packing tape Sandpaper, assorted grits (including 220. 320, 400 and 600)* Double-sided tape Hot Stuff Super TCa glue One 1/8" x 1/2" brass pin for eye* One brass hanging kit to mount butterfly on wall* *Ail Corian needed for this project, along with three No. 9 PCBGB blades, sandpaper, Hot Stuff giue, brass eye and brass hanging kit, are available in the Swallowtail Butterfly Kit (NP-SW-1) for $24.95 (plus $9.75 S&H) from BG Artforms, 2189 Philip Drive, Bensalem, PA 19020, (888) 717-4202, website: www.bgartforms.com. ""Also available from BG Artforms. See address above. instructions This project consists of two distinct pieces, the wings and the body. Each is sawn using a different technique. The first piece to make is the wing section which is cut by stacking the appropriate colored Corian and then gluing the pieces together. The second piece is the body which is sawn using a compound cutting technique. Make the wings Remember, Corian has a definite top and bottom. The top is generally smoother than the bottom and the bottom might have writing on it. Place masking tape on the top side of all of the Corian surfaces (black, red, and yellow). This will aid in keeping your blade from overheating when you are cutting the material (see Fig. 1). Adhere the wing pattern pieces to the taped surfaces with spray adhesive (see Fig. 2). Next, using double-sided tape, adhere the red and yellow pieces of Corian with their attached patterns to the top of the black Corian, positioning as indicated on the patterns (see Fig. 3). Round over the back of your No. 9 PCBGB scroll saw blade and make sure that the blade is square to your table surface (see Fig. 4). Cut around the perimeter of the wings BEFORE sawing the yellow or red sections. By doing this, you will ensure that you will have a smooth surface all the way around the wings (see Fig. 5). Once you have the outer shape of the wings, you can proceed to cut the red and yellow sections. Remember to reduce the speed of your saw and slow your feed rate for a satin smooth cut (see Fig. 6). Do not discard any of the black Corian as you will need it later when you make the body of the butterfly (see Fig. 7). Dry fit the red, black, and yellow pieces of the wings. If they do not fit perfectly, lightly sand for a snug fit (see Fig. 8). Glue the red, black, and yellow pieces of the wings together using Hot Stuff Super 7" glue. This glue dries in about 30 seconds, giving you time to position your pieces properly. Once all the pieces are glued together let dry for 30 minutes (see Fig. 9). Make the body Take some of the scraps of black left from the butterfly wings and glue them together with Hot Stuff Super T glue to form a block that is 7/8" x 1" x 4-1/4" (see Fig. 10). This will be for the body of the butterfly. Once you have assembled the block for the body, put masking tape all around it. Place the top piece of the body pattern on the side of the block that is 7/8" wide. The side piece of the pattern goes on the side of the block that is 1" wide. Make sure that the two patterns are properly aligned and then bore a 1/8" hole in the head of the butterfly to receive the brass pin for the eyes (see Fig. 11). Start sawing the top piece at the head end, cutting toward the tail, making sure that you are going very slowly and that the blade does not exit at the tail. Turn at the tail and keep sawing until you can exit at the same spot where you started. You should be able to remove the piece you just cut. Make sure that you do not break the waste area "mold" (see Fig. 12). Place masking tape around the mold you just made so that the center piece will not fall out when you saw the remaining pattern (see Fig. 13). Now turn the block 90 degrees to the m^Wm 42 Creative Woodworks & Crafts |


