Creative Woodworks & crafts 2001-04, страница 43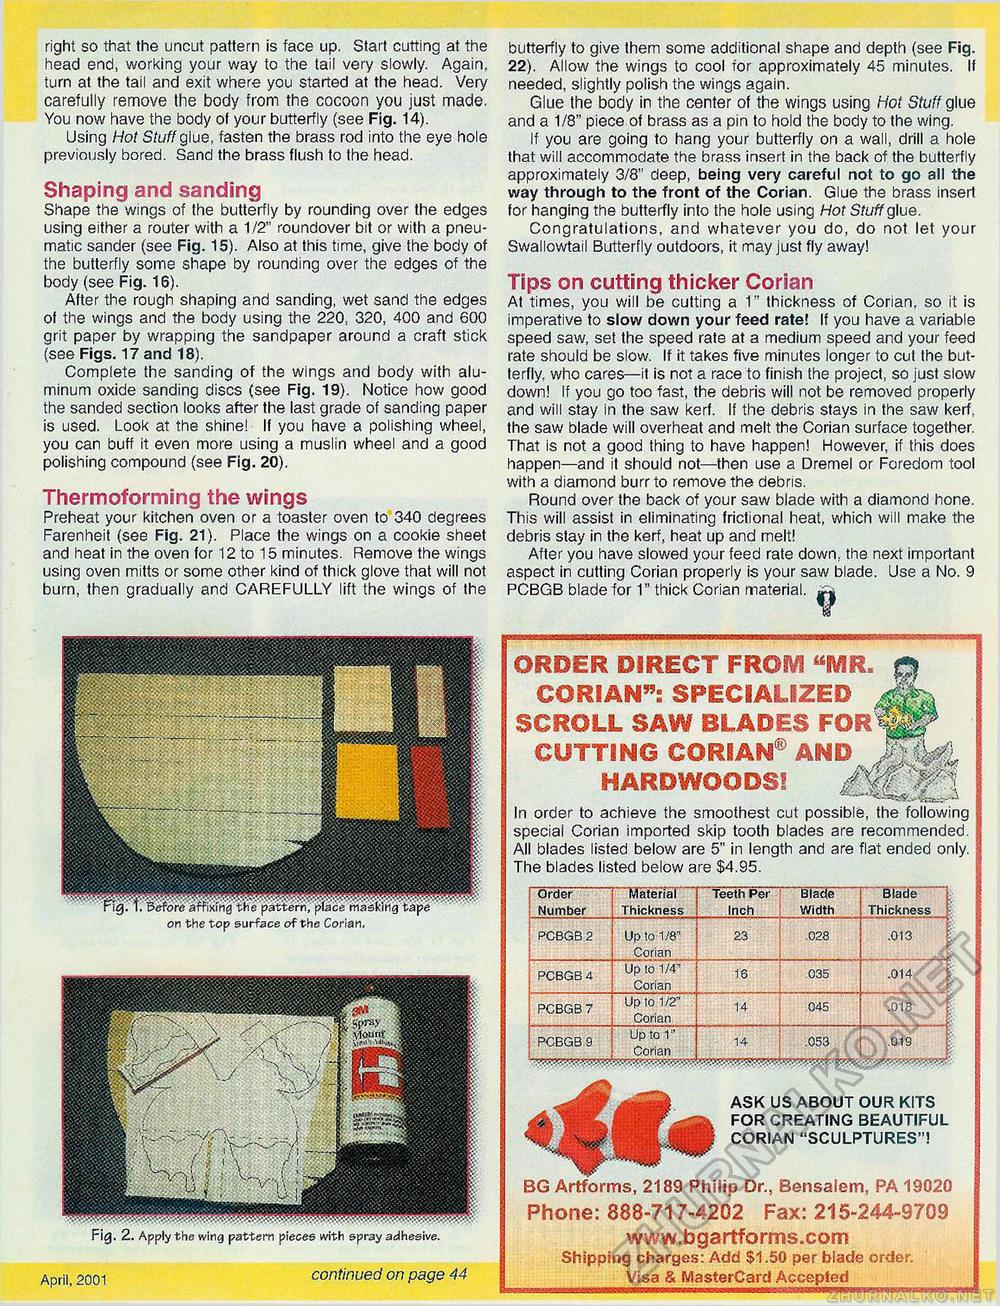
Material Thickness Blade Width Blade Thickness Order Number Teeth Per Inch Up to W Corian Up to 1/4' Corian Up to 1/2' Corian Up to 1' Corian right so that the uncut pattern is face up. Start cutting at the head end, working your way to the tail very slowly. Again, turn at the tail and exit where you started at the head. Very carefully remove the body from the cocoon you just made. You now have the body of your butterfly (see Fig. 14). Using Hot Stuff glue, fasten the brass rod into the eye hole previously bored. Sand the brass flush to the head. Shaping and sanding Shape the wings of the butterfly by rounding over the edges using either a router with a 1/2" roundover bit or with a pneumatic sander (see Fig. 15). Also at this time, give the body of the butterfly some shape by rounding over the edges of the body (see Fig. 16). After the rough shaping and sanding, wet sand the edges of the wings and the body using the 220, 320, 400 and 600 grit paper by wrapping the sandpaper around a craft stick (see Figs. 17 and 18). Complete the sanding of the wings and body with aluminum oxide sanding discs (see Fig. 19). Notice how good the sanded section looks after the last grade of sanding paper is used. Look at the shine! If you have a polishing wheel, you can buff it even more using a muslin wheel and a good polishing compound (see Fig. 20). Thermoforming the wings Preheat your kitchen oven or a toaster oven to 340 degrees Farenheit (see Fig. 21). Place the wings on a cookie sheet and heat in the oven for 12 to 15 minutes. Remove the wings using oven mitts or some other kind of thick glove that will not burn, then gradually and CAREFULLY lift the wings of the butterfly to give them some additional shape and depth (see Fig. 22). Allow the wings to cool for approximately 45 minutes. If needed, slightly polish the wings again. Glue the body in the center of the wings using Hot Stuff glue and a 1/8" piece of brass as a pin to hold the body to the wing. If you are going to hang your butterfly on a wall, drill a hole that will accommodate the brass insert in the back of the butterfly approximately 3/8" deep, being very careful not to go all the way through to the front of the Corian. Glue the brass insert for hanging the butterfly into the hole using Hot Stuff glue. Congratulations, and whatever you do, do not let your Swallowtail Butterfly outdoors, it may just fly away! Tips on cutting thicker Corian At times, you will be cutting a 1" thickness of Corian, so it is imperative to slow down your feed rate! If you have a variable speed saw, set the speed rate at a medium speed and your feed rate should be slow. If it takes five minutes longer to cut the butterfly, who cares—it is not a race to finish the project, so just slow down! If you go too fast, the debris will not be removed properly and will stay in the saw kerf. If the debris stays in the saw kerf, the saw blade will overheat and melt the Corian surface together. That is not a good thing to have happen! However, if this does happen—and it should not—then use a Dremel or Foredom tool with a diamond burr to remove the debris. Round over the back of your saw blade with a diamond hone. This will assist in eliminating frictional heat, which will make the debris stay in the kerf, heat up and melt! After you have slowed your feed rate down, the next important aspect in cutting Corian properly is your saw blade. Use a No. 9 PCBGB blade for 1" thick Corian material. ORDER DIRECT FROM "MR. CORIAN": SPECIALIZED SCROLL SAW BLADES FOR^§If* CUTTING CORIAN® AND MS^l HARDWOODS! 'MW.H ....... In order to achieve the smoothest cut possible, the following special Corian imported skip tooth blades are recommended. All blades listed below are 5" in length and are flat ended only. The blades listed below are $4.95. PCBGB 7 BG Artforms, 2189 Philip Dr., Bensaiem, PA 19020 Phone: 888-717-4202 Fax: 215-244-9709 www.bgartforms.com Shipping charges: Add $1.50 per blade order. Visa & MasterCard Accepted ASK US ABOUT OUR KITS FOR CREATING BEAUTIFUL CORIAN "SCULPTURES"! Fig. 2. Apply the wing pattern pieces with spray adhesive. April, 2001 continued on page 44 |


