Creative Woodworks & crafts 2001-08, страница 43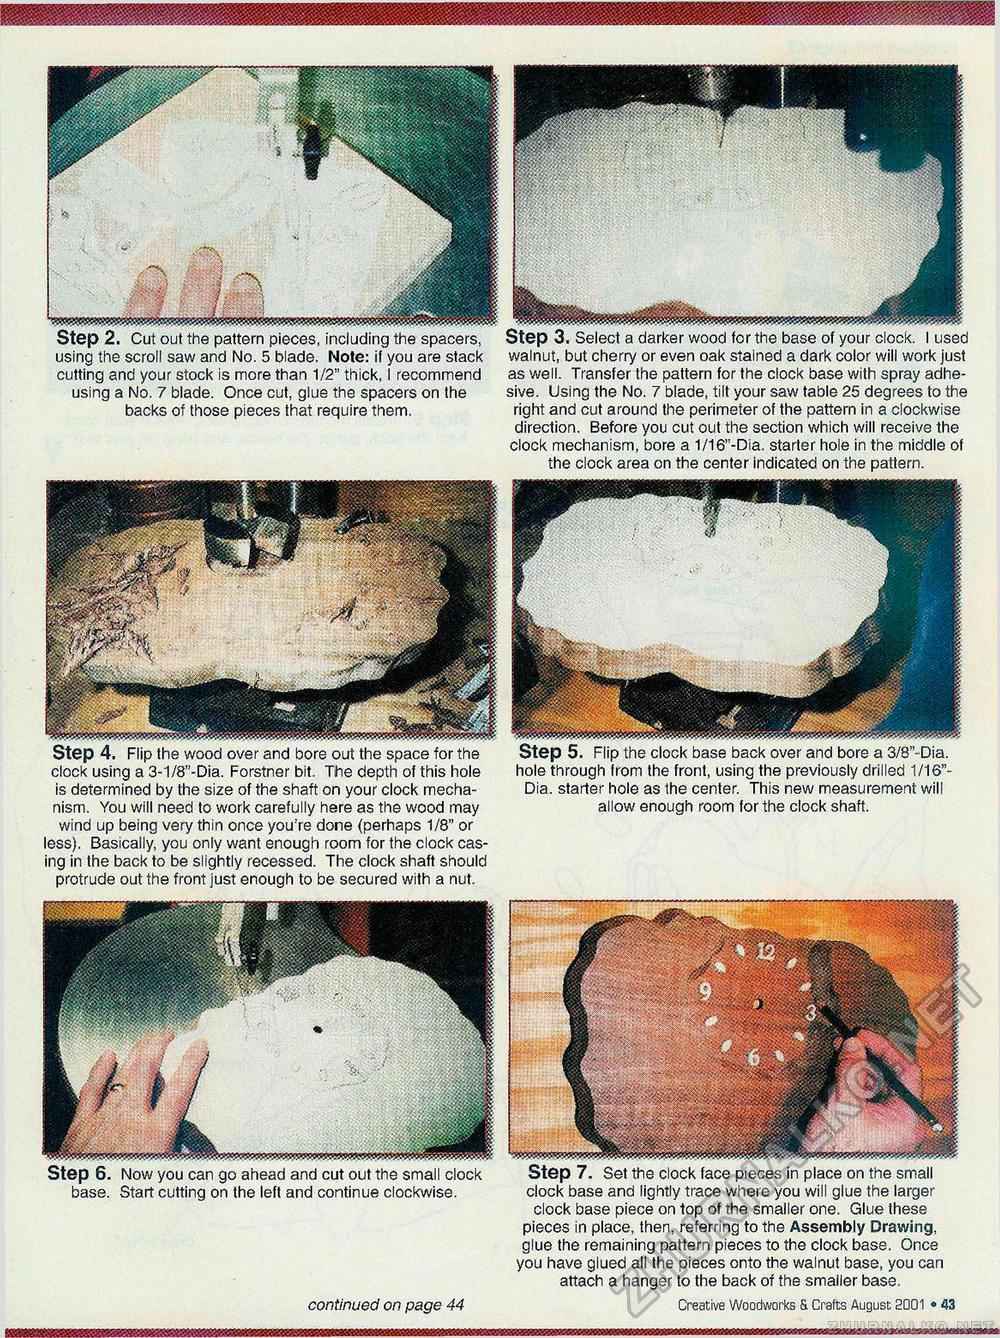
Step 2, Cut out the pattern pieces, including the spacers, using the scroll saw and No. 5 blade. Note: if you are stack cutting and your stock is more than 1/2" thick, I recommend using a No. 7 blade. Once cut, glue the spacers on the backs of those pieces that require them. Step 4. Flip the wood over and bore out the space for the clock using a 3-1/8"-Dia. Forstner bit. The depth of this hole is determined by the size of the shaft on your clock mechanism. You will need to work carefully here as the wood may wind up being very thin once you're done (perhaps 1/8" or less). Basically, you only want enough room for the clock casing in the back to be slightly recessed. The clock shaft should protrude out the front just enough to be secured with a nut. Step 6. Now you can go ahead and cut out the small clock base. Start cutting on the left and continue clockwise. continued on page 44 Step 3. Select a darker wood for the base of your clock. I used walnut, but cherry or even oak stained a dark color will work just as well. Transfer the pattern for the clock base with spray adhesive. Using the No. 7 blade, tilt your saw table 25 degrees to the right and cut around the perimeter of the pattern in a clockwise direction. Before you cut out the section which will receive the clock mechanism, bore a 1/16"-Dia. starter hole in the middle of the clock area on the center indicated on the pattern. Step 5. Flip the clock base back over and bore a 3/8"-Dia. hole through from the front, using the previously drilled 1/16"-Dia. starter hole as the center. This new measurement will allow enough room for the clock shaft. Step 7. Set the clock face pieces in place on the small clock base and lightly trace where you will glue the larger clock base piece on top of the smaller one. Glue these pieces in place, then, referring to the Assembly Drawing, glue the remaining pattern pieces to the clock base. Once you have glued all the pieces onto the walnut base, you can attach a hanger to the back of the smaller base. Creative Woodworks S Crafts August 2001 • 43 |


