Creative Woodworks & crafts 2001-08, страница 52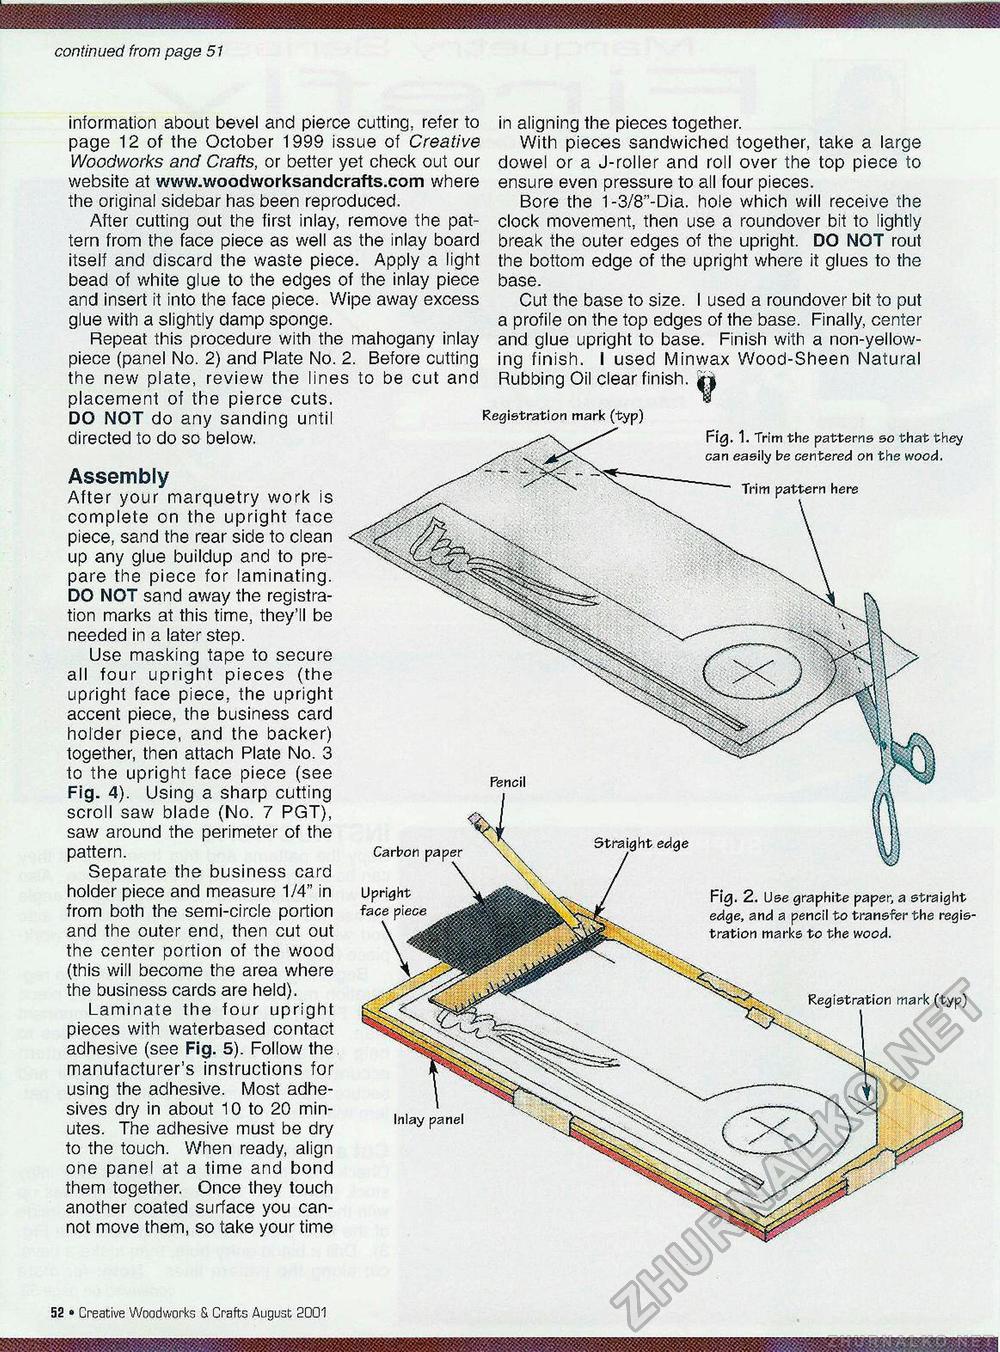
iM Wsmmmm continued from page 51 52 • Creative Woodworks & Crafts August 2001 HHBHHBHBBi information about bevel and pierce cutting, refer to page 12 of the October 1999 issue of Creative Woodworks and Crafts, or better yet check out our website at www.woodworksandcrafts.com where the original sidebar has been reproduced. After cutting out the first inlay, remove the pattern from the face piece as well as the inlay board itself and discard the waste piece. Apply a light bead of white glue to the edges of the inlay piece and insert it into the face piece. Wipe away excess glue with a slightly damp sponge. Repeat this procedure with the mahogany inlay piece (panel No. 2) and Plate No. 2. Before cutting the new plate, review the lines to be cut and placement of the pierce cuts. DO NOT do any sanding until directed to do so below. Assembly After your marquetry work is complete on the upright face piece, sand the rear side to clean up any glue buildup and to prepare the piece for laminating. DO NOT sand away the registration marks at this time, they'll be needed in a later step. Use masking tape to secure all four upright pieces (the upright face piece, the upright accent piece, the business card holder piece, and the backer) together, then attach Plate No. 3 to the upright face piece (see Fig. 4). Using a sharp cutting scroll saw blade (No. 7 PGT), saw around the perimeter of the pattern. Separate the business card holder piece and measure 1/4" in from both the semi-circle portion and the outer end, then cut out the center portion of the wood (this will become the area where the business cards are held). Laminate the four upright pieces with waterbased contact adhesive (see Fig. 5). Follow the manufacturer's instructions for using the adhesive. Most adhe-sives dry in about 10 to 20 minutes. The adhesive must be dry to the touch. When ready, align one panel at a time and bond them together. Once they touch another coated surface you cannot move them, so take your time in aligning the pieces together. With pieces sandwiched together, take a large dowel or a J-roller and roll over the top piece to ensure even pressure to all four pieces. Bore the 1-3/8"-Dia. hole which will receive the clock movement, then use a roundover bit to lightly break the outer edges of the upright. DO NOT rout the bottom edge of the upright where it glues to the base. Cut the base to size. I used a roundover bit to put a profile on the top edges of the base. Finally, center and glue upright to base. Finish with a non-yellow-ing finish. I used Minwax Wood-Sheen Natural Rubbing Oil clear finish. Registration mark Fig. 1. Trim the patterns so that they can easily be centered on the wood. Pencil Carbon Upright face piece Fig, 2. Use graphite paper, a straight edge, and a pencil to transfer the registration marks to the wood. Registration mark (typ) Inlay panel |


