Creative Woodworks & crafts 2001-08, страница 59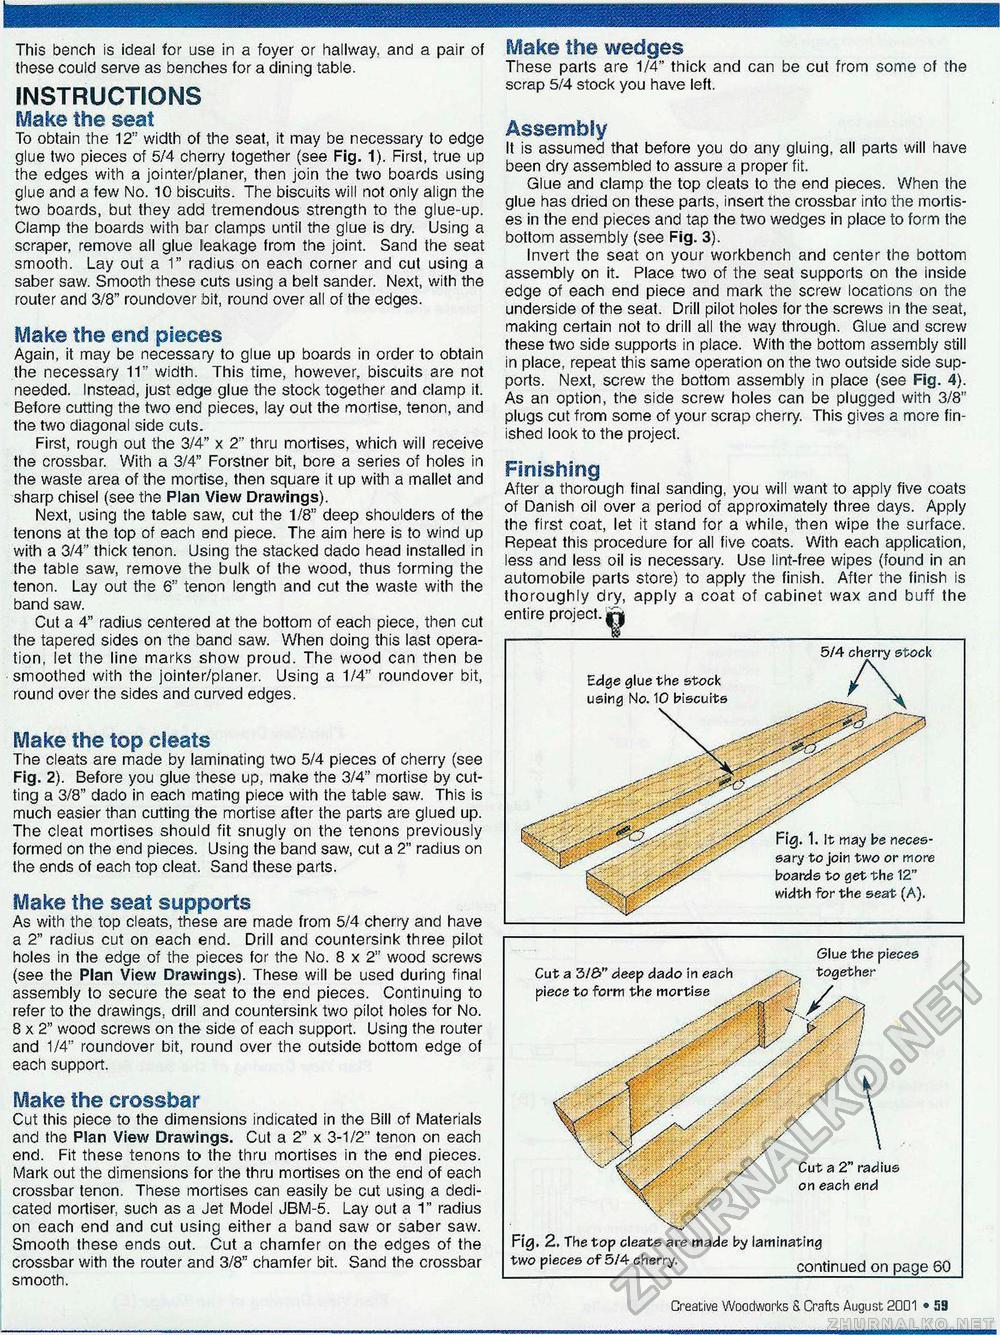
This bench is ideal for use in a foyer or hallway, and a pair of these could serve as benches for a dining table. INSTRUCTIONS Make the seat To obtain the 12" width of the seat, it may be necessary to edge glue two pieces of 5/4 cherry together (see Fig. 1). First, true up the edges with a jointer/planer, then join the two boards using glue and a few No. 10 biscuits. The biscuits will not only align the two boards, but they add tremendous strength to the glue-up. Clamp the boards with bar clamps until the glue is dry. Using a scraper, remove all glue leakage from the joint. Sand the seat smooth. Lay out a 1" radius on each corner and cut using a saber saw. Smooth these cuts using a belt sander. Next, with the router and 3/8" roundover bit, round over all of the edges. Make the end pieces Again, it may be necessary to glue up boards in order to obtain the necessary 11" width. This time, however, biscuits are not needed. Instead, just edge glue the stock together and clamp it. Before cutting the two end pieces, lay out the mortise, tenon, and the two diagonal side cuts. First, rough out the 3/4" x 2" thru mortises, which will receive the crossbar. With a 3/4" Forstner bit, bore a series of holes in the waste area of the mortise, then square it up with a mallet and sharp chisel (see the Plan View Drawings). Next, using the table saw, cut the 1/8" deep shoulders of the tenons at the top of each end piece. The aim here is to wind up with a 3/4" thick tenon. Using the stacked dado head installed in the table saw, remove the bulk of the wood, thus forming the tenon. Lay out the 6" tenon length and cut the waste with the band saw. Cut a 4" radius centered at the bottom of each piece, then cut the tapered sides on the band saw. When doing this last operation, let the line marks show proud. The wood can then be smoothed with the jointer/planer. Using a 1/4" roundover bit, round over the sides and curved edges. Make the top cleats The cleats are made by laminating two 5/4 pieces of cherry (see Fig. 2). Before you glue these up, make the 3/4" mortise by cutting a 3/8" dado in each mating piece with the table saw. This is much easier than cutting the mortise after the parts are glued up. The cleat mortises should fit snugly on the tenons previously formed on the end pieces. Using the band saw, cut a 2" radius on the ends of each top cleat. Sand these parts. Make the seat supports As with the top cleats, these are made from 5/4 cherry and have a 2" radius cut on each end. Drill and countersink three pilot holes in the edge of the pieces for the No. 8 x 2" wood screws (see the Plan View Drawings). These will be used during final assembly to secure the seat to the end pieces. Continuing to refer to the drawings, drill and countersink two pilot holes for No. 8 x 2" wood screws on the side of each support. Using the router and 1/4" roundover bit, round over the outside bottom edge of each support. Make the crossbar Cut this piece to the dimensions indicated in the Bill of Materials and the Plan View Drawings. Cut a 2" x 3-1/2" tenon on each end. Fit these tenons to the thru mortises in the end pieces. Mark out the dimensions for the thru mortises on the end of each crossbar tenon. These mortises can easily be cut using a dedicated mortiser, such as a Jet Model JBM-5. Lay out a 1" radius on each end and cut using either a band saw or saber saw. Smooth these ends out. Cut a chamfer on the edges of the crossbar with the router and 3/8" chamfer bit. Sand the crossbar smooth. Make the wedges These parts are 1/4" thick and can be cut from some of the scrap 5/4 stock you have left. Assembly It is assumed that before you do any gluing, all parts will have been dry assembled to assure a proper fit. Glue and clamp the top cleats to the end pieces. When the glue has dried on these parts, insert the crossbar into the mortises in the end pieces and tap the two wedges in place to form the bottom assembly (see Fig. 3). Invert the seat on your workbench and center the bottom assembly on it. Place two of the seat supports on the inside edge of each end piece and mark the screw locations on the underside of the seat. Drill pilot holes for the screws in the seat, making certain not to drill all the way through. Glue and screw these two side supports in place. With the bottom assembly still in place, repeat this same operation on the two outside side supports. Next, screw the bottom assembly in place (see Fig. 4). As an option, the side screw holes can be plugged with 3/8" plugs cut from some of your scrap cherry. This gives a more finished look to the project. Finishing After a thorough tinal sanding, you will want to apply five coats of Danish oil over a period of approximately three days. Apply the first coat, let it stand for a while, then wipe the surface. Repeat this procedure for all five coats. With each application, less and less oil is necessary. Use lint-free wipes (found in an automobile parts store) to apply the finish. After the finish is thoroughly dry, apply a coat of cabinet wax and buff the entire project, jjpj Fig. 2. The top cleats are made by laminating two pieces of 5/4 cherry._continued on page 60 5/4 Edge glue the stock using No. 10 biscuits Cut a 3/6" deep dado in each piece to form the mortise Glue the pieces together \ Cut a 2" radius on each end Fig. 1. It may be necessary to join two or more boards to get the 12" width for the seat (A). Creative Woodworks & Crafts August. 2001 • 59 |


