Creative Woodworks & crafts 2001-10, страница 12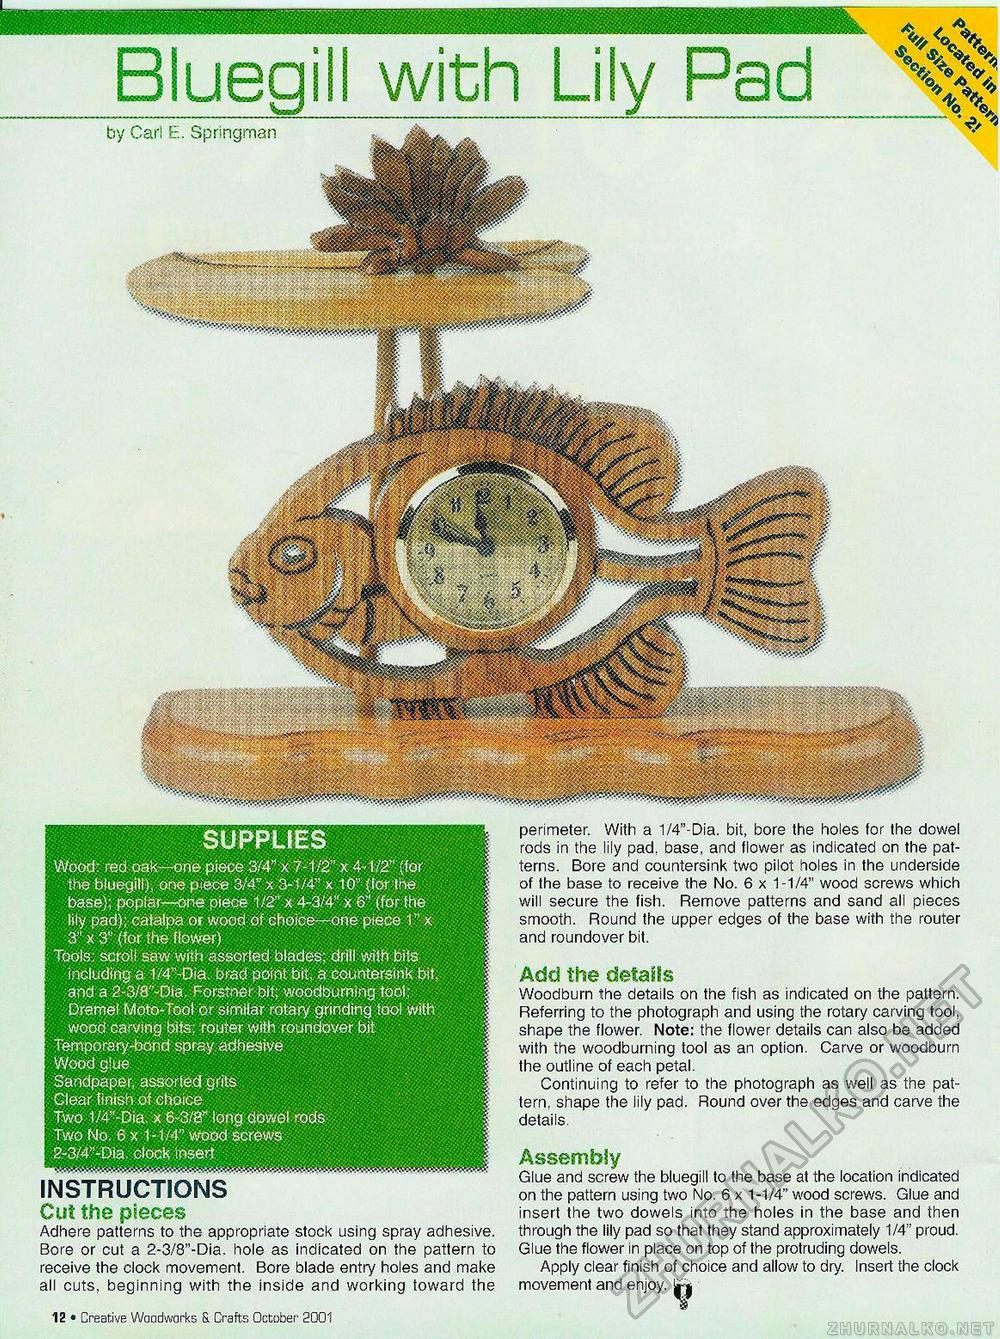
by Car! E. Springrnan SUPPLIES Wood: red oak- -one piece 3/4" x 7-1/2" x 4-1/2" (for the bluegili), one piece 3/4" x 3-1/4" x 10" (for the base); poplar—one piece 1/2" x 4-3/4" x 6" (for the lily pad); catatpa or wood of choice—one piece 1" x 3" x 3" (for She flower) Tools; scroll saw with assorted blades; drill with bits : including a 1/4"-Dia. brad point bit. a countersink bit. and a 2-3/8"-Dia. Forstner bit; woodburning tool: Dremei Moto-Tool or similar rotary grinding tool with wood carving bits; router with roundover bit Temporary-bond spray adhesive Wood glue Sandpaper, assorted grits Clear finish of choice Two 1/4"-Dia. x e-a/S' iong dowel rods Two No. 6 x 1-1/4" wood screws 2-3/4"-Dia. clock insert INSTRUCTIONS Cut the pieces Adhere patterns to the appropriate stock using spray adhesive. Bore or cut a 2-3/8"-Dia. hole as indicated on the pattern to receive the clock movement. Bore blade entry holes and make all cuts, beginning with the inside and working toward the perimeter. With a 1/4"-Dia. bit, bore the holes for the dowel rods in the lily pad: base, and flower as indicated on the patterns. Bore and countersink two pilot holes in the underside of the base to receive the No. 6x1-1/4" wood screws which will secure the fish. Remove patterns and sand all pieces smooth. Round the upper edges of the base with the router and roundover bit. Add the details Woodbum the details on the fish as indicated on the pattern. Referring to the photograph and using the rotary carving tool, shape the flower. Note: the flower details can also be added with the woodburning tool as an option. Carve or woodbum the outline of each petal. Continuing to refer to the photograph as well as the pattern, shape the lily pad. Round over the edges and carve the details. Assembly Glue and screw the bluegili to the base at the location indicated on the pattern using two No. 6 x 1-1/4" wood screws. Glue and insert the two dowels into the holes in the base and then through the lily pad so that they stand approximately 1/4" proud. Glue the flower in place on top of the protruding dowels. Apply clear finish of choice and allow to dry. Insert the clock movement and enjoy, 12 • Creative Woodworks & Crafts October- 2001 |


