Creative Woodworks & crafts 2001-10, страница 26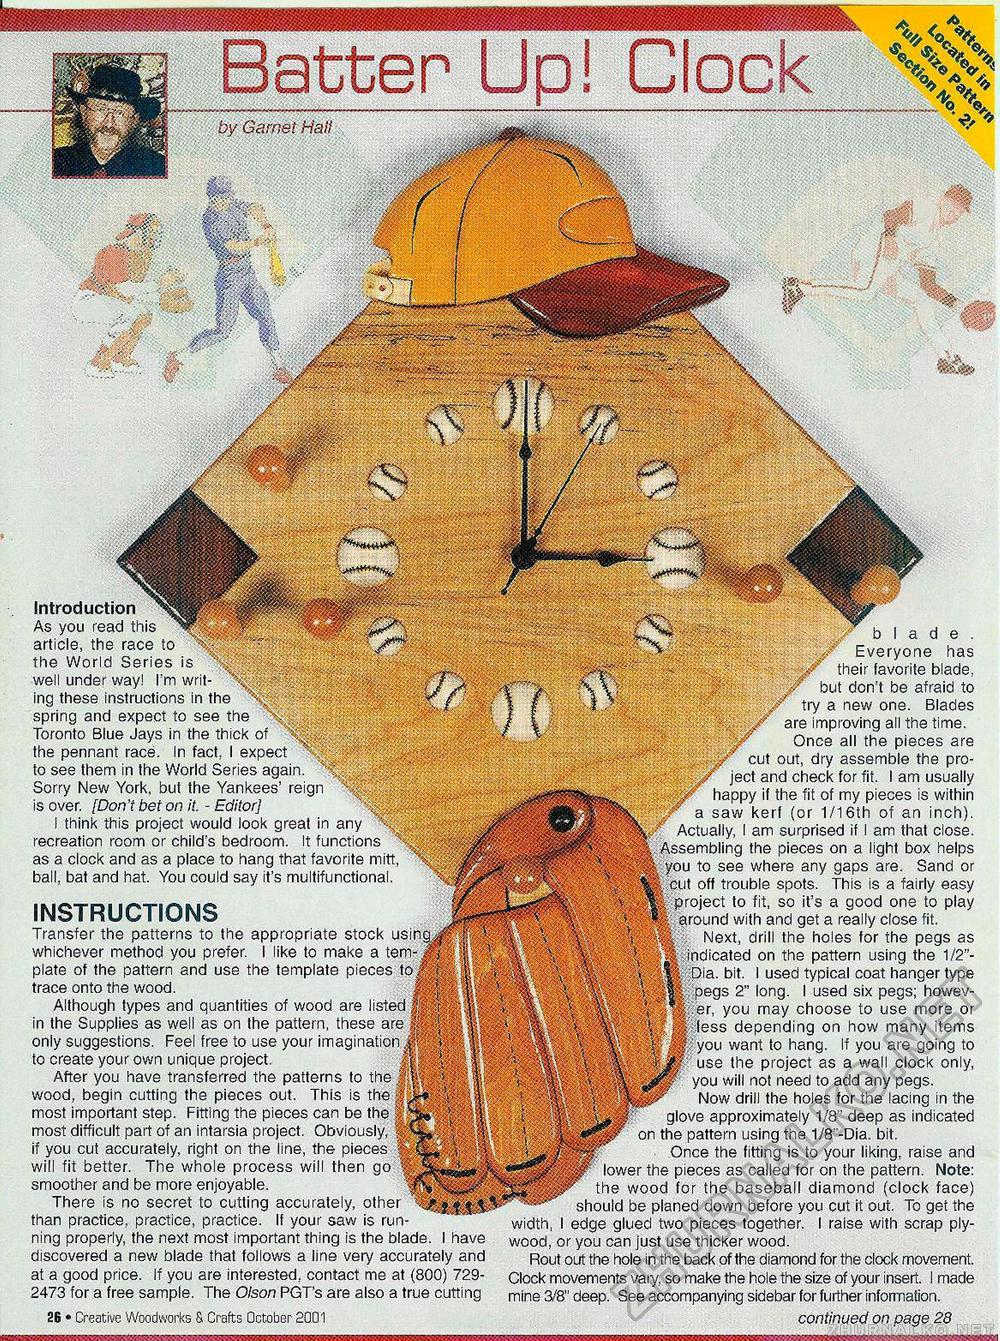
I ^ <V '' Introduction As you read this article, the race to the World Series is well under way! I'm writ-ing these instructions in the spring and expect to see the Toronto Blue Jays in the thick of the pennant race. In fact, I expect to see them in the World Series again. Sorry New York, buf the Yankees' reign is over. [Don't bet on it. - Editor] I think this project would look great in any H: recreation room or child's bedroom. It functions as a clock and as a place to hang that favorite mitt ball, bat and hat. You could say it's multifunctional. INSTRUCTIONS Transfer the patterns to the appropriate stock using^ whichever method you prefer. I like to make a template of the pattern and use the template pieces to Mf| trace onto the wood. mP* Although types and quantities of wood are listed |p® in the Supplies as well as on the pattern, these are & only suggestions. Feel free to use your imagination to create your own unique project. After you have transferred the patterns to the wood, begin cutting the pieces out. This is the most important step. Fitting the pieces can be the most difficult part of an intarsia project. Obviously, if you cut accurately, right on the line, the pieces will fit better. The whole process will then go smoother and be more enjoyable. There is no secret to cutting accurately, other than practice, practice, practice. If your saw is run ning properly, the next most important thing is the blade. 1 have discovered a new blade that follows a line very accurately and at a good price. If you are interested, contact me at (800) 729-2473 for a free sample. The Olson PGT's are also a true cutting 26 • Creative Woodworks & Crafts October 2001 V blade. V Everyone has .their favorite blade, / but don't be afraid to try a new one. Blades are improving all the time. Once all the pieces are ./' cut out, dry assemble the pro-ject and check for fit. I am usually happy if the fit of my pieces is within W a saw kerf (or 1/16th of an inch). Actually, I am surprised if I am that close. Assembling the pieces on a light box helps you to see where any gaps are. Sand or fe. cut off trouble spots. This is a fairly easy project to fit, so it's a good one to play around with and get a really close fit. ; : Next, drill the holes for the pegs as indicated on the pattern using the 1/2"-Dia. bit. I used typical coat hanger type /.pegs 2" long. I used six pegs; howev-..er, you may choose to use more or less depending on how many items you want to hang. If you are going to use the project as a wall clock only, you will not need to add any pegs. Now drill the holes for the lacing in the glove approximately 1/8" deep as indicated on the pattern using the 1/8"-Dia. bit. Once the fitting is to your liking, raise and lower the pieces as called for on the pattern. Note: the wood for the baseball diamond (clock face) should be planed down before you cut it out. To get the width, I edge glued two pieces together. I raise with scrap plywood, or you can just use thicker wood. Rout out the hole in the back of the diamond for the clock movement. Clock movements vary, so make the hole the size of your insert. I made mine 3/8" deep. See accompanying sidebar for further information. continued on page 28 |


