Creative Woodworks & crafts 2002-01, страница 17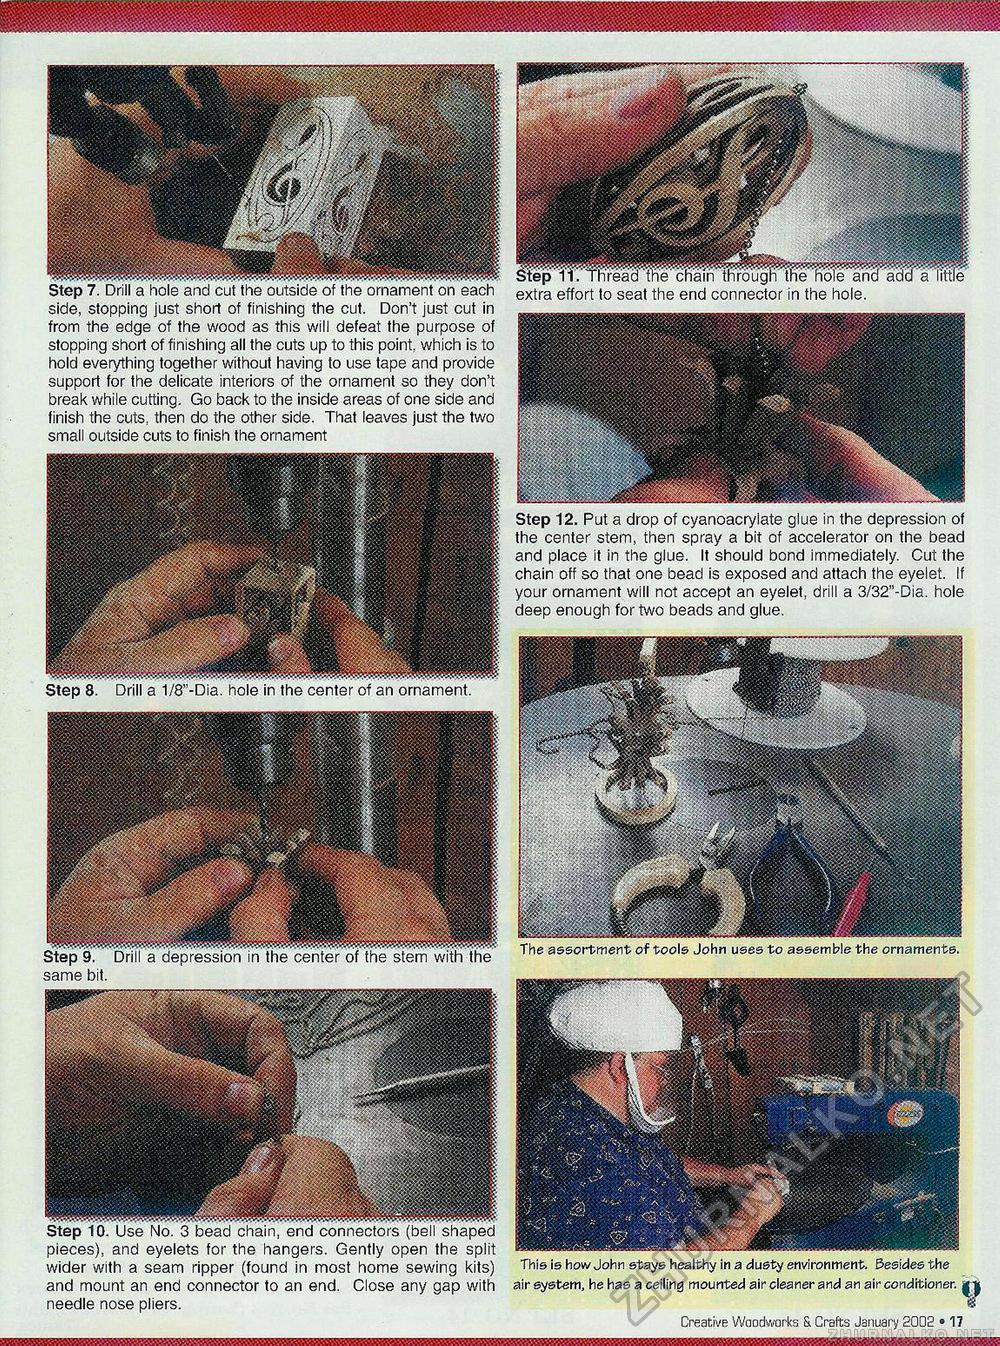
Step 7. Drill a hole and cut the outside of the ornament on each side, stopping just short of finishing the cut. Don't just cut in from the edge of the wood as this will defeat the purpose of stopping short of finishing all the cuts up to this point, which is to hold everything together without having to use tape and provide support for the delicate interiors of the ornament so they don't break while cutting. Go back to the inside areas of one side and finish the cuts, then do the other side. That leaves just the two small outside cuts to finish the ornament Step 8. Drill a 1/8"-Dia. hole in the center of an ornament. Step 9. Drill a depression in the center of the stem with the same bit. Step 10. Use No. 3 bead chain, end connectors (bell shaped pieces), and eyelets for the hangers. Gently open the split wider with a seam ripper (found in most home sewing kits) and mount an end connector to an end. Close any gap with needle nose pliers. Step i'1 '.'Thread the' chain througr extra effort to seat the end connector in the hole. Step 12. Put a drop of cyanoacrylate glue in the depression of the center stem, then spray a bit of accelerator on the bead and place it in the glue. It should bond immediately. Cut the chain off so that one bead is exposed and attach the eyelet. If your ornament will not accept an eyelet, drill a 3/32"-Dia. hole deep enough for two beads and glue. The assortment of tools John uses to assemble the ornaments. This is how John stays healthy in a dusty environment. Besides the air system, he has a ceiling mounted air cleaner and an air conditioner. | Creative Woodworks S. Crafts January 2002 • 17 |


