Creative Woodworks & crafts 2002-01, страница 20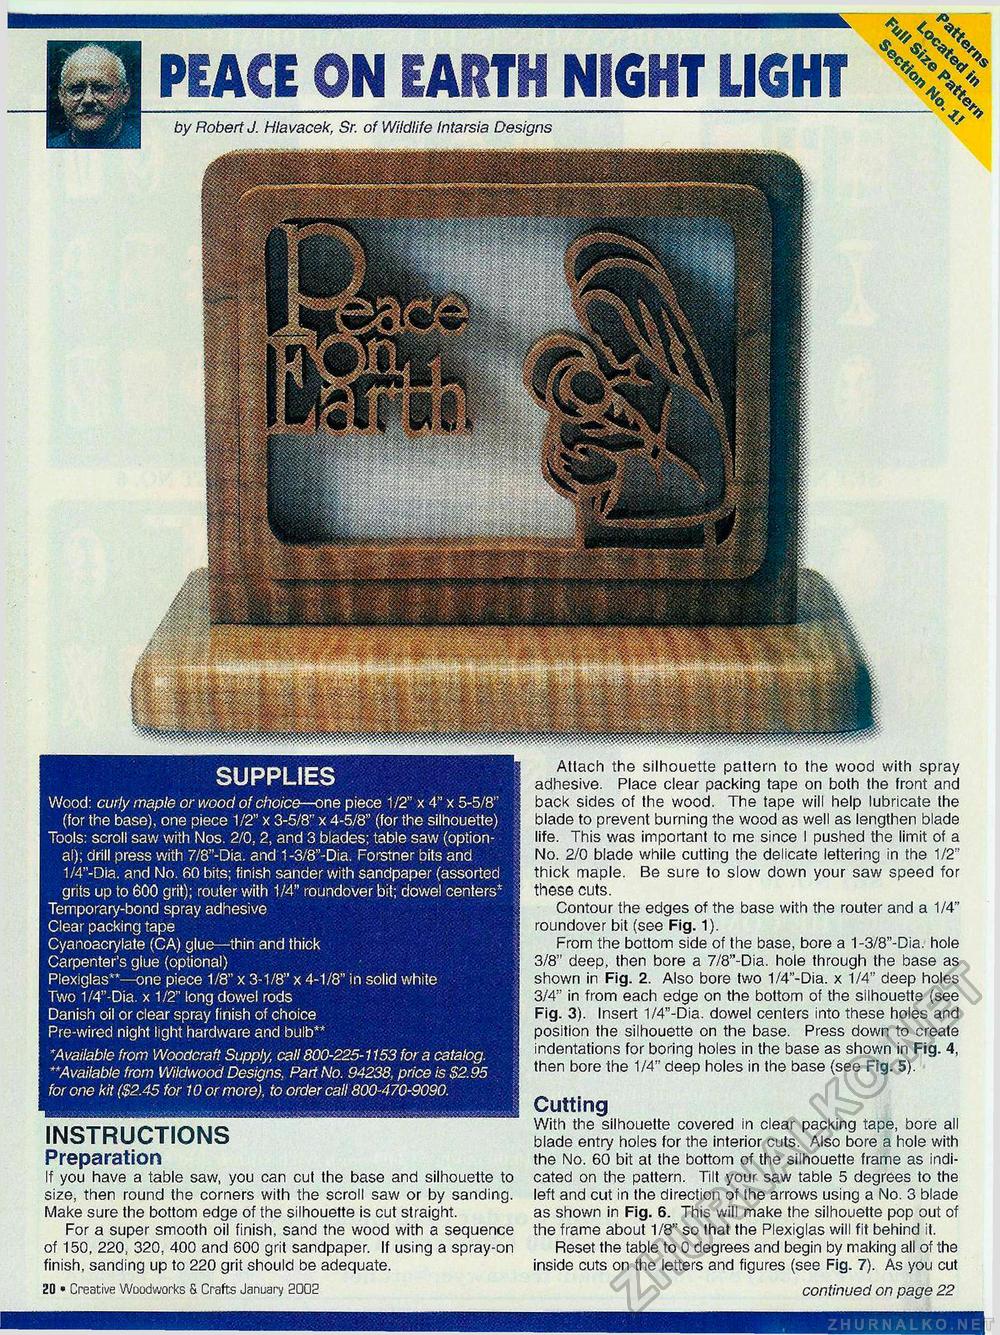
PEACE ON EARTH NIGHT LIGHT by Robert J. Hlavacek, Sr. of Wildlife Intarsia Designs - Wood: curly maple or wood of choice—one piece 1/2" x 4" x 5-5/8" (for the base), one piece 1/2" x 3-5/8" x 4-5/8" (for the silhouette) Tools: scroll saw with Nos. 2/0,2, and 3 blades; table saw (optional); drill press with 7/8"-Dia. and 1-3/8"-Dia. Forstner bits and 1/4"-Dia. and No. 60 bits; finish sander with sandpaper (assorted grits up to 600 grit); router with 1/4" rOundover bit; dowel centers* Temporary-bond spray adhesive Clear packing tape Cyanoacrylate (CA) glue—thin and thick Carpenter's glue (optional) Plexiglas"—one piece 1/8" x 3-1/8" x 4-1/8" in solid white Two 1/4"-Dia. x 1/2" long dowel rods Danish oil or clear spray finish of choice Pre-wired night light hardware and bulb" *Available from Woodcraft Supply, call 800-225-1153 for a catalog. **Available from Wildwood Designs, Part No. 94238, price is $2.95 for one kit ($2.45 for 10 or more), to order call 800-470-9090. INSTRUCTIONS Preparation If you have a table saw, you can cut the base and silhouette to size, then round the corners with the scroll saw or by sanding. Make sure the bottom edge of the silhouette is cut straight. For a super smooth oil finish, sand the wood with a sequence of 150, 220, 320, 400 and 600 grit sandpaper. If using a spray-on finish, sanding up to 220 grit should be adequate. 20 • Creative Woodworks & Crafts January 2002 Attach the silhouette pattern to the wood with spray adhesive. Place clear packing tape on both the front and back sides of the wood. The tape will help lubricate the blade to prevent burning the wood as well as lengthen blade life. This was important to me since I pushed the limit of a No. 2/0 blade while cutting the delicate lettering in the 1/2" thick maple. Be sure to slow down your saw speed for these cuts. Contour the edges of the base with the router and a 1/4" roundover bit (see Fig. 1). From the bottom side of the base, bore a 1-3/8"-Dia. hole 3/8" deep, then bore a 7/8"-Dia. hole through the base as shown in Fig. 2. Also bore two 1/4"-Dia. x 1/4" deep holes 3/4" in from each edge on the bottom of the silhouette (see Fig. 3). Insert 1/4"-Dia. dowel centers into these holes and position the silhouette on the base. Press down to create indentations for boring holes in the base as shown in Fig. 4, then bore the 1/4" deep holes in the base (see Fig. 5). Cutting With the silhouette covered in clear packing tape, bore all blade entry holes for the interior cuts. Also bore a hole with the No. 60 bit at the bottom of the silhouette frame as indicated on the pattern. Tilt your saw table 5 degrees to the left and cut in the direction of the arrows using a No. 3 blade as shown in Fig. 6. This will make the silhouette pop out of the frame about 1/8" so that the Plexiglas will fit behind it. Reset the table to 0 degrees and begin by making all of the inside cuts on the letters and figures (see Fig. 7). As you cut continued on page 22 SUPPLIES |


