Creative Woodworks & crafts 2002-01, страница 24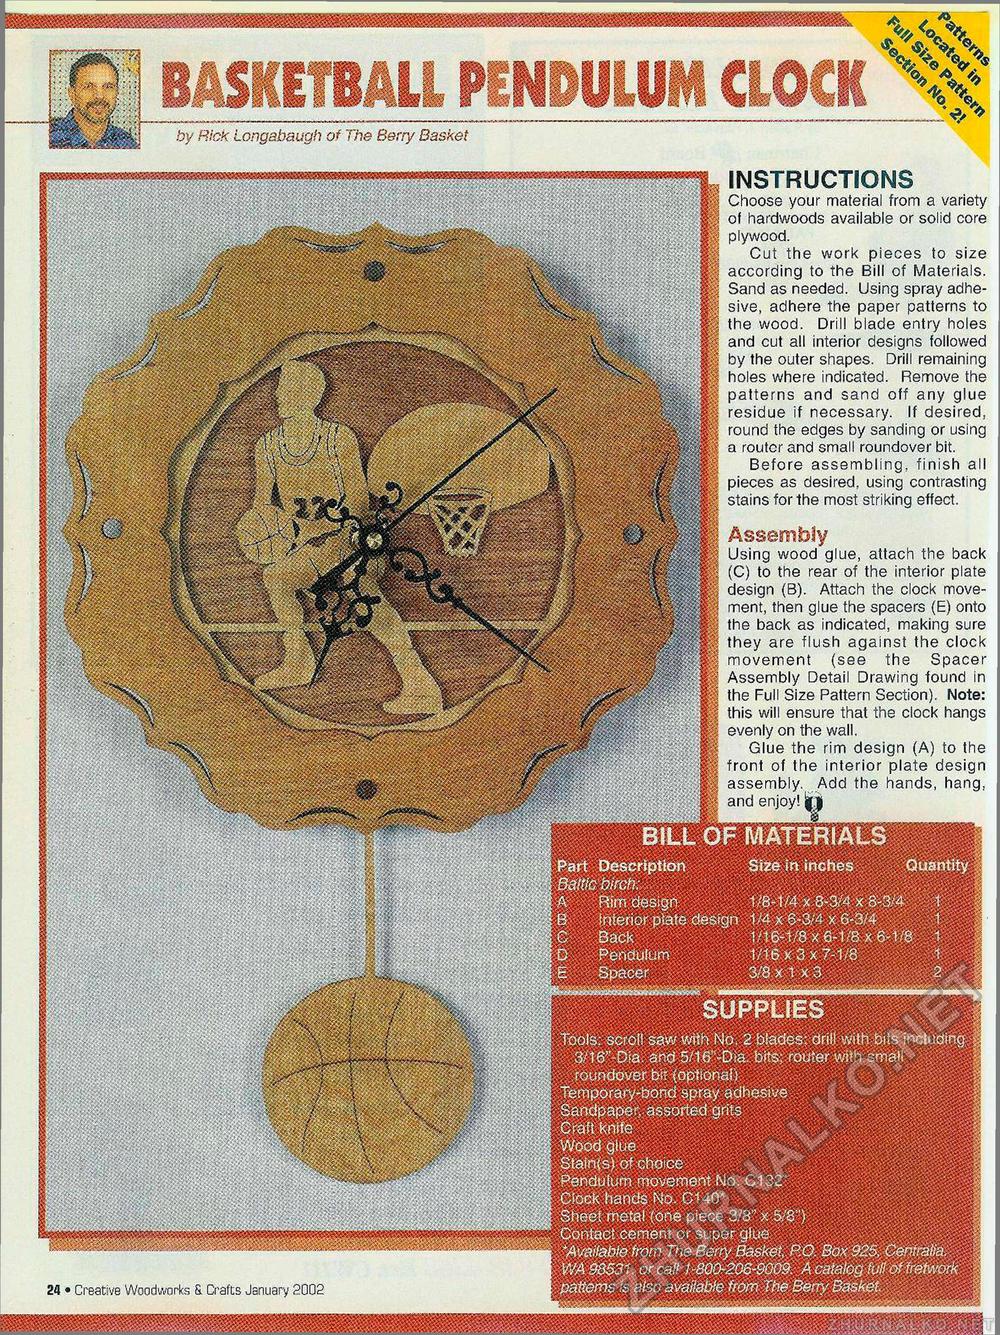
I BILL OF MATERIALS Part Description Size in inches Quantity A 1 g Inierior plate design 1M x 6-3/4 x 6-3/4 1 C Back 1/16-1/8x6-1/8x6-1/8 1 D Pendulum 1/16x3x7-1/8 1 E Spacer 3/8x1x3 3 2 -j j|g | SUPPLIES i |jj | I Tools, scroll saw with No. 2 blades: dnlj with bits inctudmg 3/16"-Dia. and 5/16"-Dia. bits; router with small roundover bff (optional) Temporary-bond spray adhesive Sandpaper, assorted grits " Craft knife Wood glue | 5 | Staines) of choice Pendulum movement No. C132* Clock hands No C140* Sheet metal (one piece 3/8" x 5/8") , § \ Contact ^p^rgfue 'Available from The Berry Basket, P.O. Box 925, Cenfraba. WA 98531. or call 1-800-206-9009: A catalog full of fretwork • patterns is also available from The Berry Basket WMW4 INSTRUCTIONS Choose your material from a variety of hardwoods available or solid core plywood. Cut the work pieces to size according to the Bill of Materials. Sand as needed. Using spray adhesive, adhere the paper patterns to the wood. Drill blade entry holes and cut all interior designs followed by the outer shapes. Drill remaining holes where indicated. Remove the patterns and sand off any glue residue if necessary. If desired, round the edges by sanding or using a router and small roundover bit. Before assembling, finish all pieces as desired, using contrasting stains for the most striking effect. Assembly Using wood glue, attach the back (C) to the rear of the interior plate design (B). Attach the clock movement, then glue the spacers (E) onto the back as indicated, making sure they are flush against the clock movement (see the Spacer Assembly Detail Drawing found in H the Full Size Pattern Section). Note: this will ensure that the clock hangs evenly on the wall. Glue the rim design (A) to the front of the interior plate design assembly. Add the hands, hang, and enjoy! j 24 • Creative Woodworks is Uratts January 2002 |


