Creative Woodworks & crafts 2002-01, страница 26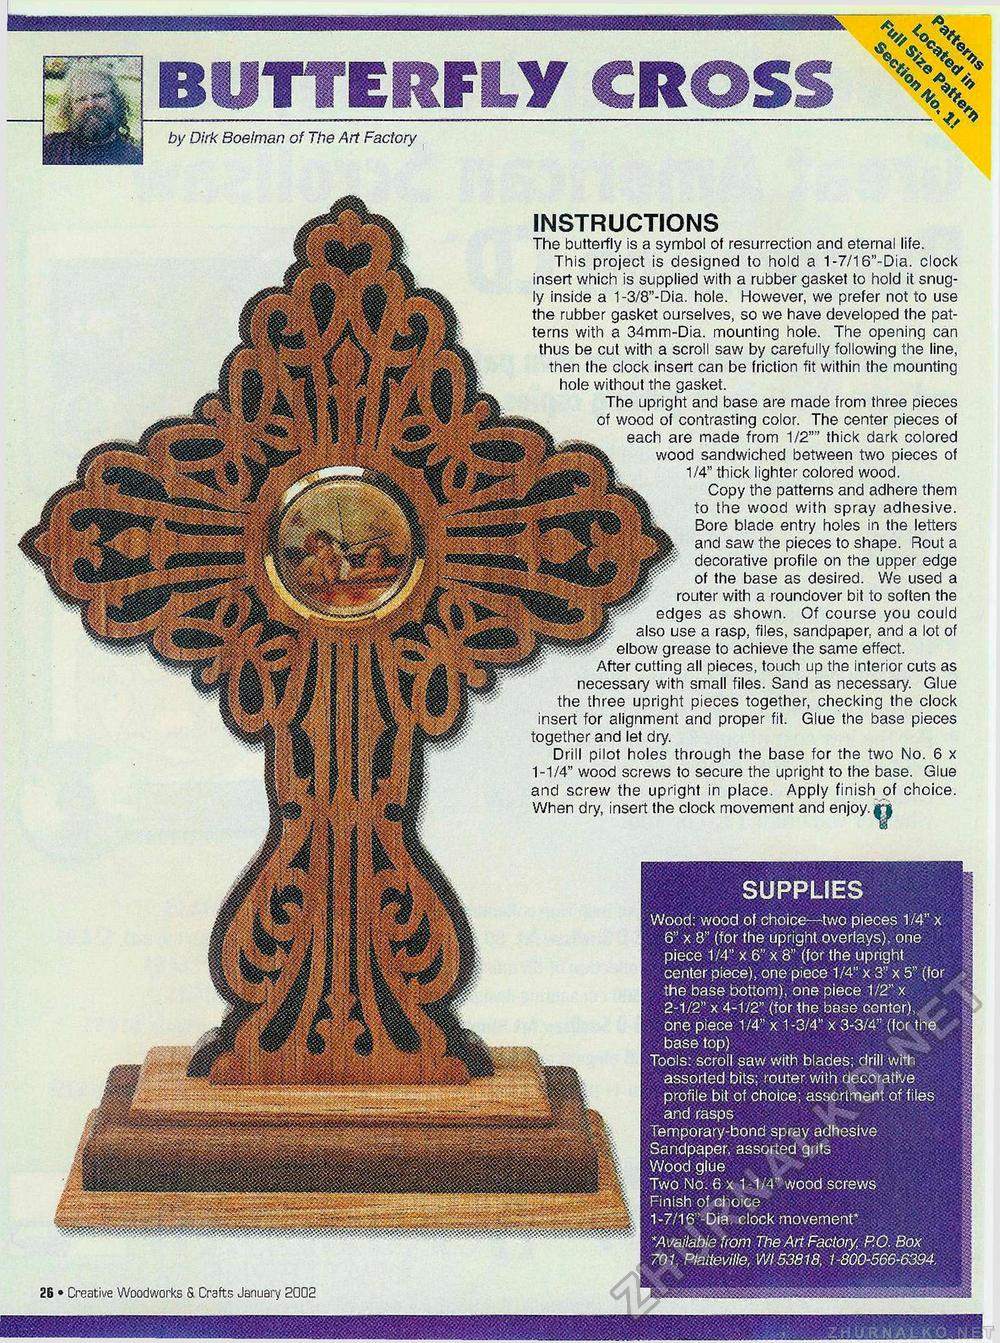
by Dirk Boeiman of The Art Factory SUPPLIES Wood: wood of choice—two pieces 1/4" x 6" x 8" (for the upright overlays), one piece 1/4" x 6" x 8" (for the upright center piece), one piece 1/4" x 3" x 5" (for the base bottom), one piece 1/2" x 2-1/2" x 4-1/2" (for the base center), one piece 1/4" x 1-3/4" x 3-3/4" (for the base top) Tools: scroll saw with blades; drill with assorted bits; router with decorative . profile bit of choice; assortment of files and rasps Temporary-bond spray adhesive Sandpaper, assorted grits Wood glue Two No. 6 x 1-1/4" wood screws Finish of choice 1-7/16"-Dia. clock movement* *Available from The Art Factory, P.O. Box 701, Ptatteville, Wl 53818, 1-800-566-6394. INSTRUCTIONS The butterfly is a symbol of resurrection and eternal life. This project is designed to hold a 1-7/16"-Dia. clock insert which is supplied with a rubber gasket to hold it snugly inside a 1-3/8"-Dia. hole. However, we prefer not to use the rubber gasket ourselves, so we have developed the patterns with a 34mm-Dia. mounting hole. The opening can thus be cut with a scroll saw by carefully following the line, then the clock insert can be friction fit within the mounting hole without the gasket. The upright and base are made from three pieces of wood of contrasting color. The center pieces of each are made from 1/2"" thick dark colored wood sandwiched between two pieces of 1/4" thick lighter colored wood. Copy the patterns and adhere them to the wood with spray adhesive. Bore blade entry holes in the letters and saw the pieces to shape. Rout a decorative profile on the upper edge of the base as desired. We used a router with a roundover bit to soften the edges as shown. Of course you could also use a rasp, files, sandpaper, and a lot of elbow grease to achieve the same effect. After cutting all pieces, touch up the interior cuts as necessar/ with small files. Sand as necessary. Glue the three upright pieces together, checking the clock insert for alignment and proper fit. Glue the base pieces together and let dry. Drill pilot holes through the base for the two No. 6 x 1-1/4" wood screws to secure the upright to the base. Glue and screw the upright in place. Apply finish of choice. When dry, insert the clock movement and enjoy. ( 26 • Creative Woodworks is Uratts January 2002 |


