Creative Woodworks & crafts 2002-01, страница 55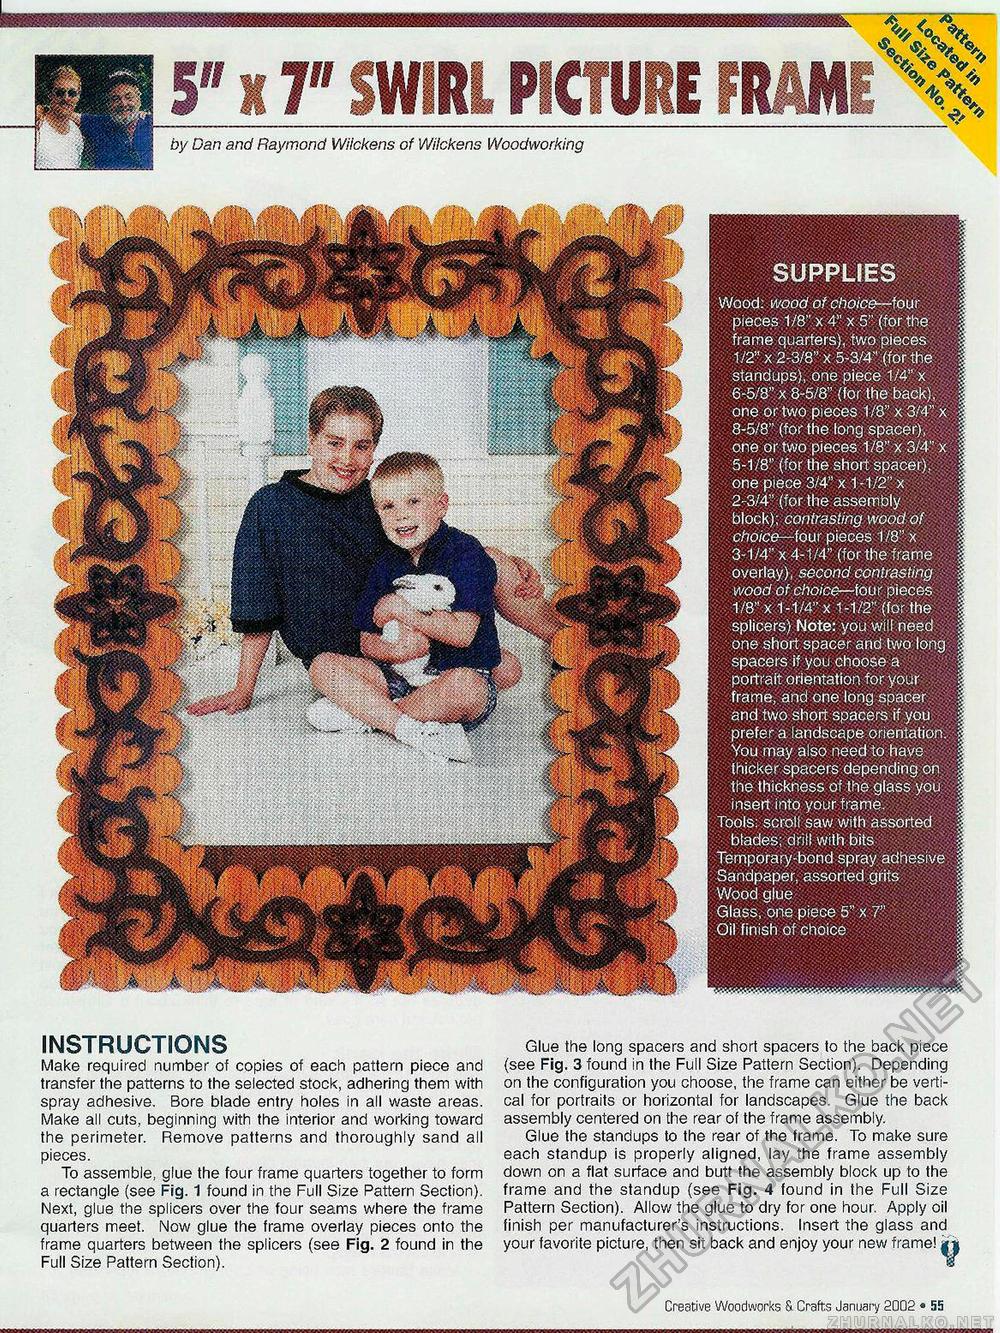
by Dan and Raymond Wiickens of Wilckens Woodworking SUPPLIES Wood: wood of choice—four pieces 1/8" x 4" x 5" (for the frame quarters), two pieces 1/2" x 2-3/8" x 5-3/4" (for the standups), one piece 1/4" x 6-5/8" x 8-5/8" (for the back), one or two pieces 1/8" x 3/4" x 8-5/8" (for the long spacer), one or two pieces 1/8" x 3/4" x 5-1/8" (for the short spacer), one piece 3/4" x 1 -1/2" x 2-3/4" (for the assembly block); contrasting wood of choice—four pieces 1/8" x 3-1/4" x 4-1/4" (for the frame overlay), second contrasting wood of choice—four pieces 1/8" x 1-1/4" x 1-1/2" (for the splicers) Note: you will need one short spacer and two long spacers if you choose a portrait orientation for your frame, and one long spacer and two short spacers if you prefer a landscape orientation. You may also need to have thicker spacers depending on the thickness of the glass you insert into your frame. Tools: scroll saw with assorted blades; drill with bits Temporary-bond spray adhesive Sandpaper, assorted grits Wood glue Glass, one piece 5" x 7" Oil finish of choice INSTRUCTIONS Make required number of copies of each pattern piece and transfer the patterns to the selected stock, adhering them with spray adhesive. Bore blade entry holes in all waste areas. Make all cuts, beginning with the interior and working toward the perimeter. Remove patterns and thoroughly sand all pieces. To assemble, glue the four frame quarters together to form a rectangle (see Fig. 1 found in the Full Size Pattern Section). Next, glue the splicers over the four seams where the frame quarters meet. Now glue the frame overlay pieces onto the frame quarters between the splicers (see Fig. 2 found in the Full Size Pattern Section). Glue the long spacers and short spacers to the back piece (see Fig, 3 found in the Full Size Pattern Section). Depending on the configuration you choose, the frame can either be vertical for portraits or horizontal for landscapes. Glue the back assembly centered on the rear of the frame assembly. Glue the standups to the rear of the frame. To make sure each standup is properly aligned, lay the frame assembly down on a flat surface and butt the assembly block up to the frame and the standup (see Fig. 4 found in the Full Size Pattern Section). Allow the glue to dry for one hour. Apply oil finish per manufacturer's instructions. Insert the glass and your favorite picture, then sit back and enjoy your new frame! |i Creative Woodworks S. Crafts January 2002 • 55 |


