Creative Woodworks & crafts 2002-03, страница 25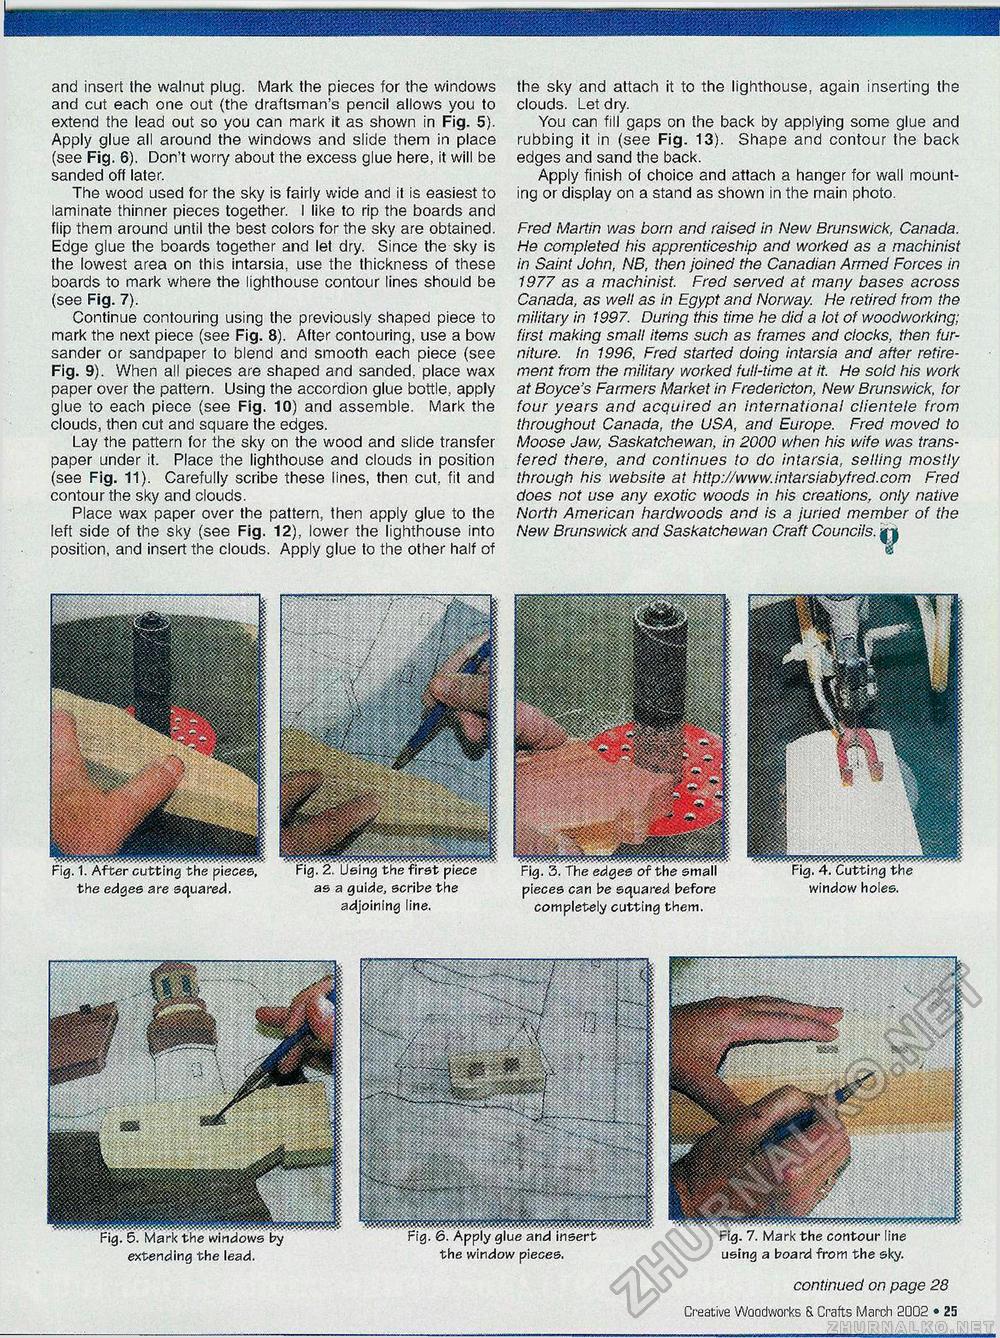
and insert the walnut plug. Mark the pieces for the windows and cut each one out (the draftsman's pencil allows you to extend the lead out so you can mark it as shown in Fig. 5). Apply glue all around the windows and slide them in place (see Fig. 6). Don't worry about the excess glue here, it will be sanded off later. The wood used for the sky is fairly wide and it is easiest to laminate thinner pieces together. I like to rip the boards and flip them around until the best colors for the sky are obtained. Edge glue the boards together and let dry. Since the sky is the lowest area on this intarsia, use the thickness of these boards to mark where the lighthouse contour lines should be (see Fig. 7). Continue contouring using the previously shaped piece to mark the next piece (see Fig. 8). After contouring, use a bow sander or sandpaper to blend and smooth each piece (see Fig. 9). When all pieces are shaped and sanded, place wax paper over the pattern. Using the accordion glue bottle, apply glue to each piece (see Fig. 10) and assemble. Mark the clouds, then cut and square the edges. Lay the pattern for the sky on the wood and slide transfer paper under it. Place the lighthouse and clouds in position (see Fig. 11). Carefully scribe these lines, then cut, fit and contour the sky and clouds. Place wax paper over the pattern, then apply glue to the left side of the sky (see Fig. 12), lower the lighthouse into position, and insert the clouds. Apply glue to the other half of the sky and attach it to the lighthouse, again inserting the clouds. Let dry. You can fill gaps on the back by applying some glue and rubbing it in (see Fig. 13). Shape and contour the back edges and sand the back. Apply finish of choice and attach a hanger for wall mounting or display on a stand as shown in the main photo. Fred Martin was born and raised in New Brunswick, Canada. He completed his apprenticeship and worked as a machinist in Saint John, NB, then joined the Canadian Armed Forces in 1977 as a machinist. Fred served at many bases across Canada, as well as in Egypt and Norway. He retired from the military in 1997. During this time he did a lot of woodworking; first making small items such as frames and clocks, then furniture. In 1996, Fred started doing intarsia and after retirement from the military worked full-time at it. He sold his work at Boyce's Farmers Market in Fredericton, New Brunswick, for four years and acquired an international clientele from throughout Canada, the USA, and Europe. Fred moved to Moose Jaw, Saskatchewan, in 2000 when his wife was trans-fered there, and continues to do intarsia, selling mostly through his website at http://www.intarsiabyfred.com Fred does not use any exotic woods in his creations, only native North American hardwoods and is a juried member of the New Brunswick and Saskatchewan Craft Councils. || as a guide, scribe the adjoining line. pieces can be squared before completely cutting them. window holes. extending the lead. using a board from the sky. continued on page 28 Creative Woodworks S. Crafts March 2002 • 25 Fig. 6. Apply glue and insert the window pieces. |


