Creative Woodworks & crafts 2002-03, страница 48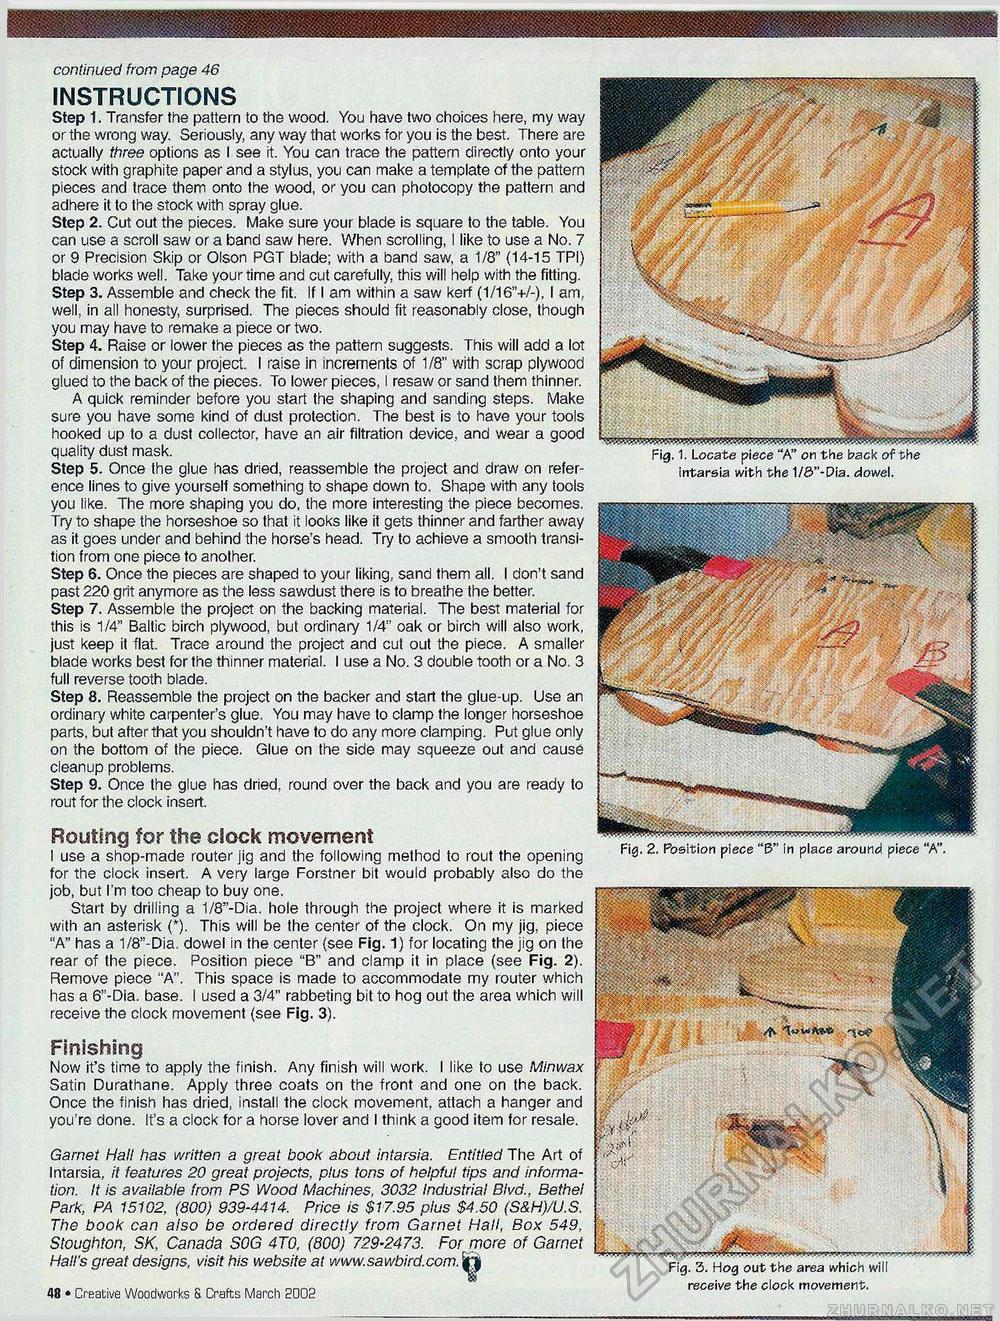
continued from page 46 INSTRUCTIONS Step 1. Transfer the pattern to the wood. You have two choices here, my way or the wrong way. Seriously, any way that works for you is the best. There are actually three options as I see it. You can trace the pattern directly onto your stock with graphite paper and a stylus, you can make a template of the pattern pieces and trace them onto the wood, or you can photocopy the pattern and adhere it to the stock with spray glue. Step 2. Cut out the pieces. Make sure your blade is square to the table. You can use a scroll saw or a band saw here. When scrolling, I like to use a No. 7 or 9 Precision Skip or Olson PGT blade; with a band saw, a 1/8" (14-15 TPI) blade works well. Take your time and cut carefully, this will help with the fitting. Step 3. Assemble and check the fit. If I am within a saw kerf (1/16"+/-), I am, well, in all honesty, surprised. The pieces should fit reasonably close, though you may have to remake a piece or two. Step 4. Raise or lower the pieces as the pattern suggests. This will add a lot of dimension to your project. I raise in increments of 1/8" with scrap plywood glued to the back of the pieces. To lower pieces, I resaw or sand them thinner. A quick reminder before you start the shaping and sanding steps. Make sure you have some kind of dust protection. The best is to have your tools hooked up to a dust collector, have an air filtration device, and wear a good quality dust mask. Step 5. Once the glue has dried, reassemble the project and draw on reference lines to give yourself something to shape down to. Shape with any tools you like. The more shaping you do, the more interesting the piece becomes. Try to shape the horseshoe so that it looks like it gets thinner and farther away as it goes under and behind the horse's head. Try to achieve a smooth transition from one piece to another. Step 6. Once the pieces are shaped to your liking, sand them all. I don't sand past 220 grit anymore as the less sawdust there is to breathe the better. Step 7. Assemble the project on the backing material. The best material for this is 1/4" Baltic birch plywood, but ordinary 1/4" oak or birch will also work, just keep it flat. Trace around the project and cut out the piece. A smaller blade works best for the thinner material. I use a No. 3 double tooth or a No. 3 full reverse tooth blade. Step 8. Reassemble the project on the backer and start the glue-up. Use an ordinary white carpenter's glue. You may have to clamp the longer horseshoe parts, but after that you shouldn't have to do any more clamping. Put glue only on the bottom of the piece. Glue on the side may squeeze out and cause cleanup problems. Step 9. Once the glue has dried, round over the back and you are ready to rout for the clock insert. Finishing Now it's time to apply the finish. Any finish will work. I like to use Minwax Satin Durathane. Apply three coats on the front and one on the back. Once the finish has dried, install the clock movement, attach a hanger and you're done. It's a clock for a horse lover and I think a good item for resale. Routing for the clock movement I use a shop-made router jig and the following method to rout the opening for the clock insert. A very large Forstner bit would probably also do the job, but I'm too cheap to buy one. Start by drilling a 1/8"-Dia. hole through the project where it is marked with an asterisk (*). This will be the center of the clock. On my jig, piece "A" has a 1/8"-Dia. dowel in the center (see Fig. 1) for locating the jig on the rear of the piece. Position piece "B" and clamp it in place (see Fig. 2). Remove piece "A". This space is made to accommodate my router which has a 6"-Dia. base. I used a 3/4" rabbeting bit to hog out the area which will receive the clock movement (see Fig. 3). Fig. 2. Position piece "f5" in place around piece "A". Garnet Hall has written a great book about intarsia. Entitled The Art of Intarsia, it features 20 great projects, plus tons of helpful tips and information. It is available from PS Wood Machines, 3032 Industrial Blvd., Bethel Park, PA 15102, (800) 939-4414. Price is $17.95 plus $4.50 (S&H)/U.S. The book can also be ordered directly from Garnet Hall, Box 549, Stoughton, SK, Canada SOG 4T0, (800) 729-2473. For more of Garnet Hall's great designs, visit his website at www.sawbird.com. ^ 24 • Creative Wnnriwnrks & Crafts March 2002 receive the clock movement. |


