Creative Woodworks & crafts 2002-03, страница 51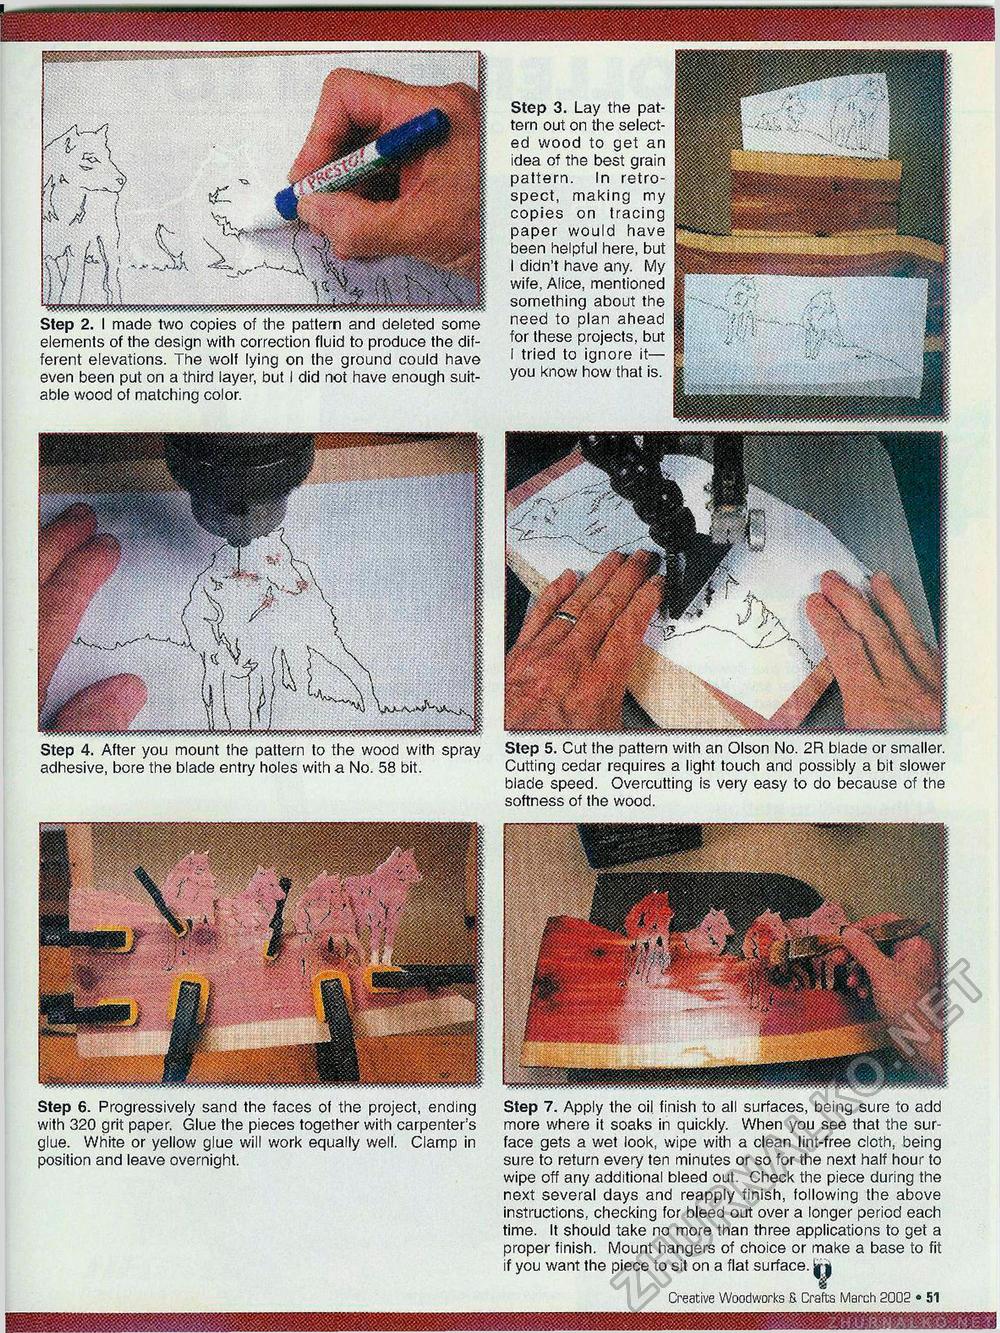
Step 4. After you mount the pattern to the wood with spray adhesive, bore the blade entry holes with a No. 58 bit. Step 5. Cut the pattern with an Olson No. 2R blade or smaller. Cutting cedar requires a light touch and possibly a bit slower blade speed. Overcutting is very easy to do because of the softness of the wood. Step 2. I made two copies of the pattern and deleted some elements of the design with correction fluid to produce the different elevations. The wolf lying on the ground could have even been put on a third layer, but I did not have enough suitable wood of matching color. Step 3. Lay the pattern out on the selected wood to get an idea of the best grain pattern. In retrospect, making my copies on tracing paper would have been helpful here, but I didn't have any. My wife, Alice, mentioned something about the need to plan ahead for these projects, but I tried to ignore it— you know how that is. Step 6. Progressively sand the faces of the project, ending with 320 grit paper. Glue the pieces together with carpenter's glue. White or yellow glue will work equally well. Clamp in position and leave overnight. Step 7. Apply the oil finish to all surfaces, being sure to add more where it soaks in quickly. When you see that the surface gets a wet look, wipe with a clean lint-free cloth, being sure to return every ten minutes or so for the next half hour to wipe off any additional bleed out. Check the piece during the next several days and reapply finish, following the above instructions, checking for bleed out over a longer period each time. It should take no more than three applications to get a proper finish. Mount hangers of choice or make a base to fit if you want the piece to sit on a flat surface. brjj Creative Woodworks & Crafts March 2002 • 51 |


