Creative Woodworks & crafts 2002-04, страница 37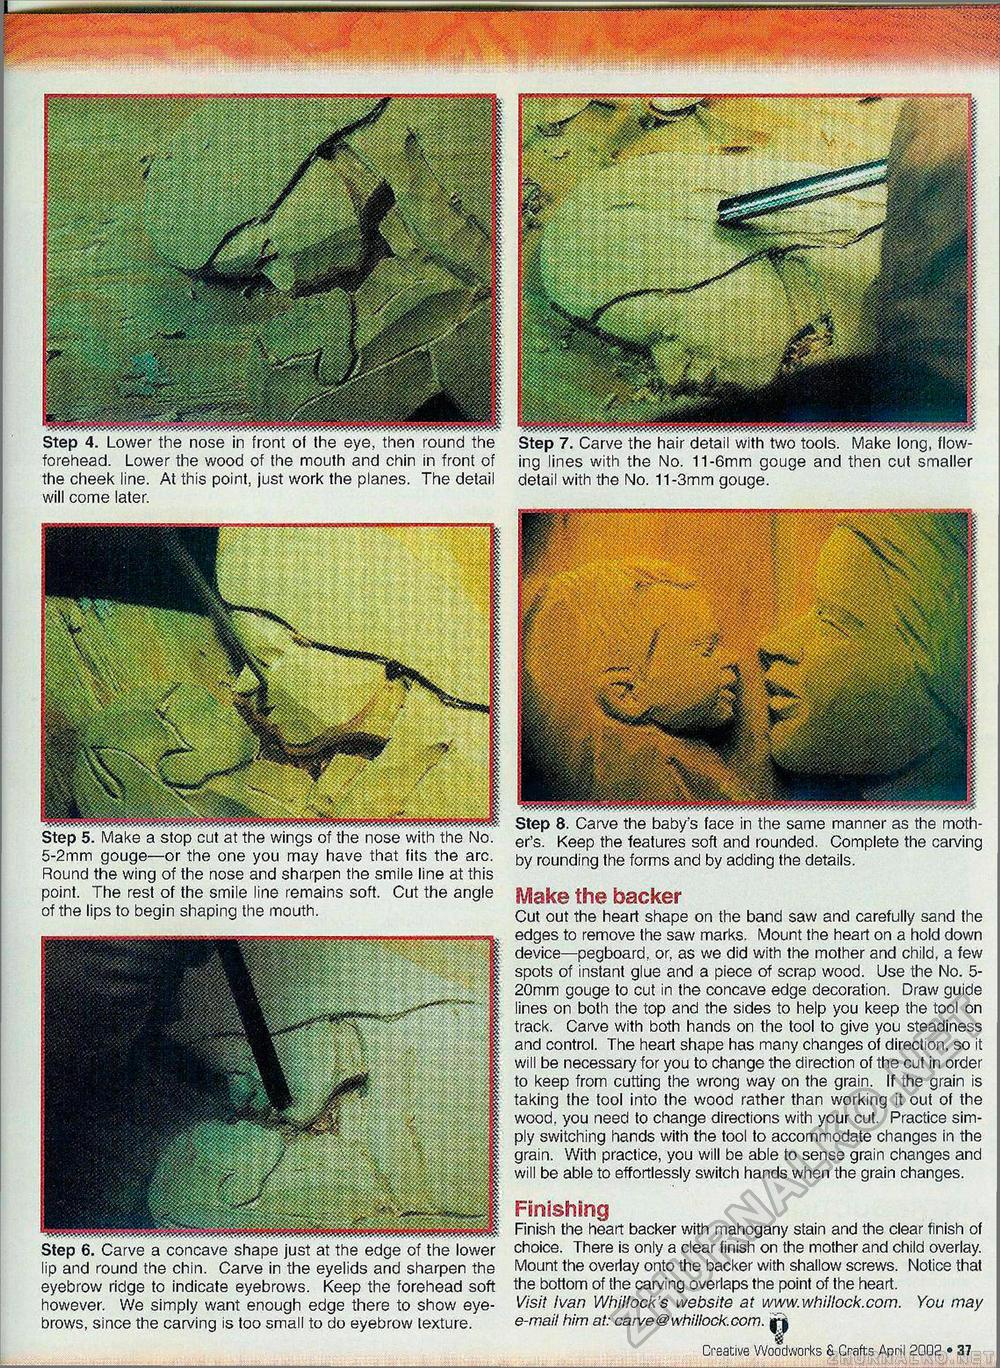
ing lines with the No. 11-6mm gouge and then cut smaller detail with the No. 11 -3mm gouge. 5-2mm gouge—or the one you may have that fits the arc. Round the wing of the nose and sharpen the smile line at this point. The rest of the smile line remains soft. Cut the angle of the lips to begin shaping the mouth. Finishing Finish the heart backer with mahogany stain and the clear finish of choice. There is only a clear finish on the mother and child overlay. Mount the overlay onto the backer with shallow screws. Notice that the bottom of the carving overlaps the point of the heart. Visit Ivan Whillock's website at www.whillock.com. You may e-mail him at: carve@whillock.com. jjjjj Creative Woodworks & Crafts April 2002 » 37 Step 4. Lower the nose in front of the eye, then round the forehead. Lower the wood of the mouth and chin in front of the cheek line. At this point, just work the planes. The detail will come later. Make the backer Cut out the heart shape on the band saw and carefully sand the edges to remove the saw marks. Mount the heart on a hold down device—pegboard, or, as we did with the mother and child, a few spots of instant glue and a piece of scrap wood. Use the No. 5-20mm gouge to cut in the concave edge decoration. Draw guide lines on both the top and the sides to help you keep the tool on track. Carve with both hands on the tool to give you steadiness and control. The heart shape has many changes of direction, so it will be necessary for you to change the direction of the cut in order to keep from cutting the wrong way on the grain. If the grain is taking the tool into the wood rather than working it out of the wood, you need to change directions with your cut. Practice simply switching hands with the tool to accommodate changes in the grain. With practice, you will be able to sense grain changes and will be able to effortlessly switch hands when the grain changes. Step 6. Carve a concave shape just at the edge of the lower lip and round the chin. Carve in the eyelids and sharpen the eyebrow ridge to indicate eyebrows. Keep the forehead soft however. We simply want enough edge there to show eyebrows, since the carving is too small to do eyebrow texture. er's. Keep the features soft and rounded. Complete the carving by rounding the forms and by adding the details. |


