Creative Woodworks & crafts 2002-04, страница 40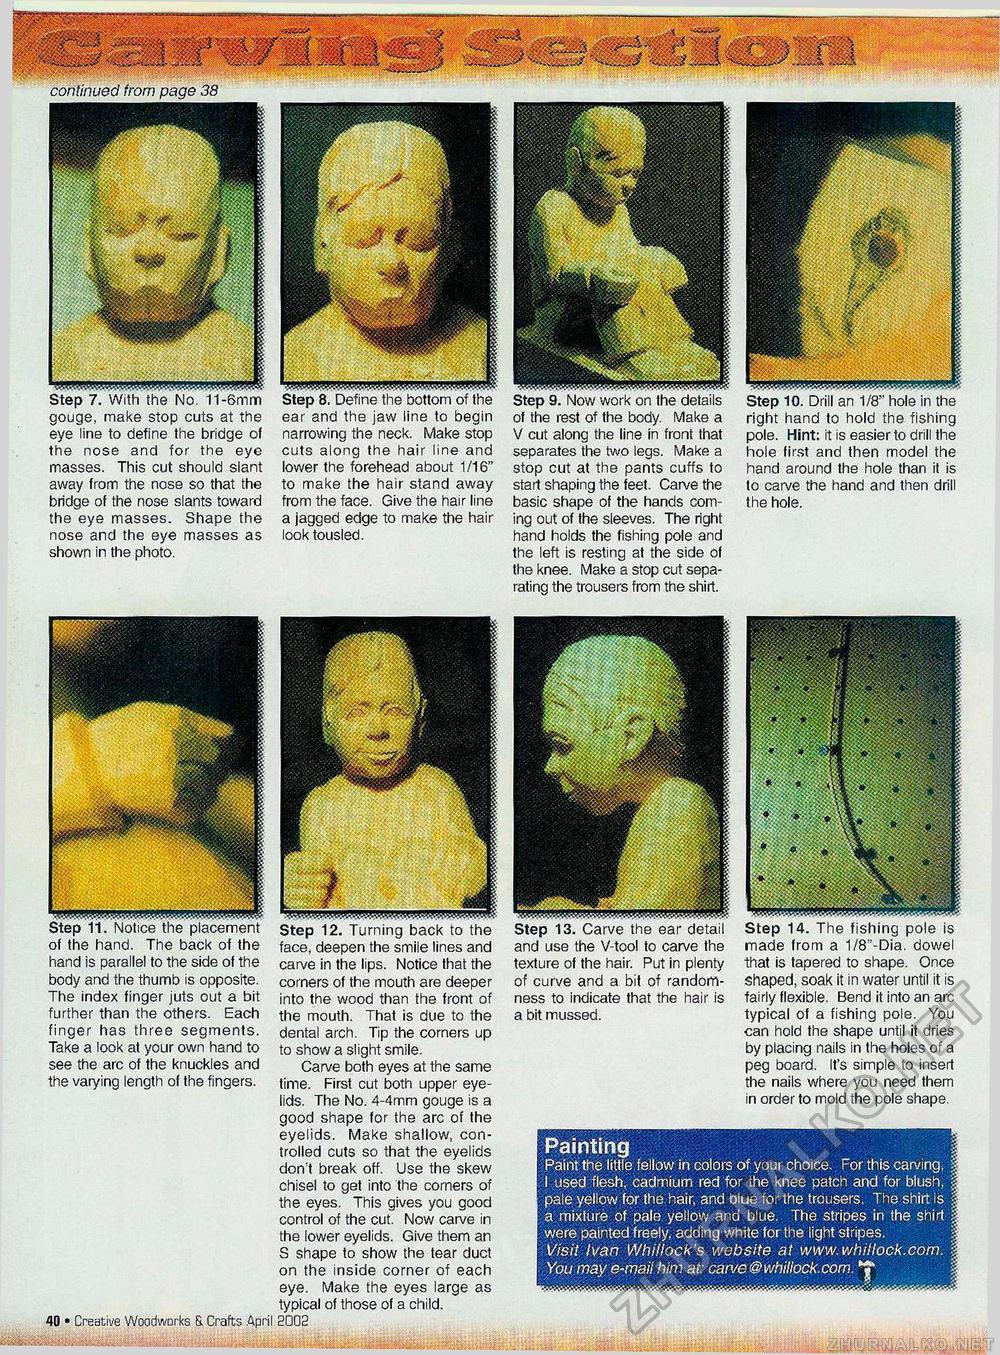
ear and the jaw line to begin narrowing the neck. Make stop cuts along the hair line and lower the forehead about 1/16" to make the hair stand away from the face. Give the hair line a jagged edge to make the hair look tousled. of the rest of the body. Make a V cut along the line in front that separates the two legs. Make a stop cut at the pants cuffs to start shaping the feet. Carve the basic shape of the hands coming out of the sleeves. The right hand holds the fishing pole and the left is resting at the side of the knee. Make a stop cut separating the trousers from the shirt. Step gouge, make stop cuts at the eye line to define the bridge of the nose and for the eye masses. This cut should slant away from the nose so that the bridge of the nose slants toward the eye masses. Shape the nose and the eye masses as shown in the photo. Step 10. Drill an 1/8" hole in the right hand to hold the fishing pole. Hint: it is easier to drill the hole first and then model the hand around the hole than it is to carve the hand and then drill the hole. Step 11, Notice the placement of the hand. The back of the hand is parallel to the side of the body and the thumb is opposite. The index finger juts out a bit further than the others. Each finger has three segments. Take a look at your own hand to see the arc of the knuckles and the varying length of the fingers. IB • Creative Woodworks S. Crafts April S002 Step 12. Turning back to the face, deepen the smile lines and carve in the lips. Notice that the corners of the mouth are deeper into the wood than the front of the mouth. That is due to the dental arch. Tip the comers up to show a slight smile. Carve both eyes at the same time. First cut both upper eyelids. The No. 4-4mm gouge is a good shape for the arc of the eyelids. Make shallow, controlled cuts so that the eyelids don't break off. Use the skew chisel to get into the corners of the eyes. This gives you good control of the cut. Now carve in the lower eyelids. Give them an S shape to show the tear duct on the inside comer of each eye. Make the eyes large as typical of those of a child. 2002 Step 14. The fishing pole is made from a 1/8'-Dia. dowel ■that is tapered to shape. Once shaped, soak it in water until it is fairly flexible. Bend it into an arc typical of a fishing pole. You can hold the shape until it dries by placing nails in the holes of a peg board. It's simple to insert the nails where you need them in order to mold the pole shape. and use the V-tool to carve the texture of the hair. Put in plenty of curve and a bit of randomness to indicate that the hair is a bit mussed. Painting Paint the little fellow in colors of your choice. For this carving, | I used flesh, cadmium red for the knee patch and for blush, | pale yellow for the hair, and blue for the trousers. The shirt is \ a mixture of pale yellow and. blue. The stripes in the shirt \ were painted freely, adding white for the light stripes. Visit Ivan Whillock's website at www.whillock.com. i You may e-mail him at: carve@whillock.com. ** |


