Creative Woodworks & crafts 2002-04, страница 43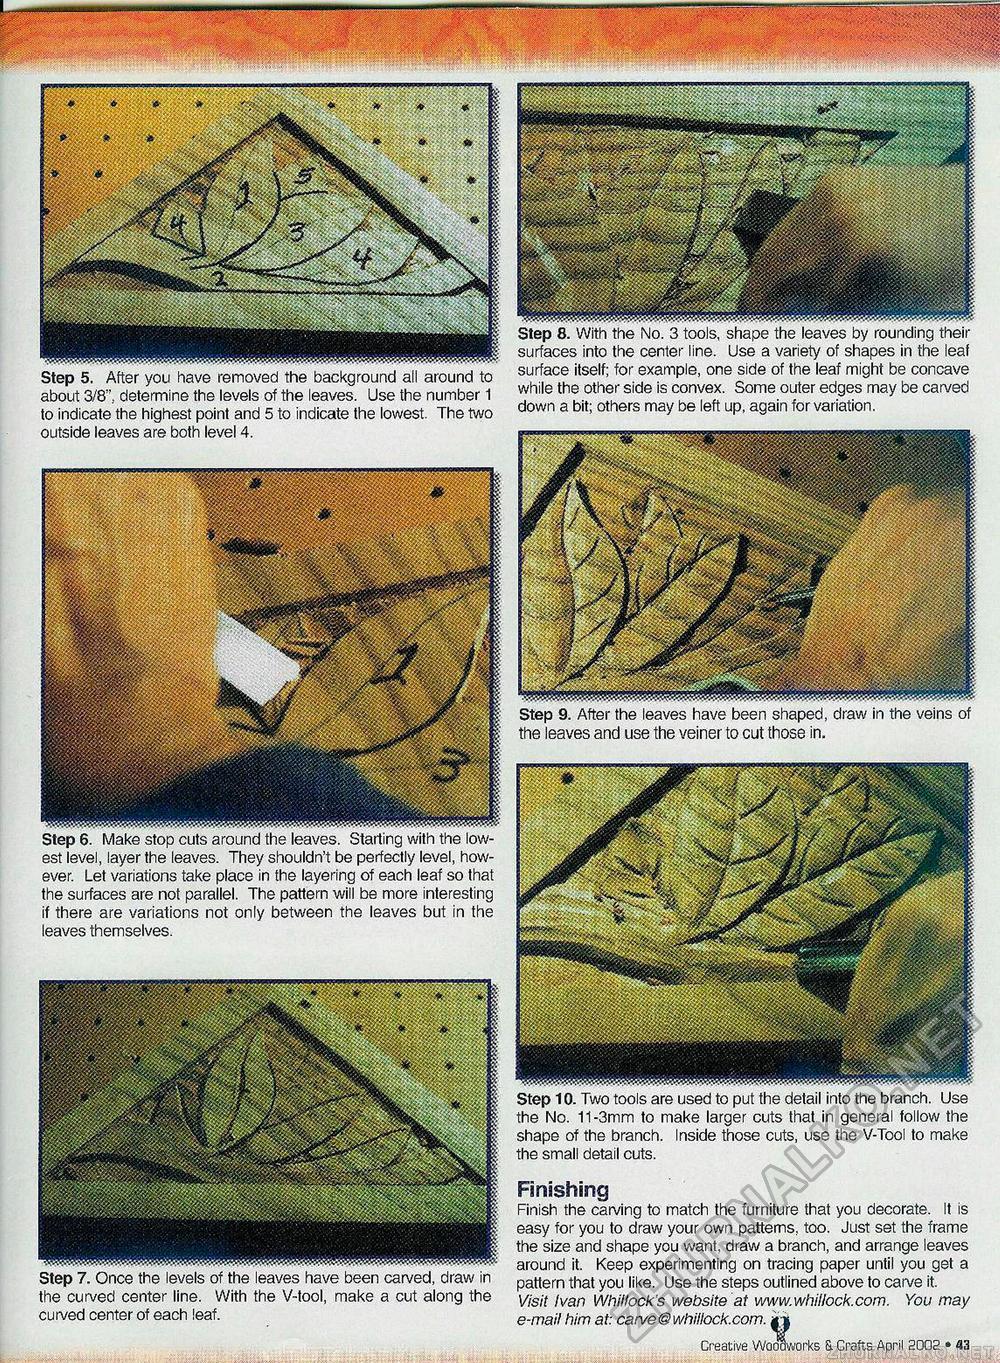
—— Step 5. After you have removed the background all around to about 3/8", determine the levels of the leaves. Use the number 1 to indicate the highest point and 5 to indicate the lowest. The two outside leaves are both level 4. est level, layer the leaves. They shouldn't be perfectly level, however. Let variations take place in the layering of each leaf so that the surfaces are not parallel. The pattern will be more interesting if there are variations not only between the leaves but in the leaves themselves. Step 7. Once the levels of the leaves have been carved, draw in the curved center line. With the V-tool, make a cut along the curved center of each leaf. their the leaf surface itself; for example, one side of the leaf might be concave while the other side is convex. Some outer edges may be carved down a bit; others may be left up, again for variation. Step 9. After the leaves have been shaped, draw in the veins of the leaves and use the veiner to cut those in. Finishing Finish the carving to match the furniture that you decorate. It is easy for you to draw your own patterns, too. Just set the frame the size and shape you want, draw a branch, and arrange leaves around it. Keep experimenting on tracing paper until you get a pattern that you like. Use the steps outlined above to carve it. Visit Ivan Whillock's website at www.whillock.com. You may e-mail him at: carve ©whillock.com. i j Creative Woodworks & Crafts April 2002 » 43 Step 10. Two tools are used to the No. 11-3mm to make shape of the branch. Insi< the small detail cuts. the detail into the branch. Use jts that in general follow the cuts, use the V-Tool to make |


