Creative Woodworks & crafts 2002-06, страница 36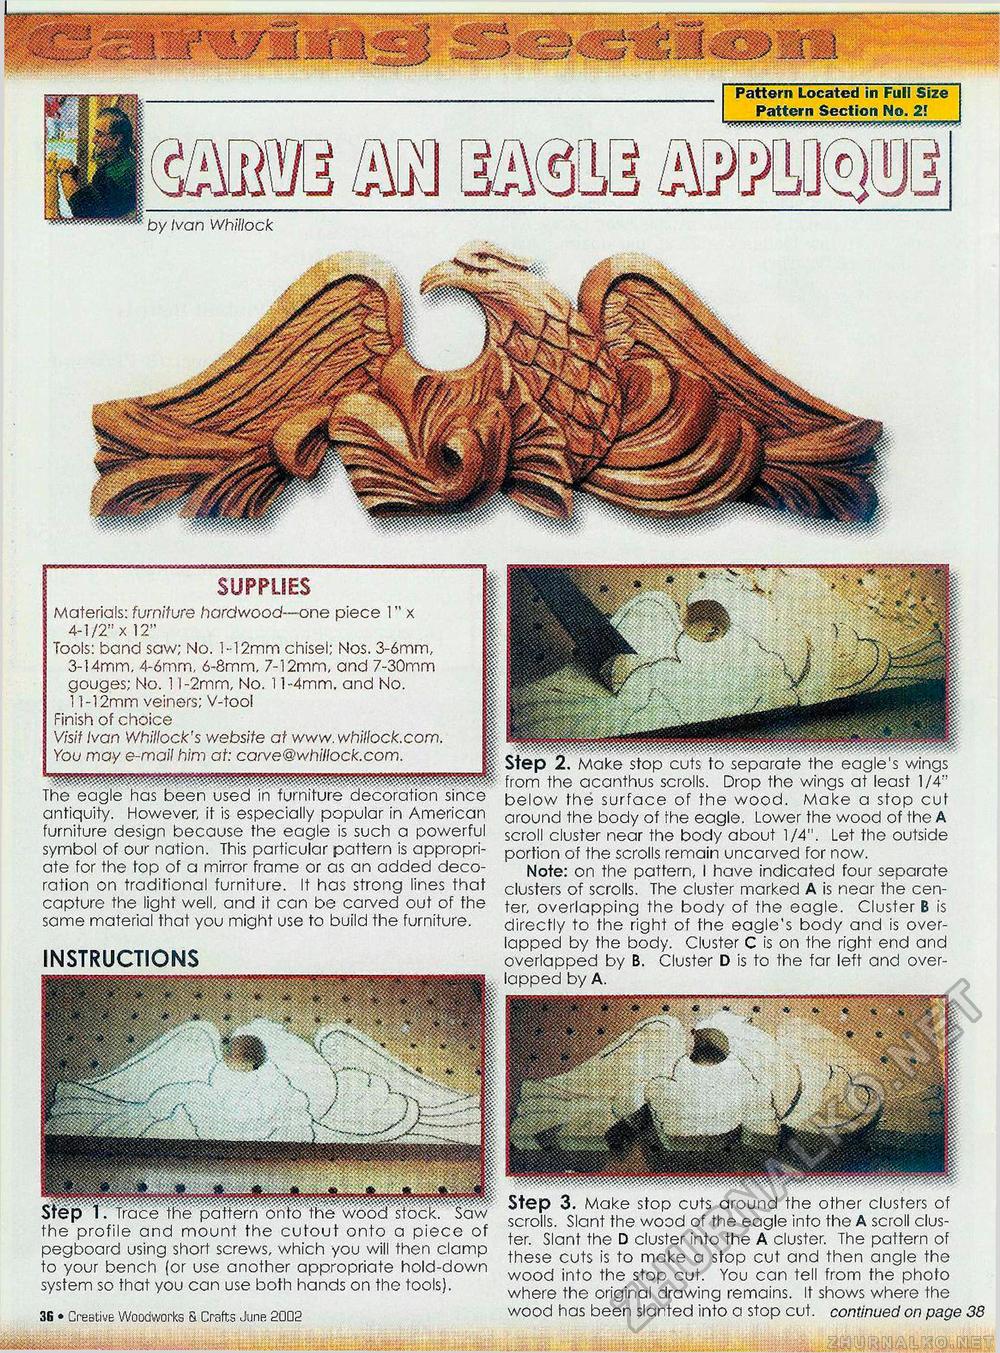
Pattern Located in Full Size Pattern Section No. 21 by Ivan whillock SUPPLIES Materials: furniture hardwood—one piece 1" x 4-1/2" x 12" Tools: band saw; No. 1-12mm chisel; Nos. 3-6mm, 3-14mm, 4-6mm, 6-8mm, 7-12mm, and 7-30mm gouges; No. 1 l-2mm, No. 1 l-4mm. and No. 11-12mm veiners; V-tool Finish of choice Visit Ivan Whillock's website at www.whiilock.com. You may e-mail him at: carve@whillock.com. The eagle has been used in furniture decoration since antiquity. However, if is especially popular in American furniture design because the eagle is such a powerful symbol of our nation. This particular pattern is appropriate for the fop of a mirror frame or as an added decoration on traditional furniture. It has strong lines that capture the light well, and it can be carved out of the same material that you might use to build the furniture. INSTRUCTIONS from the acanthus scrolls. Drop the wings at least 1/4" below the surface of the wood. Make a stop cut around the body of fhe eagle. Lower the wood of the A scroll cluster near the body about 1/4". Let the outside portion of the scrolls remain uncarved for now. Note: on the pattern, I have indicated four separate clusters of scrolls. The cluster marked A is near the center, overlapping the body of the eagle. Cluster B is directly to fhe right of fhe eagle's body and is overlapped by the body. Cluster C is on the right end and overlapped by B. Cluster D is to the far left and overlapped by A. the profile and mount the cutout onto a piece of pegboard using short screws, which you will then clamp to your bench (or use another appropriate hold-down system so that you can use both hands on the tools). 36 • Creative Woodworks S. Crafts June 2002 theme of Pete's. Step 3. Make stop cuts around the other clusters of scrolls. Slant the wood of the eagle info the A scroll cluster. Slant the D cluster into the A cluster. The pattern of these cuts is to moke a stop cut and then angle the wood into the stop cut. You can tell from the photo where the original drawing remains. It shows where the wood has been slanted into a stop cut. continued on page 38 |


