Creative Woodworks & crafts 2002-08, страница 34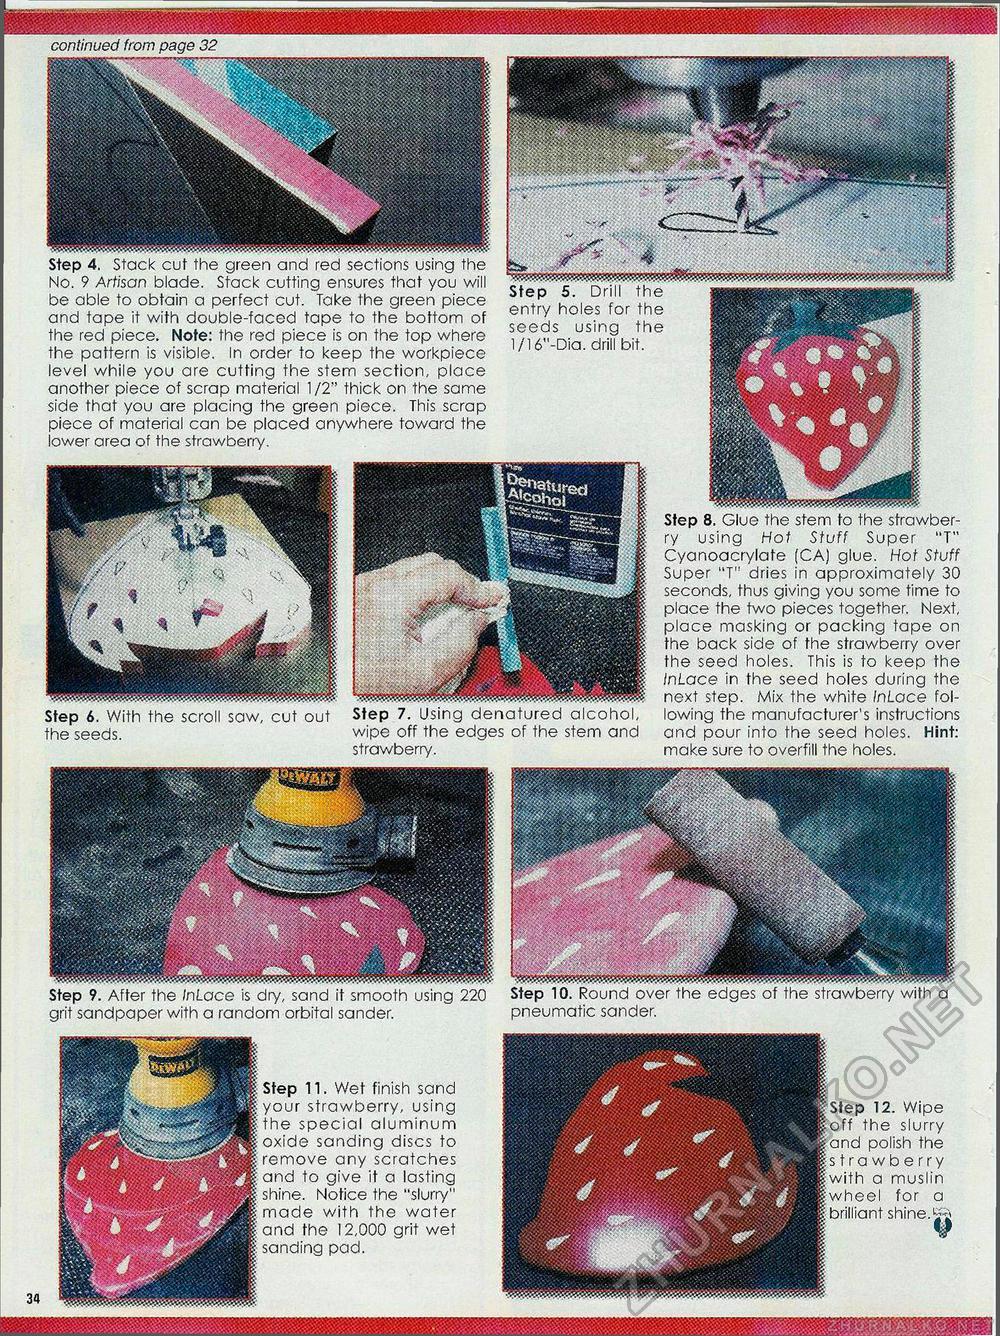
.-v.-'- .•' • - " • ••.•..- '-•;■ .•■•,•--• continued from page 32 m Step 4. Stack cut the green and red sections using the No. 9 Artisan blade. Stack cutting ensures that you will be able to obtain a perfect cut. Take the green piece and tape it with double-faced tape to the bottom of the red piece. Note: the red piece is on the top where the pattern is visible. In order to keep the workpiece level while you are cutting the stem section, place another piece of scrap material 1/2" thick on the same side that you are placing the green piece. This scrap piece of material can be placed anywhere toward the lower area of the strawberry. Step 8. Glue the stem to the strawberry using Hot Stuff Super "T" Cyanoacrylate (CA) glue. Hot Stuff Super "T" dries in approximately 30 seconds, thus giving you some time to place the two pieces together. Next, place masking or packing tape on the back side of the strawberry over the seed holes. This is to keep the InLace in the seed holes during the next step. Mix the white InLace following the manufacturer's instructions and pour into the seed holes. Hint: make sure to overfill the holes. entry seeds using the 1/16"-Dia. drill bit. Step 11. Wet finish sand your strawberry, using the special aluminum oxide sanding discs to remove any scratches and to give it a lasting shine. Notice the "slurry" made with the water and the 12,000 grit wet sanding pad. 12. Wipe ff the slurry d polish the tra wb e rry h a muslin for a shine. & Step 6. With the scroll saw, cut out the seeds. Step 7. Using denatured alcohol, wipe off the edges of the stem ana strawberry. Step 9. After the InLace is dry, sand it smooth using 220 grit sandpaper with a random orbital sander. pneumatic sander. |


