Creative Woodworks & crafts 2002-08, страница 36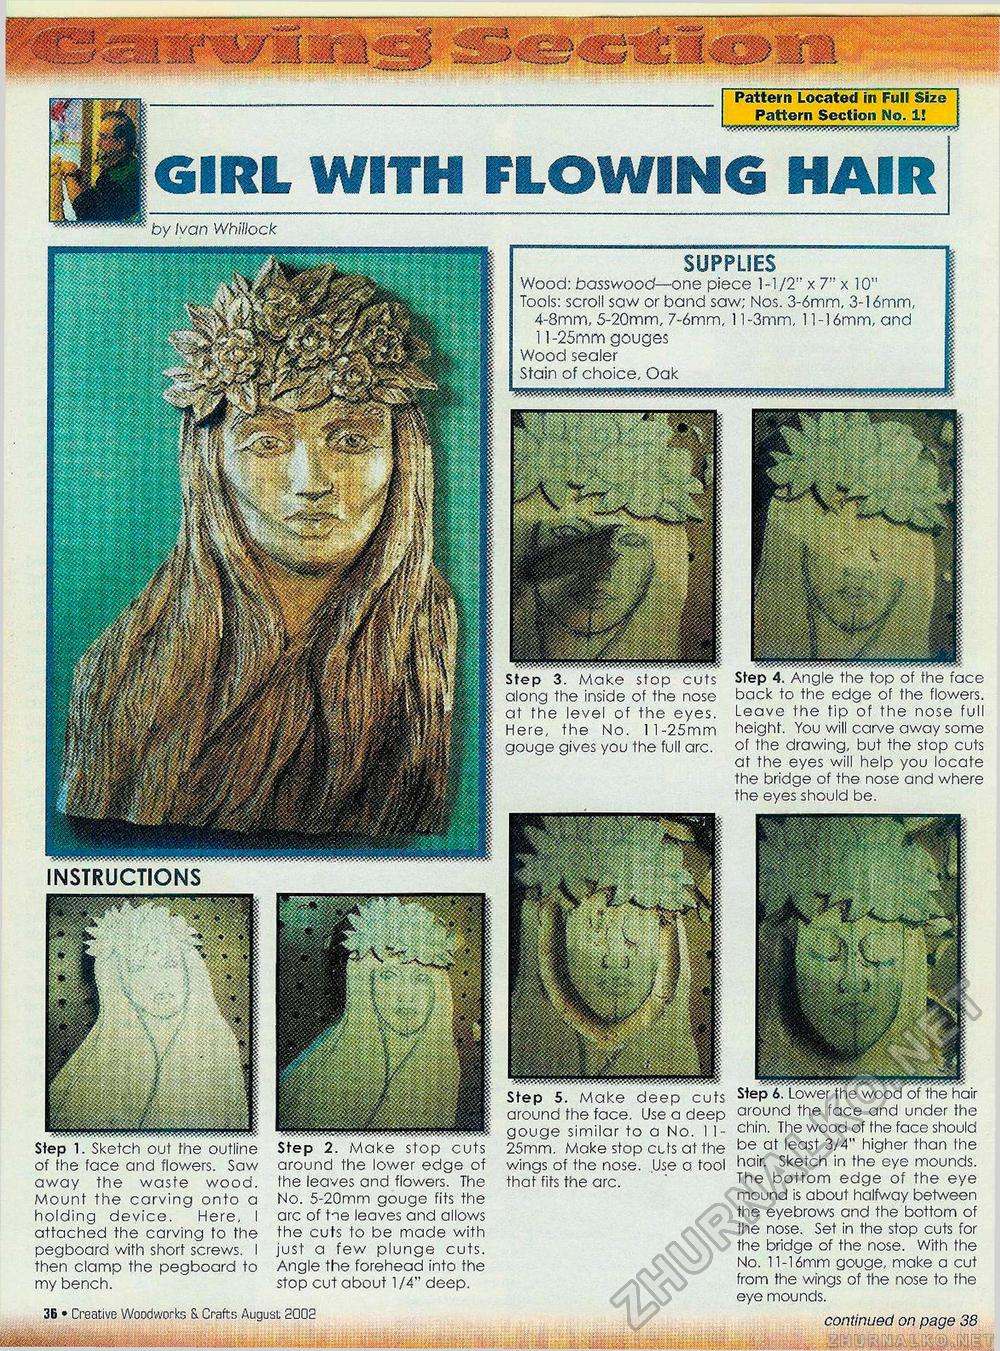
Pattern Located in Full Size Pattern Section No. 1! GIRL WITH FLOWING HAIR by Ivan Whillock SUPPLIES Wood: basswood—one piece 1-1/2" x 7" x 10" Tools: scroll sow or band saw; Nos. 3-6mm, 3-16mm, 4-8mm, 5-20mm, 7-6mm, 11-3mm, 11-16mm, and 11-25mm gouges Wood sealer Stain of choice. Oak mmmmmmmmmmmmmmmtsmmiummmmmi INSTRUCTIONS 3B • Creative Woodworks & Crafts August 2002 Step 3. Make stop cuts along the inside of the nose at the level of the eyes. Here, the No. ll-25mm gouge gives you the full arc. Step 4. Angle the top of the face back to the edge of the flowers. Leave the tip of the nose full height. You will carve away some of the drawing, but the stop cuts at the eyes will help you locate the bridge of the nose and where the eyes should be. continued on page 38 Step 1. Sketch out the outline of the face and flowers. Saw away the waste wood. Mount the carving onto a holding device. Here, I attached the carving to the pegboard with short screws. I then clamp the pegboard to my bench. Step 5. Make deep cuts around the face. Use a deep gouge similar to a No. I 1-25mm. Moke stop cuts at the wings of the nose. Use a tool that fits the arc. Step 6. Lower the wood of the hair around the face and under the chin. The wood of the face should be at least 3/4" higher than Ihe hair. Sketch in the eye mounds. The bottom edge of the eye mound is about halfway between the eyebrows and the bottom of the nose. Set in the stop cuts for the bridge of the nose. With the No. 11-16mm gouge, make a cut from the wings of the nose to the eye mounds. Step 2. Make stop cuts around the lower edge of the leaves and flowers. The No. 5-20mm gouge fits the arc of tne leaves and allows the cuts to be made with just a few plunge cuts. Angle the forehead into the stop cut about 1/4" deep. |


