Creative Woodworks & crafts 2002-11, страница 22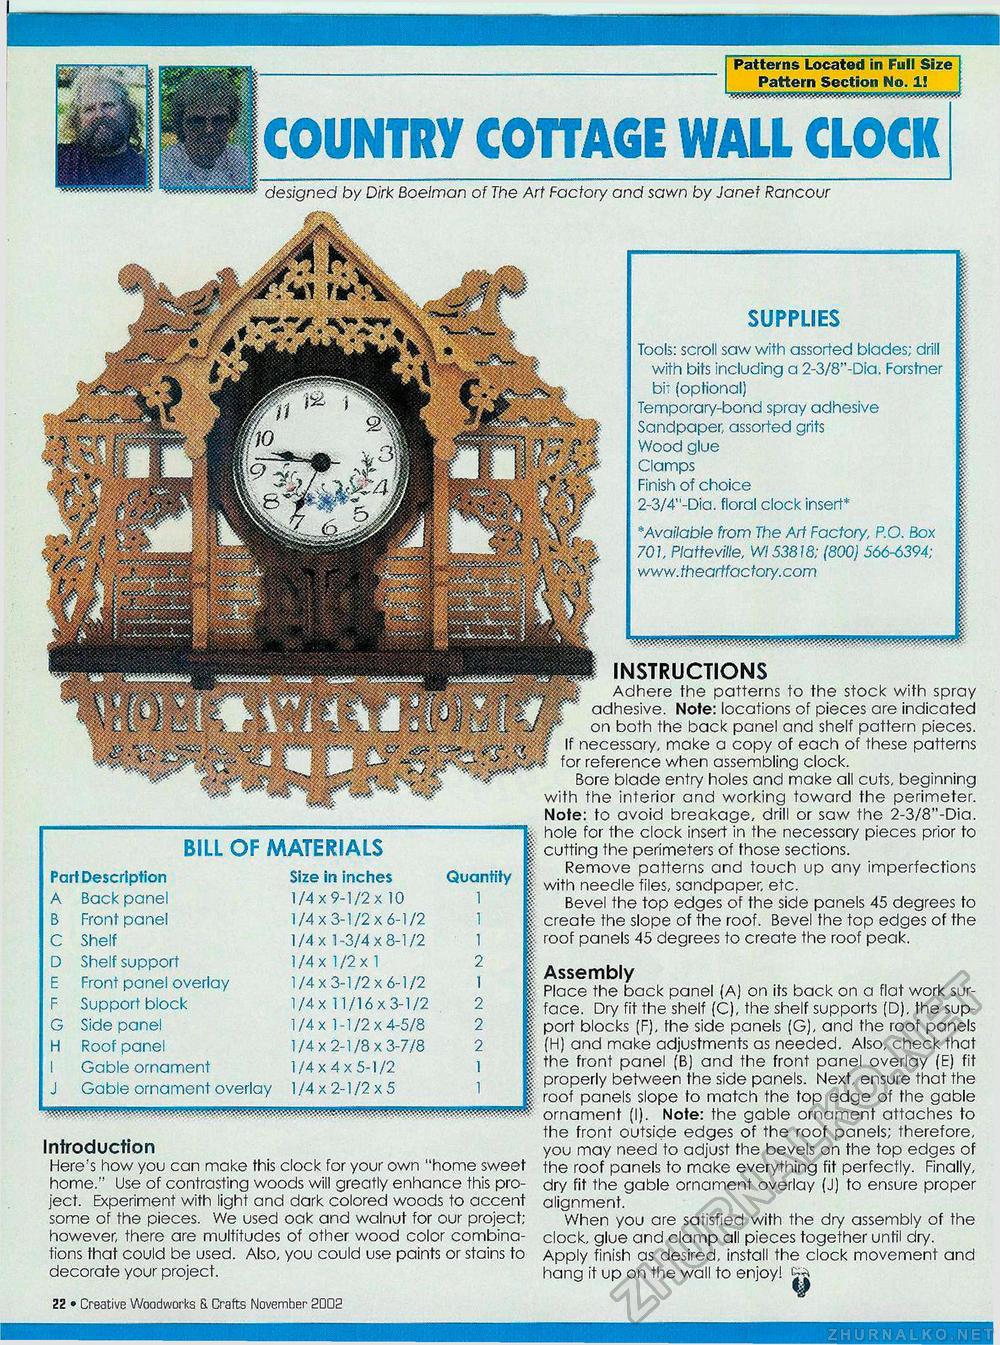
| Patterns Located in Full Size I Pattern Section No. 1! I COUNTRY COTTAGE WALL CLOCKdesigned by Dirk Boelman of The Art Factory and sawn by Janet Rancour
Introduction Here's how you can make this clock for your own "home sweet home." Use of contrasting woods will greatly enhance this project. Experiment with light and dark colored woods to accent some of the pieces. We used oak and walnut for our project; however, there are multitudes of other wood color combinations that could be used. Also, you could use paints or stains to decorate your project. 22 • Creative Woodworks S. Crafts November 20D2 SUPPLIES Tools: scroll saw with assorted blades; drill with bits including a 2-3/8"-Dia. Forstner bit (optional) Temporary-bond spray adhesive Sandpaper, assorted grits Wood glue Clamps Finish of choice 2-3/4"-Dia. floral clock insert* * Available from The Art Factory, P.O. Box 701, Platteville, Wl 53818; (800) 566-6394; www.theartfactory.com INSTRUCTIONS Adhere the patterns to the stock with spray adhesive. Note: locations of pieces are indicated on both the back panel and shelf pattern pieces. If necessary, make a copy of each of these patterns for reference when assembling clock. Bore blade entry holes and make all cuts, beginning with the interior and working toward the perimeter. Note: to avoid breakage, drill or saw the 2-3/8"-Dia. hole for the clock insert in the necessary pieces prior to cutting the perimeters of those sections. Remove patterns and touch up any imperfections with needle files, sandpaper, etc. Bevel the top edges of the side panels 45 degrees to create the slope of the roof. Bevel the top edges of the roof panels 45 degrees to create the roof peak. Assembly Place the back panel (A) on its back on a flat work surface. Dry fit the shelf (C), the shelf supports (D). the support blocks (F), the side panels (G), and the roof panels (H) and make adjustments as needed. Also, check that the front panel (B) and the front panel overlay (E) fit properly between the side panels. Next, ensure that the roof panels slope to match the top edge of the gable ornament (I). Note: the gable ornament attaches to the front outside edges of the roof panels; therefore, you may need to adjust the bevels on the top edges of the roof panels to make everything fit perfectly. Finally, dry fit the gable ornament overlay (J) to ensure proper alignment. When you are satisfied with the dry assembly of the clock, glue and clamp all pieces together until dry. Apply finish as desired, install the clock movement and hang it up on the wall to enjoy! cjj V |
||||||||||||||||||||||||||||||||||||


