Creative Woodworks & crafts 2003-01, страница 18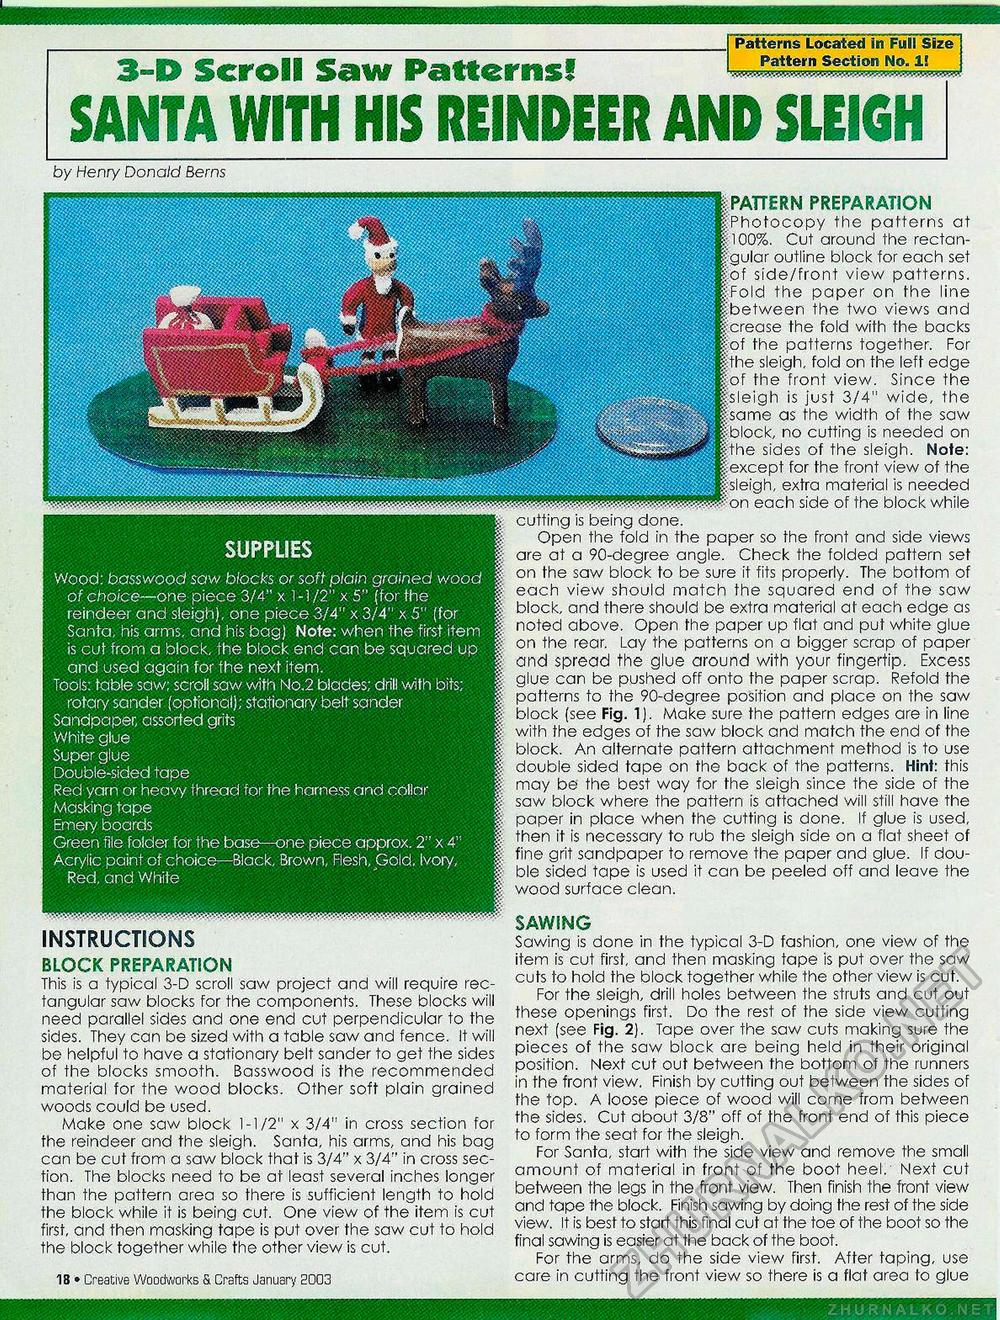
Patterns Located in Full Size Pattern Section No. 1! 3-D Scroll Saw Patterns! SANTA WITH HIS REINDEER AND SLEIGH by Henry Donald Berns MM SUPPLIES Wood: basswood saw blocks or soft plain grained wood of choice—one piece 3/4" x 1 -1 /2" x 5" (for the reindeer and sleigh), one piece 3/4" x 3/4" x 5" (for Santa, his arms, and his bag) Note: when the first item is cut from a block, the block end can be squared up and used again for the next item. Tools: table saw: scroll saw with No.2 blades; drill with bits; rotary sander (optional); stationary belt sander Sandpaper, assorted grits White glue Super glue Double-sided tape Red yarn or heavy thread for the harness and collar Masking tape Emery boards Green file folder for the base—one piece approx. 2" x 4" Acrylic paint of choice—Black, Brown, Flesh, Gold, Ivory, Red, and White j cutting is being done. | Open the fold in the paper so the front and side views | are at a 90-degree angle. Check the folded pattern set | on the saw block to be sure it fits properly. The bottom of | each view should match the squared end of the saw | block, and there should be extra material at each edge as | noted above. Open the paper up flat and put white glue | on the rear. Lay the patterns on a bigger scrap of paper | and spread the glue around with your fingertip. Excess | glue can be pushed off onto the paper scrap. Refold the | patterns to the 90-degree position and place on the saw I block (see Fig. 1). Make sure the pattern edges are in line I with the edges of the saw block and match the end of the | block. An alternate pattern attachment method is to use | double sided tape on the back of the patterns. Hint: this | may be the best way for the sleigh since the side of the | saw block where the pattern is attached will still have the | paper in place when the cutting is done. If glue is used, | then it is necessary to rub the sleigh side on a flat sheet of | fine grit sandpaper to remove the paper and glue. If dou-| ble sided tape is used it can be peeled off and leave the | wood surface clean. SAWING Sawing is done in the typical 3-D fashion, one view of the item is cut first, and then masking tape is put over the saw cuts to hold the block together while the other view is cut. For the sleigh, drill holes between the struts and cut out these openings first. Do the rest of the side view cutting next (see Fig. 2). Tape over the saw cuts making sure the pieces of the saw block are being held in their original position. Next cut out between the bottom of the runners in the front view. Finish by cutting out between the sides of the top. A loose piece of wood will come from between the sides. Cut about 3/8" off of the front end of this piece to form the seat for the sleigh. For Santa, start with the side view and remove the small amount of material in front of the boot heel. Next cut between the legs in the front view. Then finish the front view and tape the block. Finish sawing by doing the rest of the side view. It is best to start this final cut at the toe of the boot so the final sawing is easier at the back of the boot. For the arms, do the side view first. After taping, use care in cutting the front view so there is a flat area to glue j PATTERN PREPARATION SPhotocopy the patterns at 1100%. Cut around the rectan-Igular outline block for each set |of side/front view patterns. |Fold the paper on the line ^between the two views and |crease the fold with the backs fof the patterns together. For |the sleigh, fold on the left edge |of the front view. Since the |sleigh is just 3/4" wide, the Ksame as the width of the saw |block, no cutting is needed on f-the sides of the sleigh. Note: ^except for the front view of the Isleigh, extra material is needed ^on each side of the block while BLOCK PREPARATION This is a typical 3-D scroll saw project and will require rectangular saw blocks for the components. These blocks will need parallel sides and one end cut perpendicular to the sides. They can be sized with a table saw and fence. It will be helpful to have a stationary belt sander to get the sides of the blocks smooth. Basswood is the recommended material for the wood blocks. Other soft plain grained woods could be used. Make one saw block 1-1/2" x 3/4" in cross section for the reindeer and the sleigh. Santa, his arms, and his bag can be cut from a saw block that is 3/4" x 3/4" in cross section. The blocks need to be at least several inches longer than the pattern area so there is sufficient length to hold the block while it is being cut. One view of the item is cut first, and then masking tape is put over the saw cut to hold the block together while the other view is cut. Creative Woodworks S. Crafts January 2003 • 25 INSTRUCTIONS |


