Creative Woodworks & crafts 2003-01, страница 16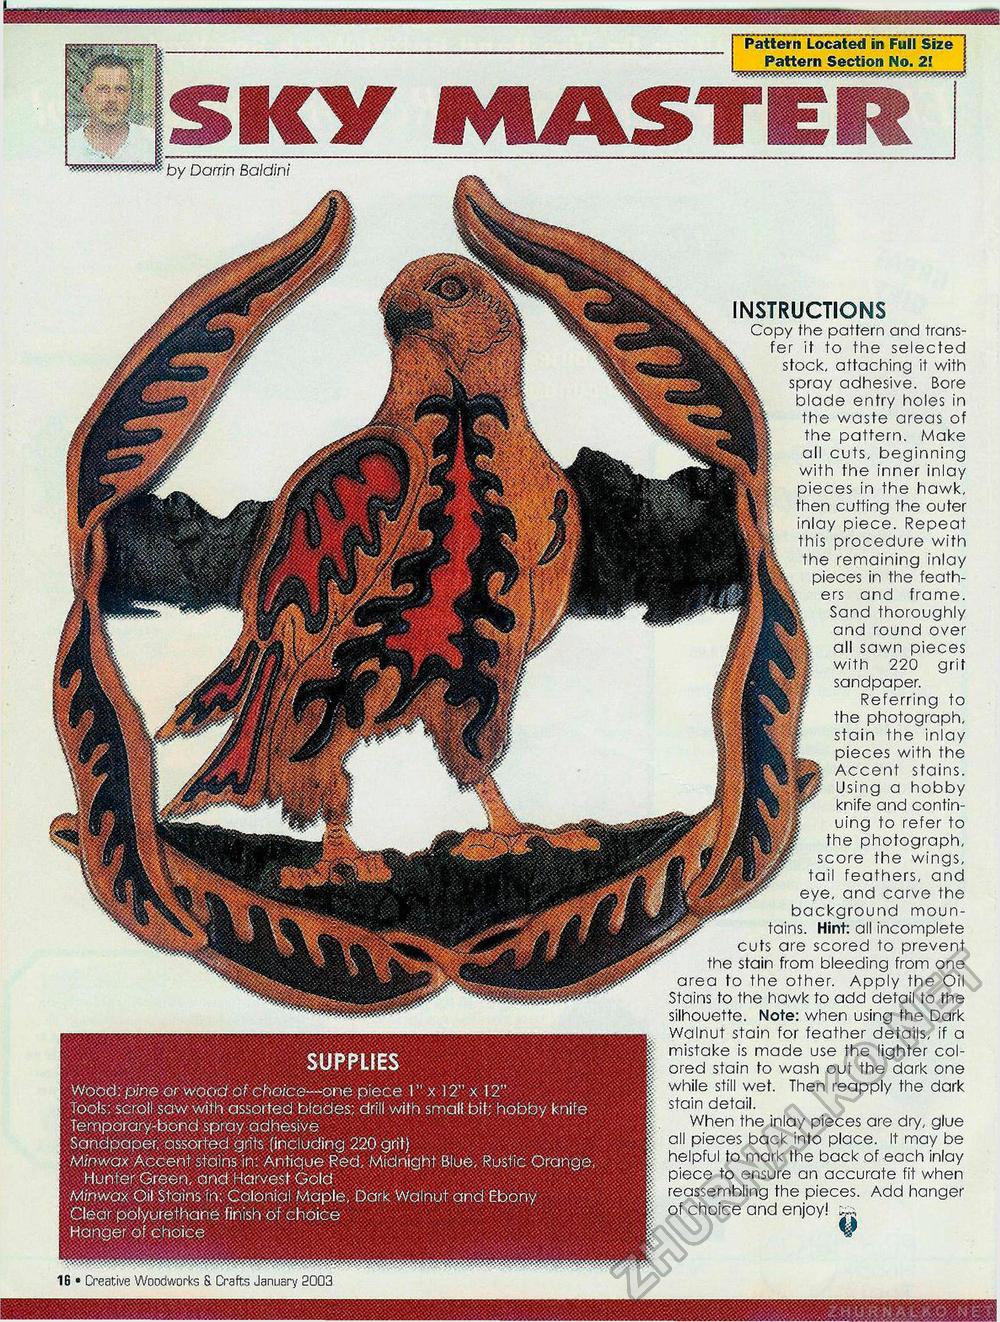
SUPPLIES Wood: pine or woocf of choice—one piece 1" x 12" x 12" Tools: scroll saw with assorted blades; drill with small bit; hobby knife Temporary-bond spray adhesive Sandpaper, assorted grits (including 220 grit) Minwax Accent stains in: Antique Red, Midnight Blue, Rustic Orange: Hunter Green, and Harvest Gold Minwax Oil Stains in: Colonial Maple, Dark Walnut and Ebony Clear polyurethane finish of choice Hanger of choice ' __V-:.;:-:r;: :-:-y: ;•■--■■ ■ ■ -. :-. ......... MASPattern Located in Full Size Pattern Section No. 21 by Damn Baldini INSTRUCTIONS Copy the pattern and transfer it to the selected stock, attaching it with spray adhesive. Bore blade entry holes in the waste areas of the pattern. Make all cuts, beginning with the inner inlay pieces in the hawk, then cutting the outer inlay piece. Repeat this procedure with the remaining inlay pieces in the feathers and frame. Sand thoroughly and round over all sawn pieces with 220 grit sandpaper. Referring to the photograph, stain the inlay pieces with the Accent stains. Using a hobby knife and continuing to refer to the photograph, score the wings, tail feathers, and eye, and carve the background mountains. Hint: all incomplete cuts are scored to prevent the stain from bleeding from one area to the other. Apply the Oil Stains to the hawk to add detail to the silhouette. Note: when using the Dark Walnut stain for feather details, if a mistake is made use the lighter colored stain to wash out the dark one while still wet. Then reapply the dark stain detail. When the inlay pieces are dry, glue all pieces back into place. It may be helpful to mark the back of each inlay piece to ensure an accurate fit when reassembling the pieces. Add hanger of choice and enjoy! ^ Creative Woodworks S. Crafts January 2003 • 25 |


